 SOLOMON LUNGER
.
May 14, 2019
.
Department
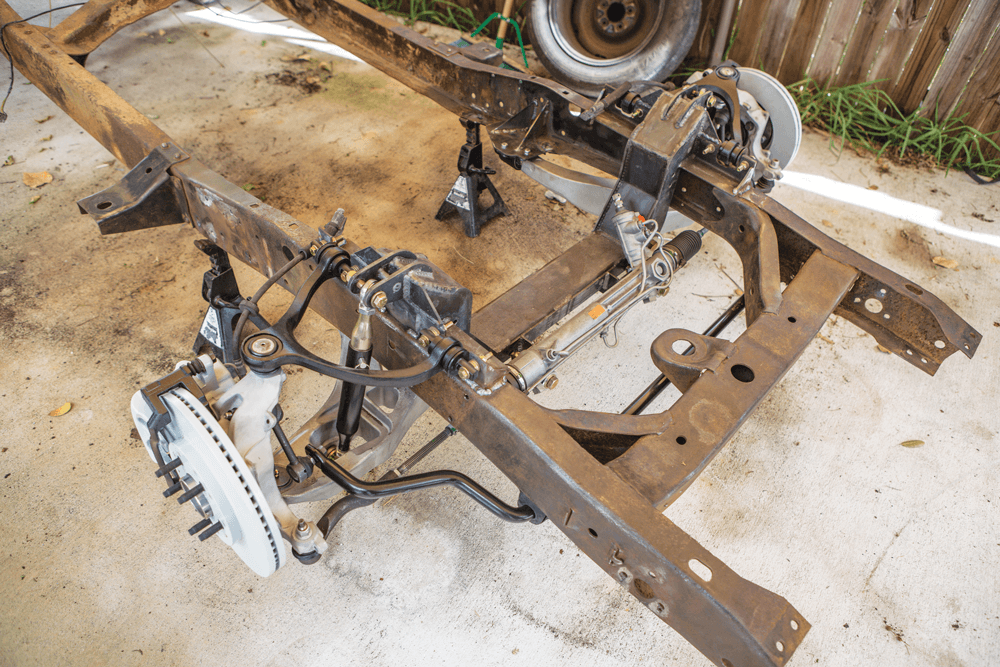
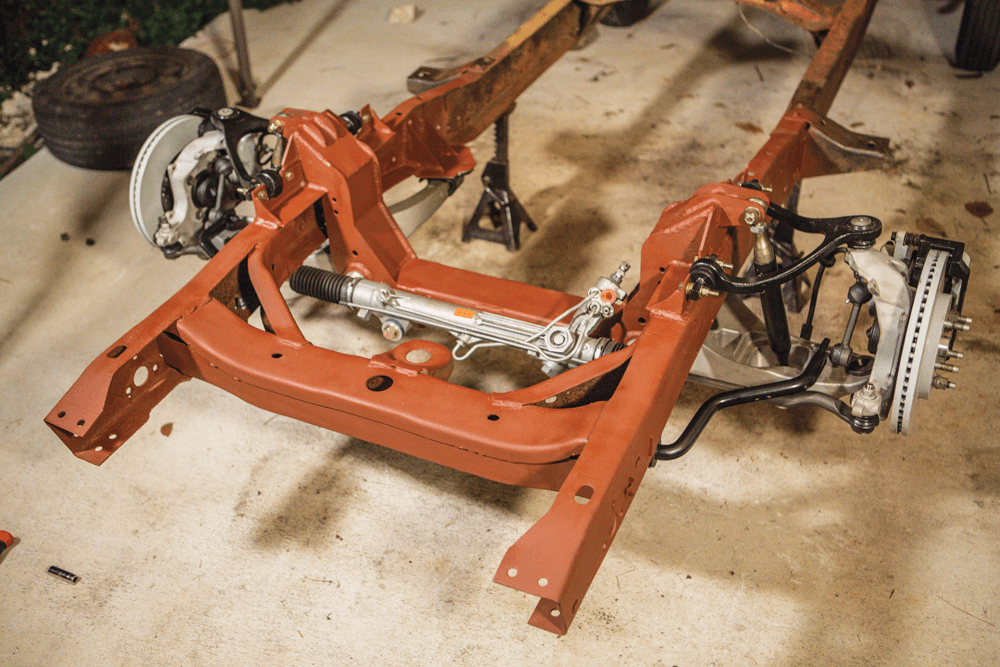
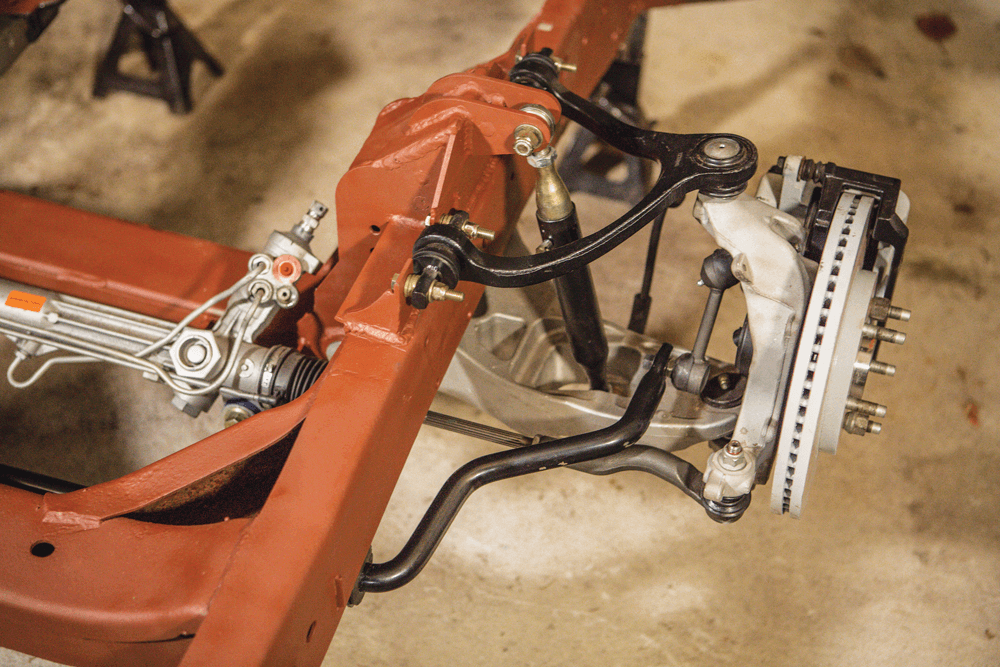
Team321’s front setup is designed with a weld-in steel crossmember to mount the crown Vic suspension components—including control arms, knuckles, bearings, brakes and sway bar links. Due to the narrowed track width, you can’t use the factory sway bar or steering rack. And this is not a cut/weld of the factory Crown Vic crossmember. Team321’s Narrow Crown Vic crossmember is a purpose-built crossmember that fits the F-100 frame with no modifications. Team321 offers this setup in two packages: the base package includes the crossmember, upper control arms, all mounting hardware and sway bar; the complete suspension package adds the lower control arms, steering rack, coilovers, knuckles, steering tie rods and sway bar links.
The narrowed track width crossmember solves a variety of issues, like the increased wheel options and, beyond the benefits of narrowing the track width, the crossmember is designed for mounting coilovers, which opens up an endless selection of spring rates and allows for fine tuning of the ride height. For those looking for air, Ridetech Shockwaves can also be used. The steering rack is sourced from a Lincoln Mark 8, and brake options begin with factory Crown Vic disc brakes and include 14-inch or larger Wilwood options. Motor mount options include small block and big block Ford V-8s, Ford Mod motors and Coyote V-8s while adding more selections as customers request them.
195 MOTORSPORTS
954-583-4215
facebook.com/i95motorsportsfla
TEAM321
321-960-5945
www.Team321.com

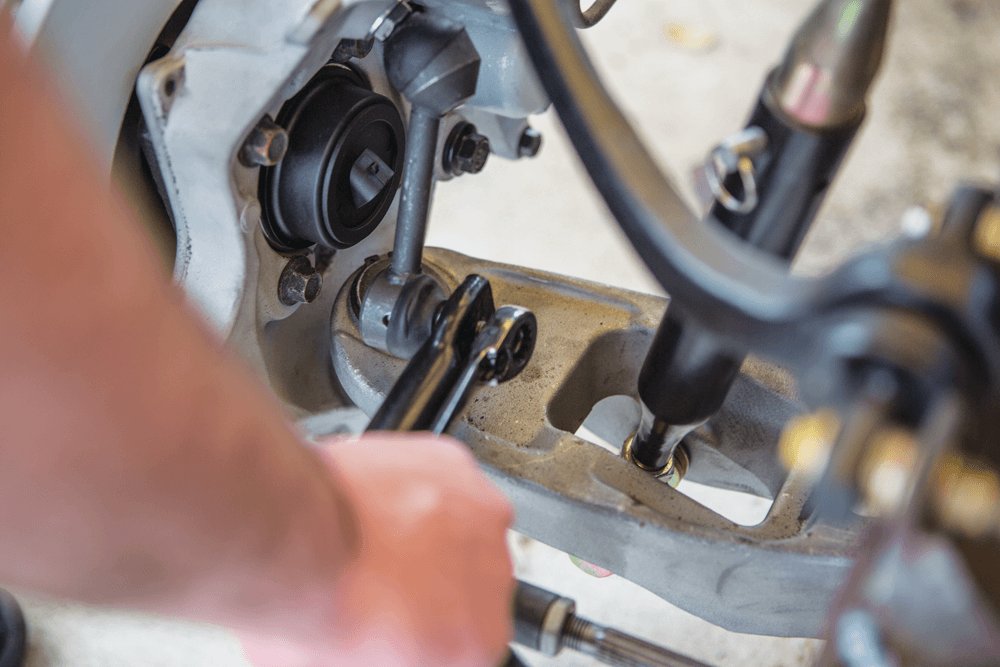
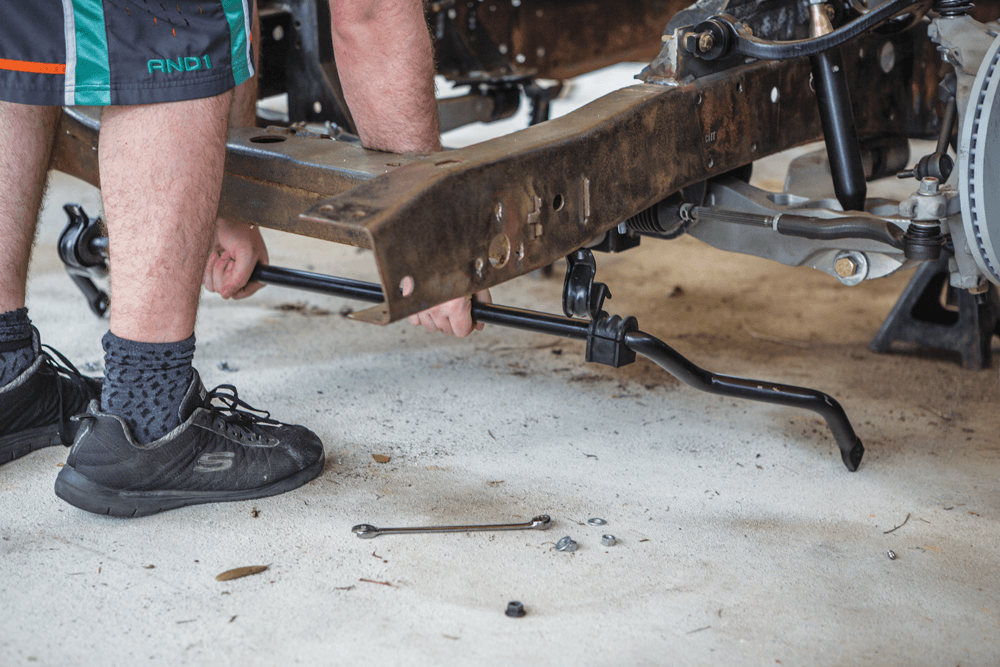
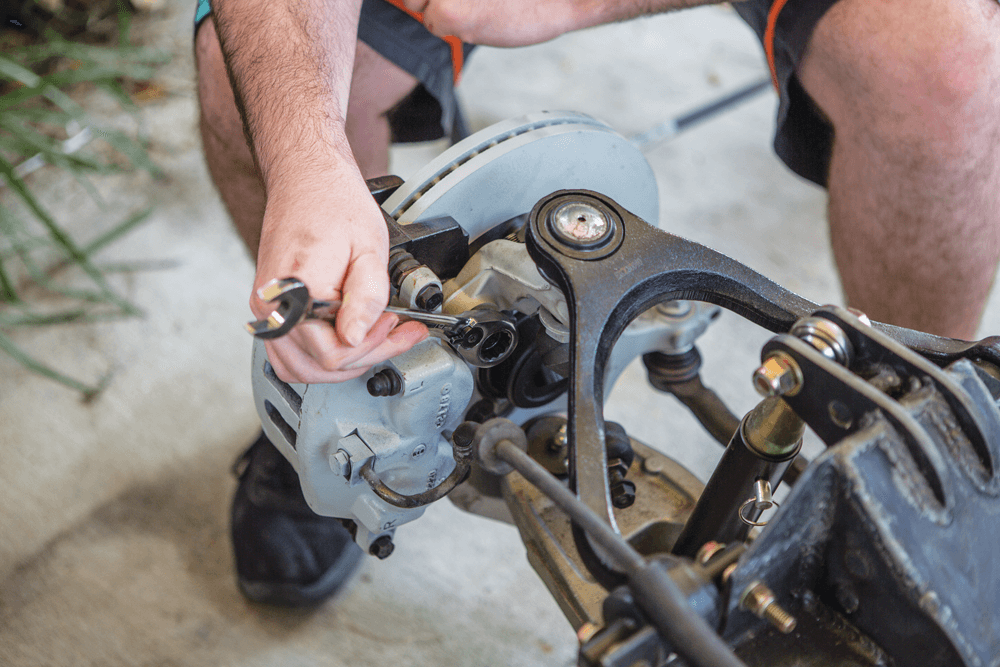
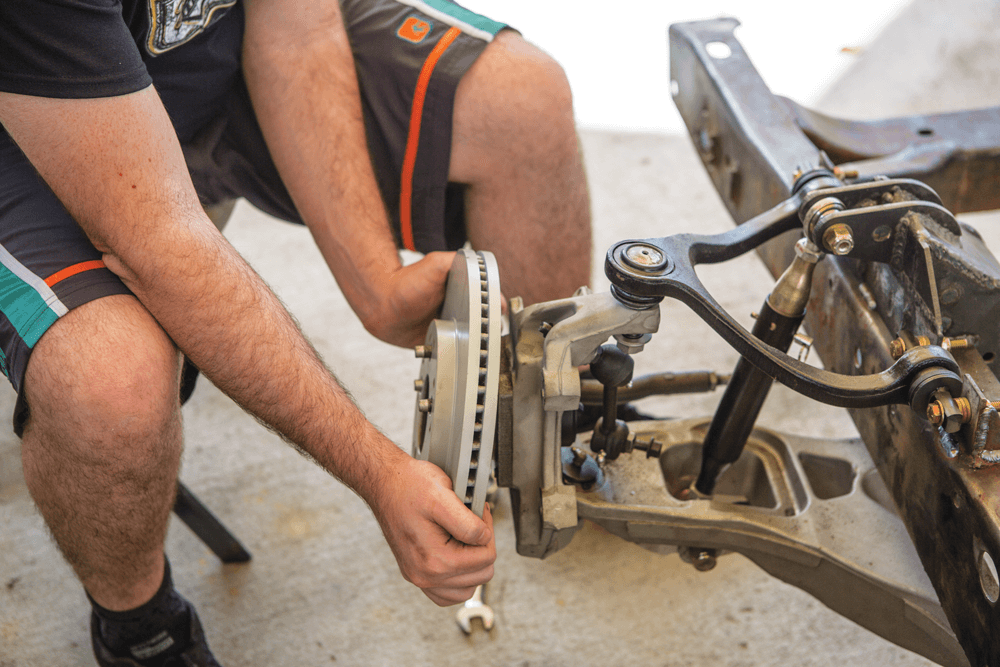
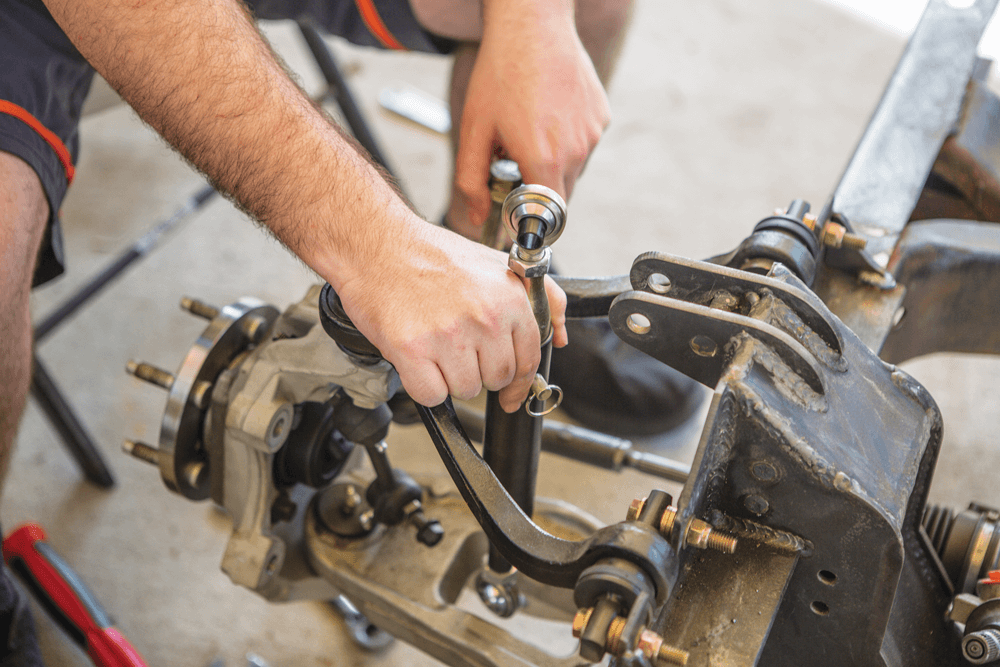
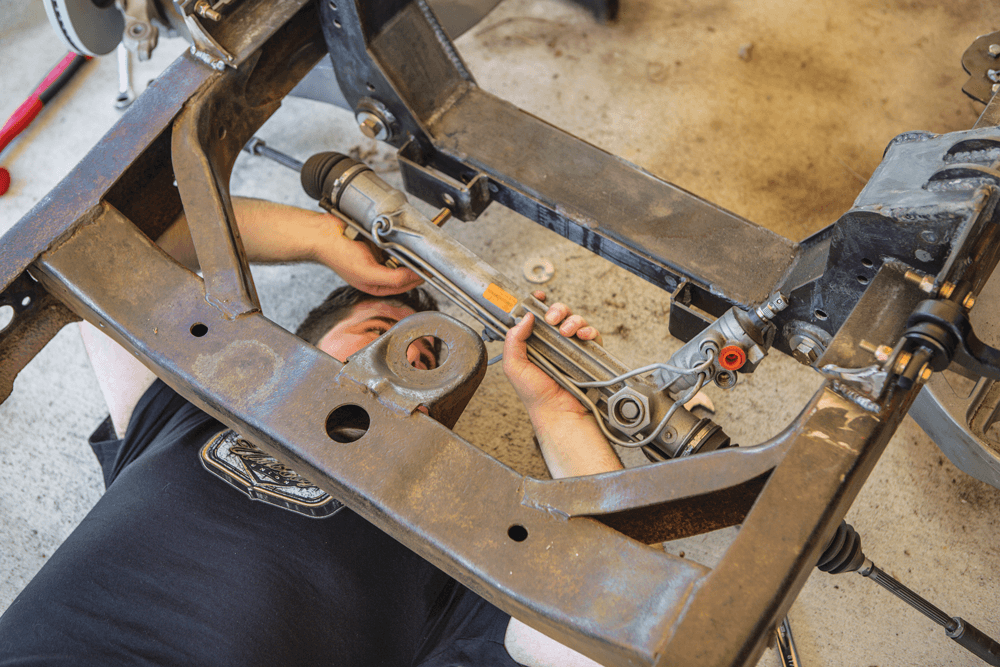
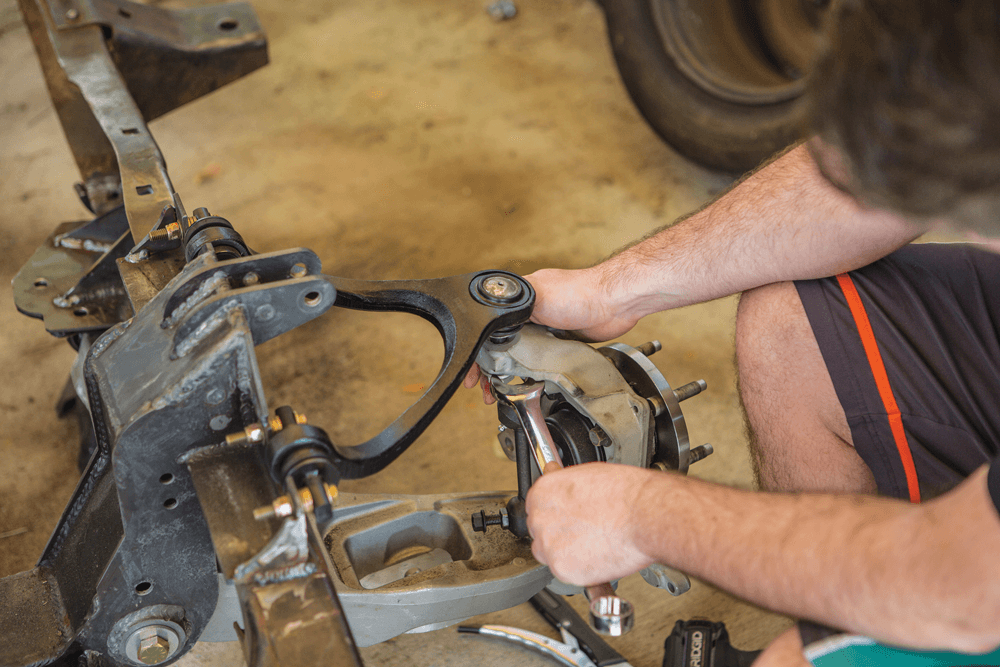
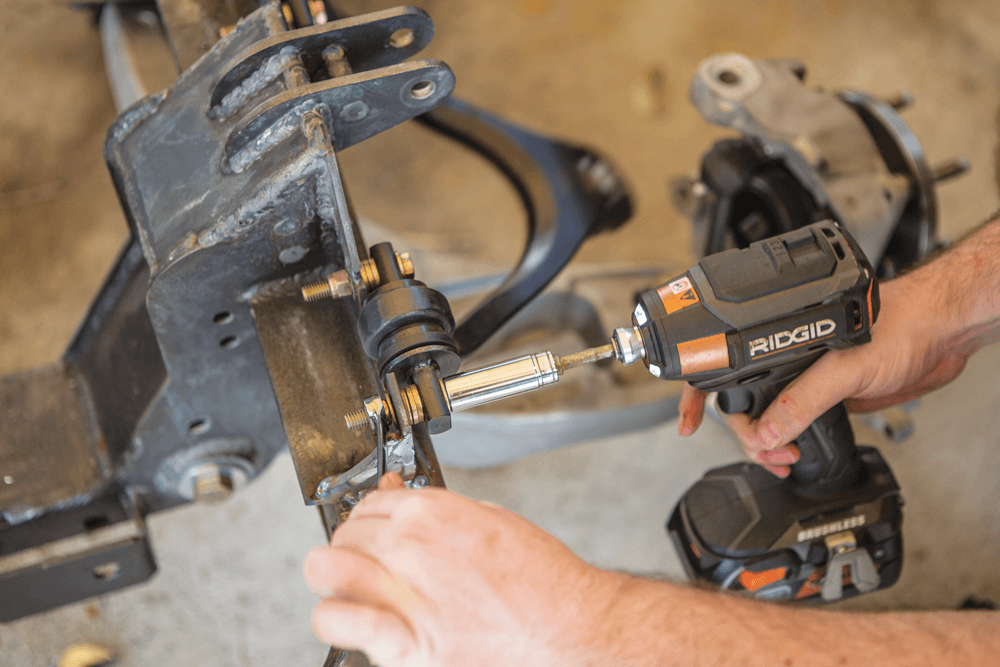
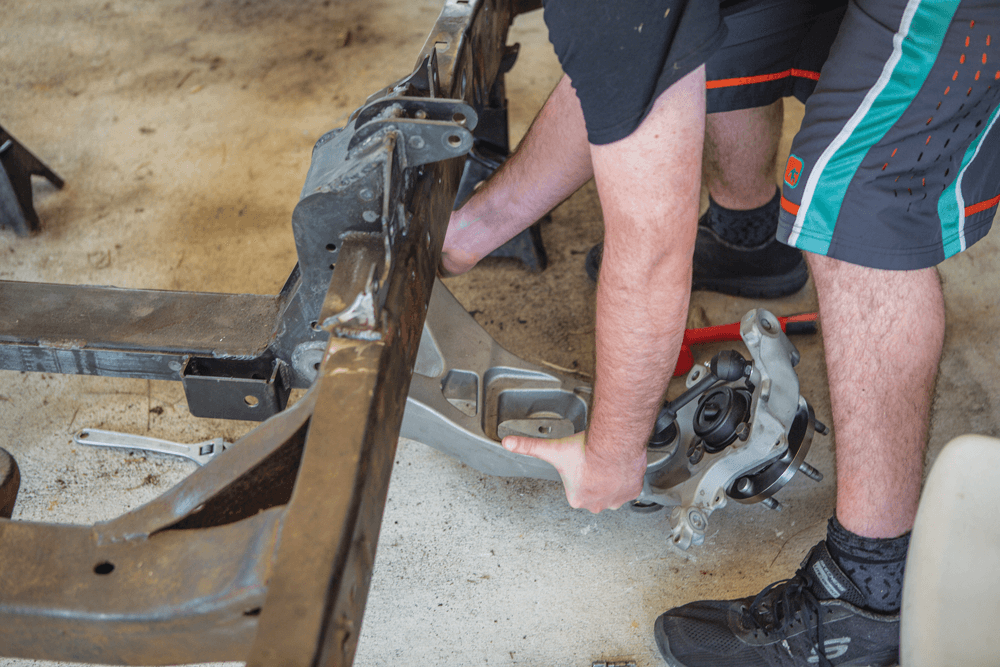
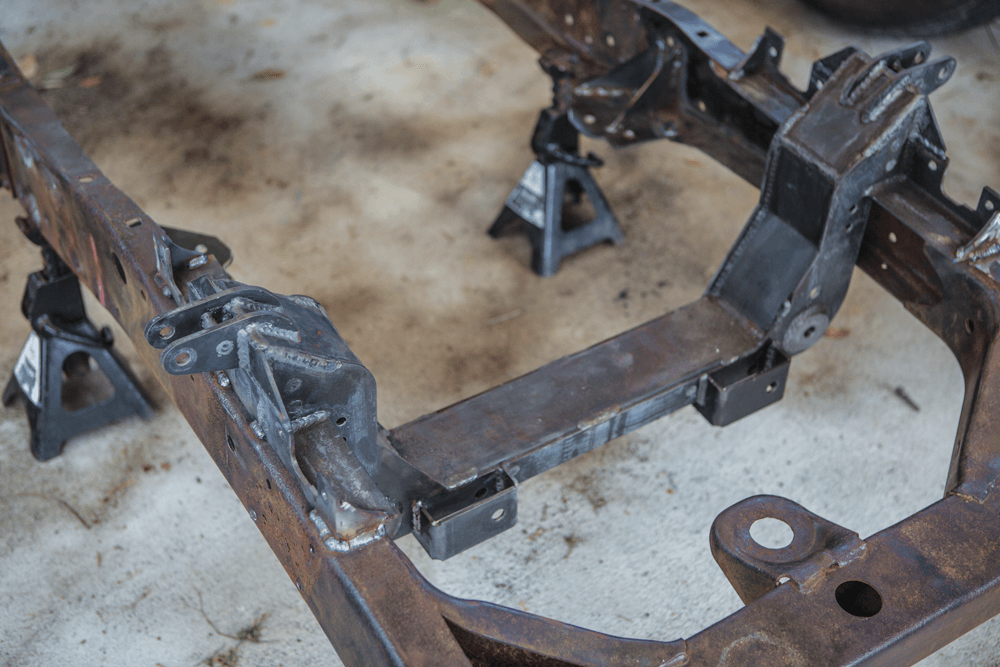
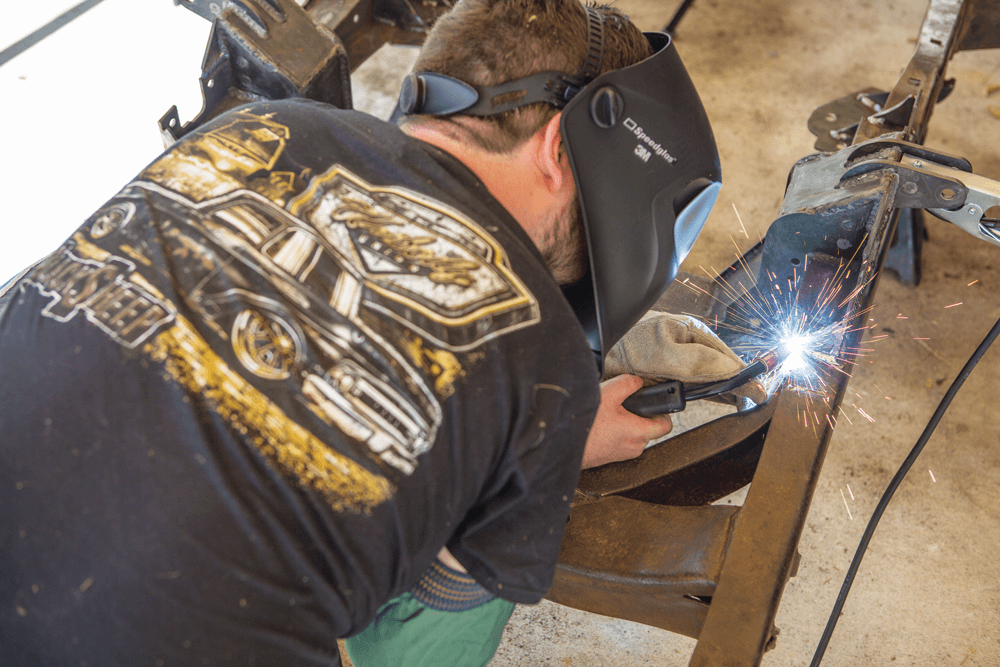
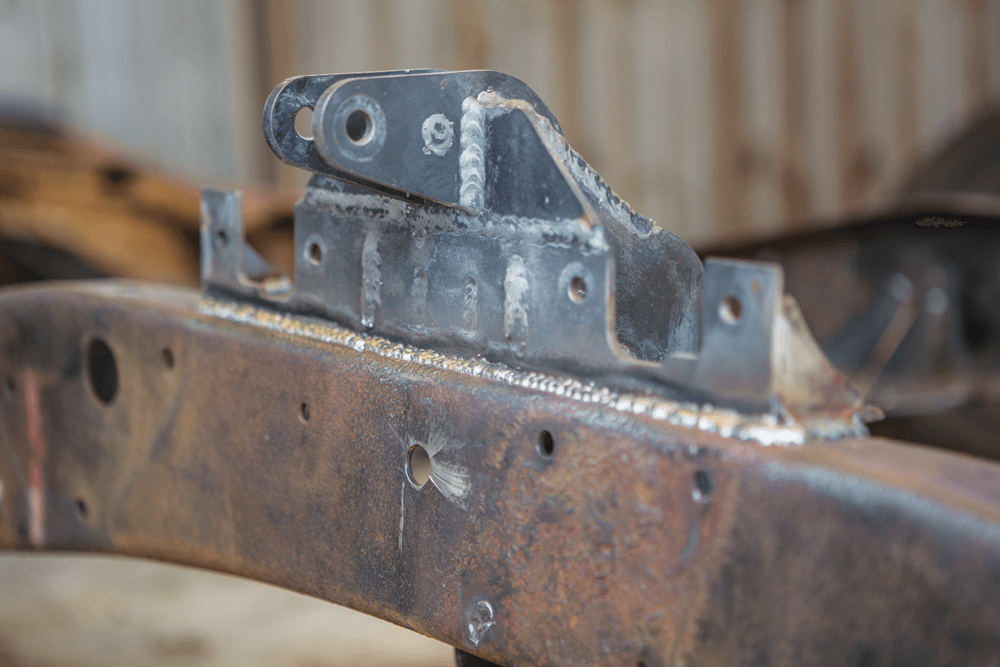
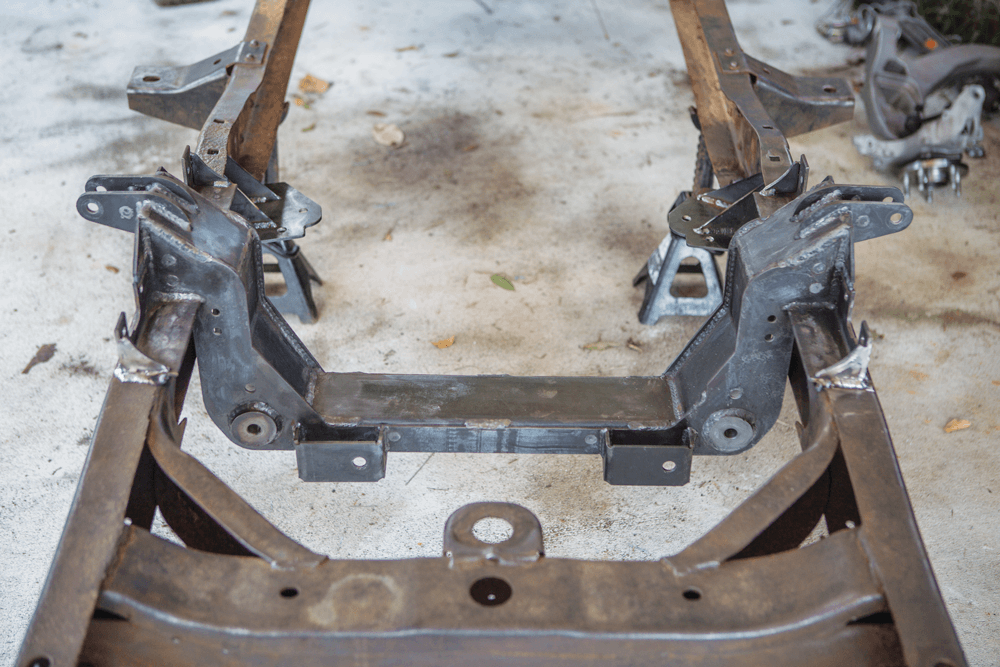
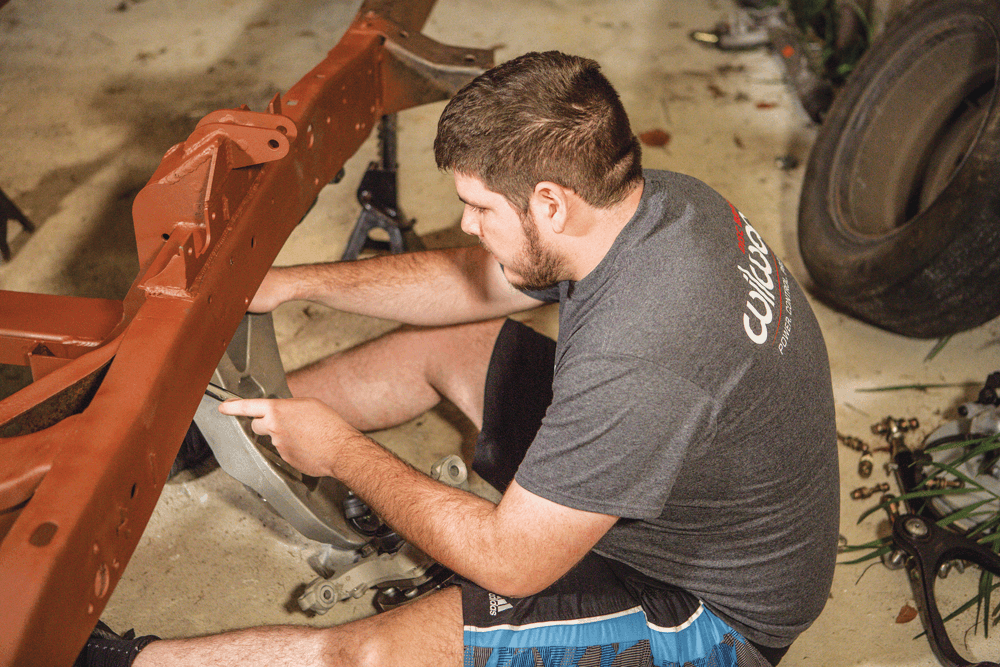
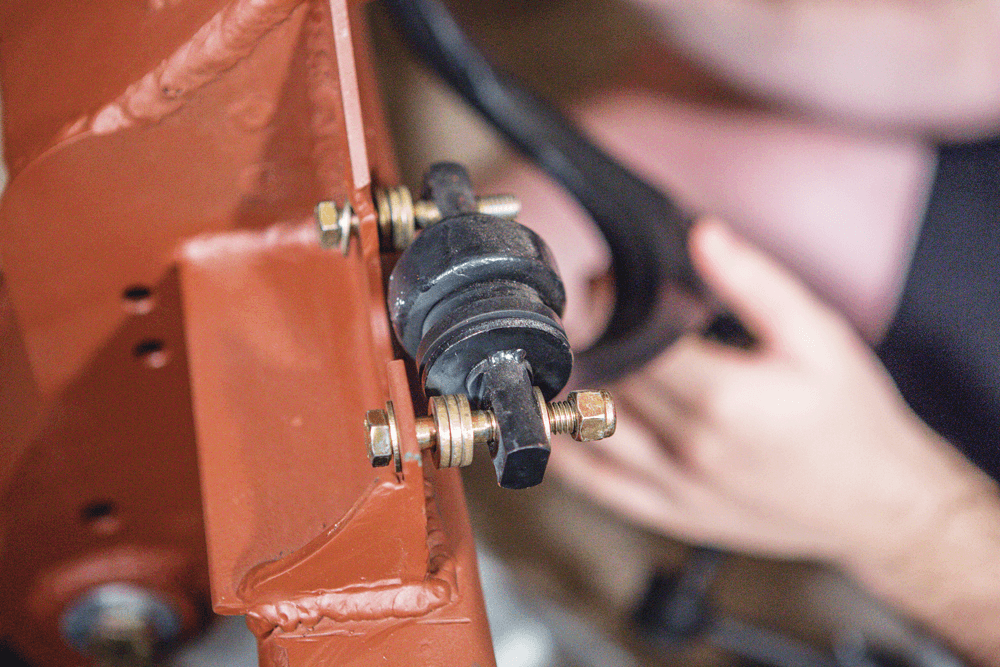
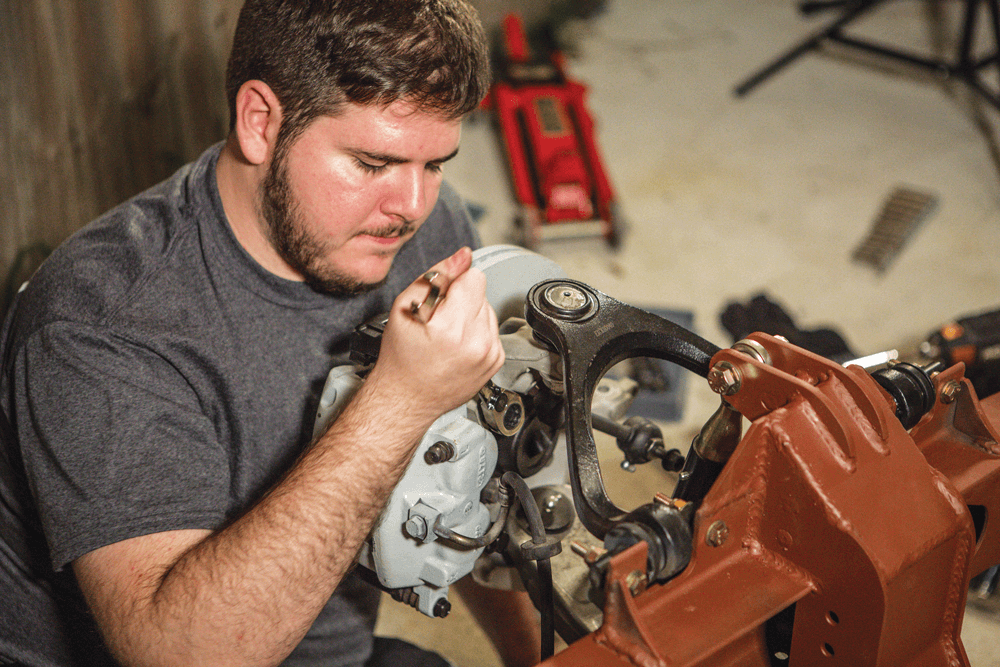
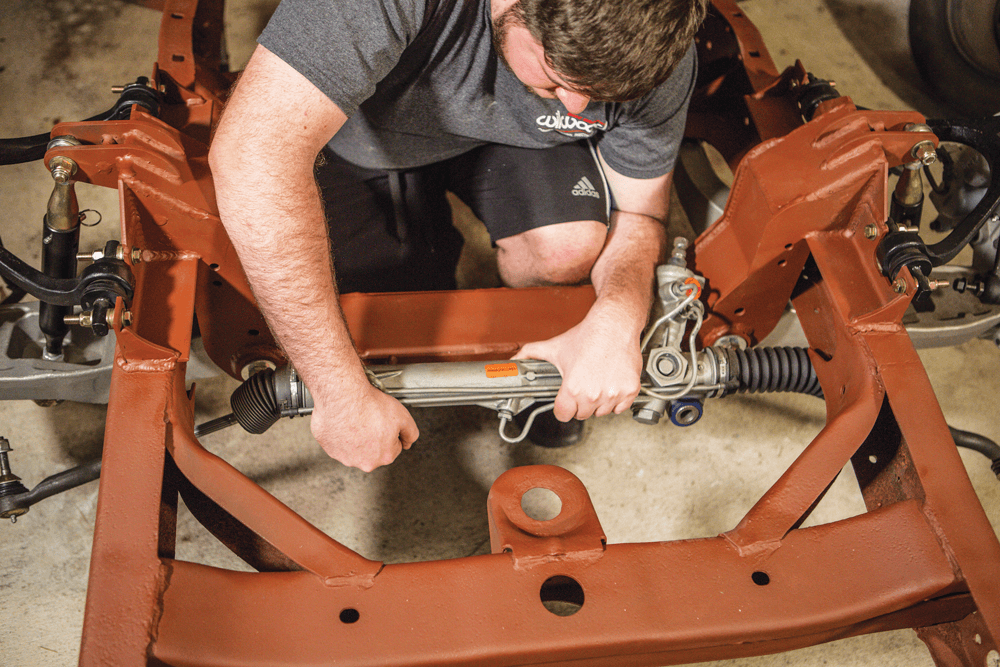
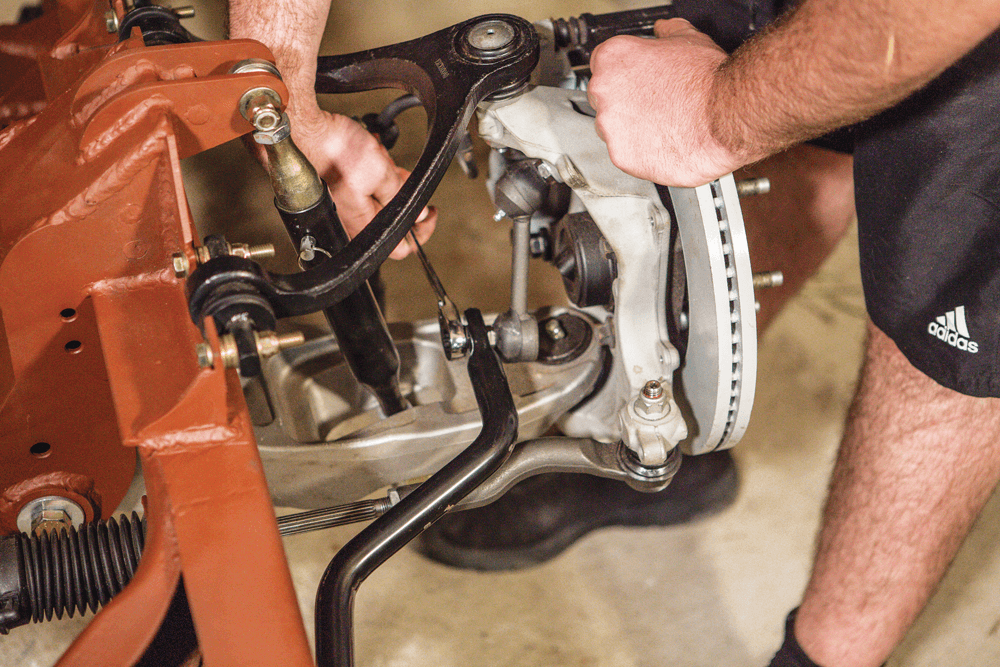
…the narrrowed track width crossmember is designed for mounting coilovers, which opens up an endless selection of spring rates…
What is the solution for the issue with traditional IFS setups on Ford F100 trucks?
Struggling with your Ford F100’s traditional Independent Front Suspension (IFS) setup? There’s a game-changing solution: the bolt-on coilover conversion kit.
Compared to traditional IFS setups, the coilover conversion kit offers a much-needed upgrade in terms of both performance and versatility. It’s an essential modification for any Ford F100 enthusiast seeking a modern, reliable, and easily adjustable suspension system.
Upgrade your Ford F100’s suspension today and experience the difference!
What issue do traditional IFS setups have on the classic Ford F100 pickups?
Traditional independent front suspension (IFS) setups on classic Ford F100 pickups come with a few notable drawbacks. One major issue is the use of standard coil springs paired with basic, off-the-shelf shocks. These components generally lack the advanced engineering needed to provide a smooth ride and optimal handling.
By understanding these limitations, it’s easier to appreciate the benefits of upgrading to a modern suspension system.
What are the specifications of the new coilover conversion kit for the Ford F100?
Transforming your Ford F100’s suspension is now easier than ever with our new coilover conversion kits. Here’s a breakdown of the specifications you can expect:
Each kit includes high-quality components designed to improve your vehicle’s handling and ride quality. Select the spring rate that best matches your driving style and needs:
By choosing the appropriate coilover kit tailored to your driving needs, you can significantly enhance your FordF100’s suspension system, leading to a smoother and more responsive driving experience.
For which years of Ford F100 trucks is the Crown Vic front swap with coilovers available?
If you own a Ford F100 truck manufactured between 1965 and 1979, you’re in luck! The Crown Vic front swap with coilover suspension is compatible with these models. Whether you’ve already made the swap or are considering it, there are parts available to support your project.
What are the part numbers for the coilover kits available for the Ford F100?
If you’re searching for coilover kits for your Ford F100, here are the available part options:
Each kit is designed to meet the specific suspension needs of your Ford F100, providing adjustable settings for a customizable ride.
For easy reference, here’s a quick summary:
Part Number Description 300183 Front Coil-Over Kit, Ford F100 (2003-2011), Single Adjustable, 550 lb. Springs 300184 Front Coil-Over Kit, Ford F100 (2003-2011), Single Adjustable, 650 lb. Springs 300185 Front Coil-Over Kit, Ford F100 (2003-2011), Single Adjustable, 750 lb. Springs These options offer varied spring rates to match your driving preference and load needs.
Where can one find details on a specific F100 build with the new bolt-on coilover system?
For detailed information on a specific F100 build featuring the new bolt-on coilover system, head over to the Instagram profile @thecraig909. This account showcases the build and provides insights into the process, including photos and updates. Explore this profile to see the installation journey and get a closer look at how this coilover system enhances Ford F100 bumpside and dentside pickups.
Make sure to follow and stay updated on the latest modifications and enhancements!
What is the new product alert for Ford F100 trucks?
Are you driving a classic Ford F100 from 1965-1979? If you’ve been thinking about upgrading to a Crown Victoriafront swap with coilovers, we have fantastic news for you!
From 2003 to 2011, the Ford Crown Victoria featured an Independent Front Suspension (IFS) system that perfectly fits classic Ford F100 pickups. However, this setup traditionally uses basic coil springs and standard shocks, which might not give you the performance or ride quality you desire.
Our newly developed coilover conversion kit is designed to enhance the IFS swap in your Ford F100. Here’s what makes it special:
Upgrade your Ford F100’s performance and comfort with our bolt-on coilover conversion kit! Your classic truck deserves the best, and this kit delivers superior results without the hassle.
How can one contact the team for more details about the coilover kits?
Curious about our coilover kits? We’re here to help! For detailed information, reach out via phone. Simply dial (310)-834-7478 to speak directly with our knowledgeable team.
Prefer digital communication? Email us or use the contact form on our website. We aim to respond promptly, ensuring you get the answers you need.
For instant support, consider using our live chat feature available during business hours. This offers a quick, efficient way to get answers without the wait.
Feel free to reach out however suits you best. We’re committed to providing you with the information and support you need.
What types of engine swaps are compatible with the new coilover and spring setups for the Ford F100?
Motor mount options include small block and big block Ford V-8s, Ford Mod motors and Coyote V-8s while adding more selections as customers request them.
Whether you’re running a 5.0 Coyote swap, opting for a big block, or going with a built 289 or 302, we’ve got a coilover and spring setup for your Crown Victoria IFS swap on your F-100 pickup truck. Our setups are designed to provide optimal performance and handling, ensuring that your engine swap is complemented by a suspension system that can handle the increased power and torque.
Our dedication to quality and customer satisfaction means we continuously expand our selection based on your feedback, ensuring you always have the best options for your build.
What are the challenges and benefits of performing a front end swap versus taking the vehicle to a professional shop?
When considering a front-end swap versus taking your vehicle to a professional shop, there are several factors to weigh, ranging from challenges and benefits to cost implications.
In summary, choosing between a DIY front-end swap and professional service hinges on your skill level, available resources, and how much you value your time versus cost savings. Each option has its merits, but it’s essential to evaluate what suits your needs and capabilities best.
What are the advantages of swapping just the front end compared to the entire frame?
When deciding whether to swap just the front end rather than the entire frame in a classic truck, there are several key advantages to consider:
Swapping only the front end allows you to retain the original frame of your classic truck. This means you can keep the vehicle registered under its original make and model year. As a result, you avoid any reclassification that may lead to increased property taxes or additional regulatory requirements, such as emissions testing that newer models typically face.
Maintaining the original frame sidesteps the need to register the car under a newer year, which can often come with higher fees and more stringent emission checks. This translates to cost savings over time and fewer bureaucratic hurdles.
By upgrading to an independent coil suspension through a front-end swap, you significantly improve the truck’s ride comfort and handling precision. This enhancement is particularly beneficial for those who desire modern performance without sacrificing the vehicle’s classic essence.
Swapping the front end while keeping the existing frame offers more flexibility for customization. It allows you to selectively enhance specific parts of the vehicle to suit your preferences, such as matching all four wheels or integrating parts from different models to improve performance or aesthetics.
Combining components like the front of one model with the rear of another, you can maintain a cohesive design that matches your vision. This approach also ensures functional consistency across the suspension and drivetrain systems.
In essence, opting for a front-end swap rather than a full-frame replacement provides a balanced approach to upgrading your classic truck. It allows for modern performance improvements while offering regulatory and cost benefits, all without compromising the vehicle’s classic designation.
Why do some people prefer to swap only the front end rather than the complete frame?
When considering vehicle customization, many enthusiasts choose to swap only the front end rather than replacing the entire frame. This decision often hinges on several practical and financial factors.
One major reason is to maintain the classic status of the vehicle. In certain states, like Arizona, changing the entire frame can require re-registering the vehicle under the year of the new frame. This can result in losing the vintage classification, leading to higher property taxes and possibly necessitating compliance with stricter emissions testing. By only swapping the front end, owners can keep the original registration intact, avoiding these additional costs and requirements.
Swapping just the front end can allow for significant mechanical upgrades—such as improved suspension systems—without the need to completely overhaul the vehicle. This method provides a balance; you can enhance performance and modernize the driving experience while maintaining original frame rails, thereby retaining aspects of the vehicle’s initial design. This approach often suits those looking to achieve independent coil suspension, enhancing ride quality and handling.
Lastly, a partial front-end swap also allows the owner to implement modifications that align with their specific needs or style preferences, such as matching all four wheels for a cohesive look, without committing to a full reconstruction that might alter the vehicle’s character.
In summary, opting for a front-end swap can effectively combine the advantages of modernization with the retention of classic vehicle status, presenting a cost-effective, pragmatic solution for car enthusiasts.
What modifications might be necessary when adapting the front end or rear suspension from other vehicles?
When adapting the front end or rear suspension from other vehicles, several modifications might be necessary to ensure a seamless integration and optimal performance.
By carefully planning these modifications, you can achieve a balanced and well-performing vehicle with enhanced features.
How does the parallel 4-link rear suspension impact the vehicle’s ride height?
One of the key benefits of a parallel 4-link rear suspension system is its impact on the vehicle’s ride height. This sophisticated setup offers several advantages:
In essence, the parallel 4-link rear suspension positively affects ride height by offering flexibility, improving handling, and ensuring a comfortable ride—all crucial factors for performance and comfort enthusiasts.
How do state regulations affect the registration and classification of modified trucks?
State regulations can significantly impact how modified trucks are registered and classified. For example, in states like Arizona, altering the foundational components of a vehicle, such as the frame, can lead to a change in its classification and registration.
Modifying your truck by swapping its frame or similar foundational components can lead to significant changes in how it is processed by state regulations. These changes often aim to ensure vehicles meet current safety and environmental standards, but they can affect owners financially and administratively. Always check with your local Department of Motor Vehicles (DMV) for specifics relevant to your state.
What considerations should be taken into account regarding vehicle registration and taxes when performing a frame swap?
When planning a frame swap on your vehicle, there are several important considerations to keep in mind regarding registration and taxes:
In summary, a frame swap involves more than just the physical work—it can significantly alter your vehicle’s legal and financial standing. Always research thoroughly and consult local authorities to ensure compliance and avoid unexpected expenses.
What are the implications of using a 2003 or newer Crown Vic front end for a swap?
Implications of Using a 2003 or Newer Crown Vic Front End for a Swap
Using a 2003 or newer front end from a Crown Vic provides the advantage of a straightforward bolt-in installation. This version is designed for simplicity, reducing the need for extensive modifications or custom fabrication.
These newer models are engineered to align well with modern automotive components. This means you can benefit from up-to-date suspension geometry, which enhances handling performance and ride quality.
Parts for 2003 and newer models are generally more available and come with better aftermarket support. You’ll find easier access to replacement parts and upgrades, thanks to the popularity and prevalence of these models.
While some enthusiasts have experimented with older frame sections, these versions require more effort to fit and align properly. They are not the ideal choice if you prefer a more plug-and-play approach.
Before committing, consider the costs involved, including any potential modifications to your existing setup. However, the overall ease and improved functionality often make the 2003+ front ends a more cost-effective option in the long run.
How does the rear suspension from a Crown Vic affect the vehicle, and are there alternative rear suspension options?
The rear suspension from a Crown Victoria, known for its durable design, does have some drawbacks when integrated into other vehicle applications. Here’s how it affects the vehicle:
Considering these challenges, you might explore alternative rear suspension options that offer a better fit:
Evaluating these alternatives can ensure you select the suspension that best meets your vehicle’s requirements, aligning with both performance needs and cargo capabilities.
What steps are involved in completing a successful front end swap on a classic truck?
Picking up where we left off, it was time for disassembly and final welding. But first, let’s delve into the reasoning behind a front-end swap and its implications.
Before diving into the nitty-gritty, it’s crucial to decide whether to tackle the project yourself or take it to a professional shop. If you’re not very experienced, consider the complexity of the task and the tools you’ll need. A front-end swap is often preferred over a complete frame swap due to its relative simplicity and cost-effectiveness. However, this decision should factor in your specific goals and the condition of your truck.
Many enthusiasts choose to swap only the front-end because it significantly improves handling and ride quality while leaving the rear end intact. This approach can be less invasive and more manageable for DIYers. If you decide to only swap the front end, be aware that the rear may still need adjustments later for optimal performance and balance.
With our direction set, we proceeded with the disassembly:
We used a temporary coilover placeholder since we might still end up with air ride on this project — only time will tell!
Once stripped back down, you can really see the Team321 crossmember and how she looks tacked in place before final welding. With the crossmember bare, we finalized all the finish welding on the top, bottom, and sides.
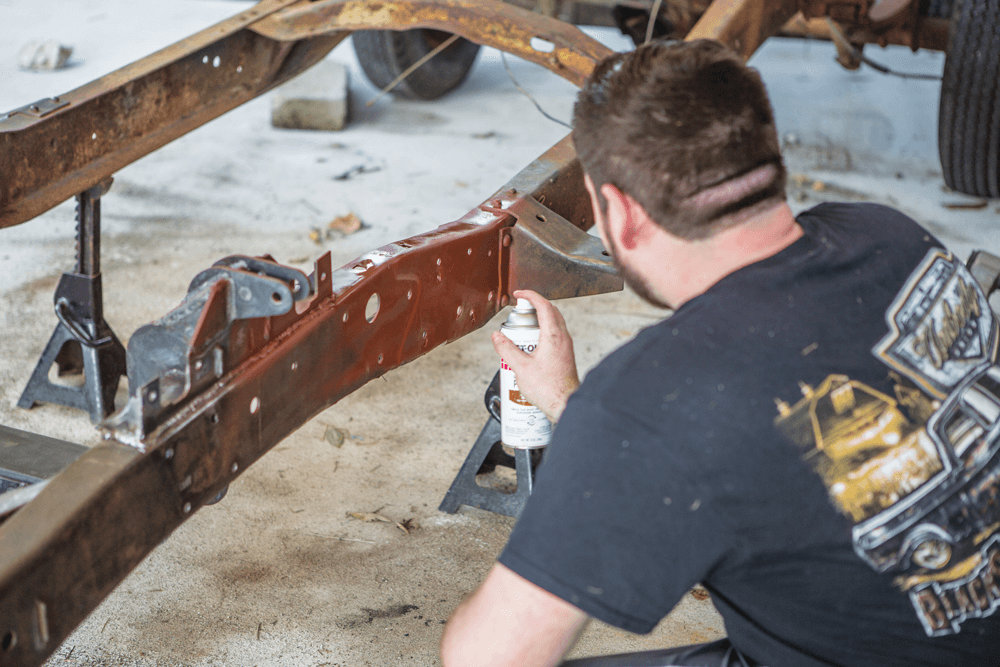
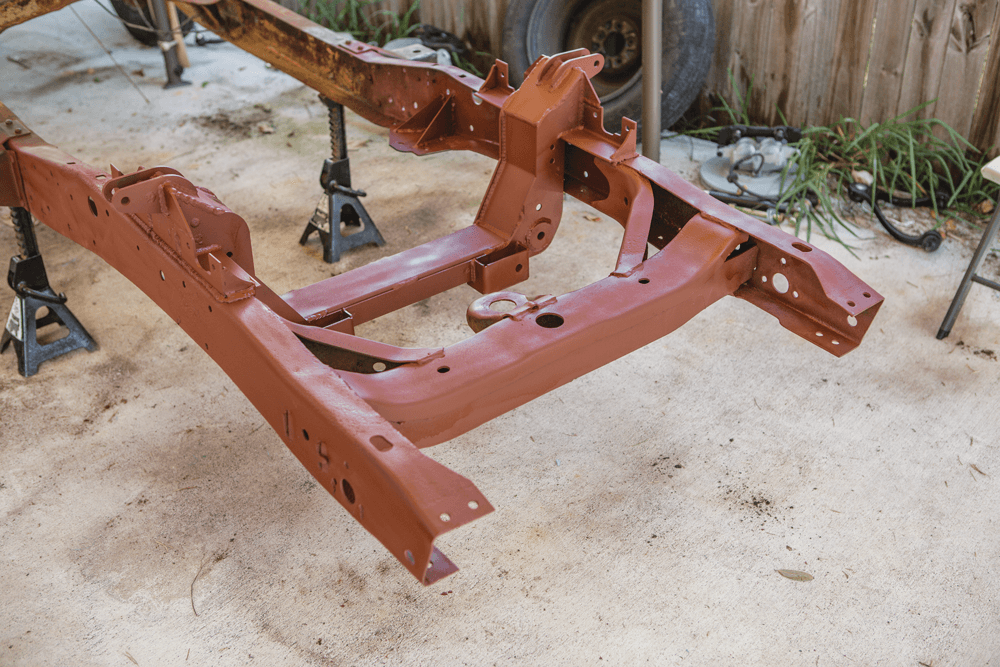
The crossmember was fully welded and ready for some color and final assembly. Since we’re still undecided on various aspects like color and air ride, we decided to apply a no-rust primer to protect the frame from the elements until it’s ready for a powder coat.
After adequate dry time, we went through the process in reverse, reinstalling the rest of the gear back onto the crossmember.
By understanding both the broader context and detailed steps, you’re better equipped to execute a successful front-end swap on your classic truck. Whether you’re doing it yourself or seeking professional help, each decision should align with your overall vision for the project.
What needs to be done to the rear if only a front-end swap is performed?
If only the front end is swapped, it’s important to assess the rear suspension to ensure balanced handling and performance. This might include upgrading or adjusting rear components to match the new front setup, ensuring alignment and stability are maintained.
Why do most people only perform a front-end swap rather than a complete frame swap?
Many opt for a front-end swap because it can improve handling and suspension performance without the extensive work or cost involved in a full frame swap. It also allows for customization while maintaining the vehicle’s original structure.
Should I attempt the swap myself or take it to a shop?
The decision to do it yourself or go to a shop depends on your experience level, available tools, and confidence. If you’re inexperienced, seeking professional help might ensure quality work and safety. However, if you and your friends have some mechanical know-how, it could be an opportunity to learn and save on costs.
What is the Crown Vic front end swap, and why is it popular for F-100 trucks?
Easy As 3, 2, 1 Crown Vic Swap Setup into a Ford F-100
<Team321’s> front setup is designed with a weld-in steel crossmember to mount the Crown Vic suspension components—including control arms, knuckles, bearings, brakes, and sway bar links. Due to the narrowed track width, you can’t use the factory sway bar or steering rack. This is not a cut/weld of the factory Crown Viccrossmember. Team321’s Narrow Crown Vic crossmember is a purpose-built crossmember that fits the F-100 frame with no modifications. Team321 offers this setup in two packages: the base package includes the crossmember, upper control arms, all mounting hardware, and sway bar; the complete suspension package adds the lower control arms, steering rack, coilovers, knuckles, steering tie rods, and sway bar links.
The Crown Vic front end swap is a popular modification for F-100 truck enthusiasts, offering modern performance and ride quality while maintaining the classic truck’s charm. This swap provides several benefits:
When opting for a Crown Vic front end swap, there are important considerations to ensure a successful project:
By integrating personal experiences and practical advice, the Crown Vic front end swap emerges as a balanced blend of old-school style and contemporary performance, making it a sought-after upgrade for F-100 aficionados.
What are practical solutions to common issues associated with the swap?
To maintain the classic truck status while enhancing performance, some suggest using the front suspension from a Crown Vic and the rear from another model, like a ’90s T-bird. This avoids a full frame swap and retains the original frame rails, bypassing some legal and registration challenges.
What are the community consensus and experiences regarding this swap?
Community members have shared experiences suggesting that using a combination of different vehicle components can optimize the upgrade. For example, integrating the front end of a Crown Vic with the rear end of a ’90s T-bird retains the classic truck’s frame while upgrading the suspension.
What are the legal implications of the swap?
Swapping the entire frame may require re-registering the vehicle, potentially as a newer model, which could result in higher property taxes and necessitate emissions testing. This could impact the vehicle’s classic registration status.
Which Crown Vic models are suitable for the swap?
The 2003 and newer Crown Victoria models are the ideal choices for a bolt-in swap, as they fit more seamlessly with the F-100 frame without requiring significant modifications.
What is the purpose of the upper frame mounts in a Crown Victoria sub-frame installation on F-Series trucks?
The upper frame mounts serve several crucial functions in the installation of a Crown Victoria sub-frame onto F-Series trucks:
Utilizing upper frame mounts in this context enhances the overall installation process, ensuring functionality without compromising style or performance.
What clearance benefits do these upper frame mounts provide for low ride height setups?
When you’re working with low ride height systems, like air rides or static drop kits, ensuring adequate clearance is crucial.
In summary, for low ride height configurations, these mounts ensure efficient operation and longevity by maximizing space and minimizing potential contact points.
How have customers reviewed the upper frame mounts in terms of quality and fit?
When it comes to the quality and fit of upper frame mounts, customers express strong satisfaction backed by glowing reviews.
Overall, customer feedback consistently praises the upper frame mounts for their top-quality materials, precise fit, and the enhanced look they bring to installations.
What are the available height options for the upper frame mounts?
When it comes to customizing your upper frame mounts, you have a variety of height options to choose from, allowing you to tailor the setup to your specific needs:
By selecting the appropriate frame mount height, you ensure a cohesive build, maintaining both the functionality and styling that match your project’s design vision.
What specific bolts are used with these upper frame mounts?
These upper frame mounts are compatible with the standard through-frame bolts from factory-produced Crown Victoria vehicles manufactured between 2003 and 2011. Please note that these bolts should be installed in a downward orientation, and they are not included with the mounts. Make sure to use suitable size and grade to ensure a secure fit.
What components are included in the sale of these upper frame mounts?
The sale includes a set of upper frame brackets specifically designed for both the driver and passenger sides. These components are crafted from raw steel, providing a sturdy base ready for customization or use as-is. It’s important to note that this purchase only consists of the upper frame brackets themselves. Although they are shown alongside the upper control arms for illustrative purposes, the control arms are not part of this sale.
How long is the estimated build and ship time for the upper frame mounts after purchase?
After purchasing the upper frame mounts, you can expect the build and shipping process to take approximately two weeks. Please note this timeframe begins from the date of your purchase.
What are the return conditions for the upper frame mounts?
If you’re considering returning upper frame mounts, here are the conditions you need to know:
By meeting these conditions, your return process will be smooth and hassle-free.
Share Link