 Kevin Whipps
.
April 02, 2019
.
C10 Builders Guide
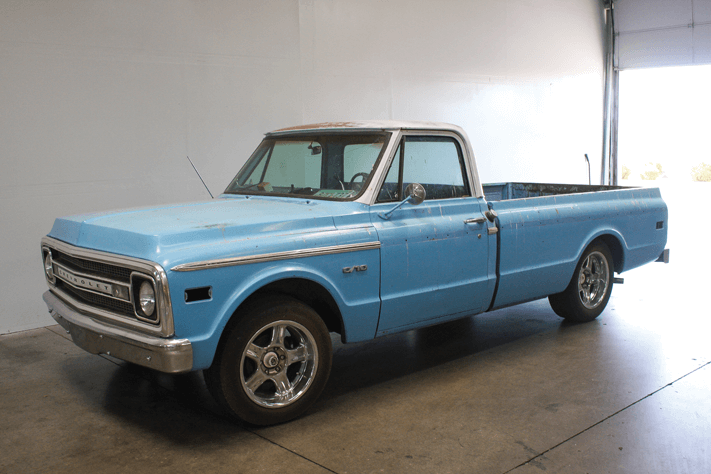
If you’re in the market for a new C-10, you’re going to hit a harsh reality: Short beds ain’t cheap. If you find one that is, it might have a shotgun hole through the headliner, or maybe it’s missing the bed entirely. Either way, if you’re looking for a good deal, you might want to consider a long bed. After all, you can always cut it down.
Kyle at Metalox Fab has made his living doing just that for loyal customers from all across North America for the past few years. The resulting beds have a tiny scar down the front and back, and sometimes not even that. He knows these trucks so well that the job is done like a surgeon—clean and perfect.
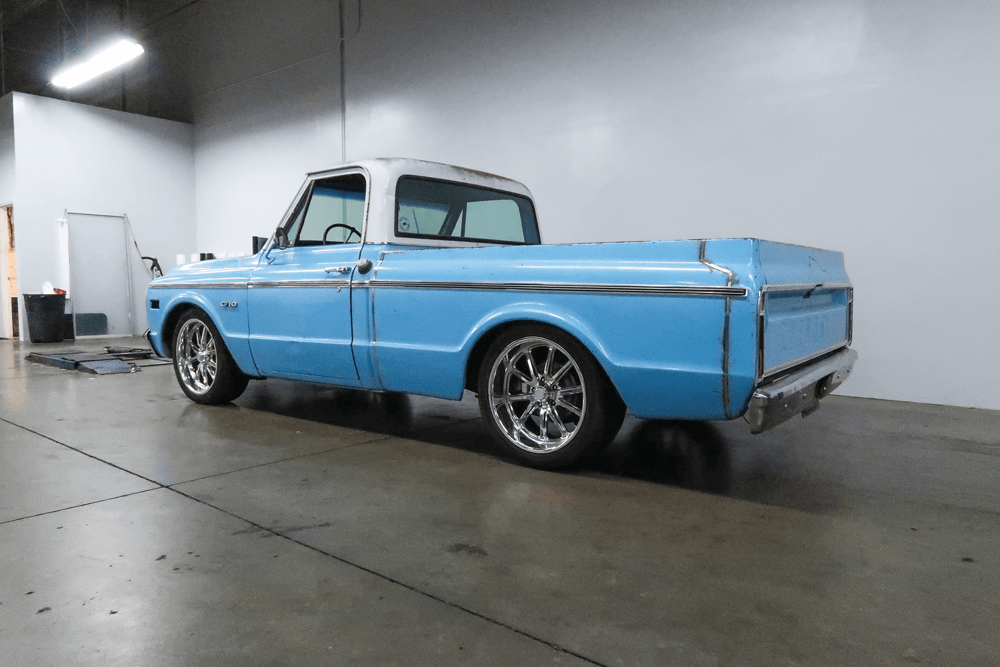
We were fortunate enough to spend some time with him while he cut down a 1969 Chevrolet C-10 long bed. By the time he was done a few days later, the truck was not only 20 inches shorter, but it looked a ton better, too.

SOURCES
Metalox Fabrication
8615 W. Kelton Lane,
Suite 305
Peoria AZ 85382
@metaloxfab
623-308-1170
TAD Drive Shafts
22010 N. 24th Ave
Phoenix, AZ 85027
623-869-0510
Tadshafts.com
How do users handle fitment issues with aftermarket parts not lining up properly?
When dealing with aftermarket parts, it’s not uncommon to encounter fitment issues. These parts are often reverse-engineered, which can lead to minor discrepancies in how they align with the vehicle. Here’s how many users overcome these challenges:
By approaching fitment challenges with these strategies, users can often achieve satisfactory results, ensuring their vehicle maintains its integrity and functionality.
What steps do users take to ensure they get the best fitting parts for their projects?
When embarking on any automotive restoration or conversion project, getting the right fitting parts is crucial for both aesthetics and functionality. Here are steps users commonly take to ensure they achieve the best results:
Original Equipment Manufacturer (OEM) parts are often the top choice due to their precise fit and compatibility.
Not all aftermarket parts are created equal. Researching the manufacturers can save a lot of headaches.
Aftermarket parts can vary in quality and fit, so it’s imperative to scrutinize these options carefully.
Buying from well-regarded sellers can also make a significant difference.
Once the parts arrive, conduct a thorough inspection before attempting installation.
Leveraging online communities and resources can provide valuable insights and assistance.
By following these steps, automotive enthusiasts can significantly increase their chances of acquiring parts that fit well and meet their project requirements. This systematic approach helps minimize the setbacks often associated with improper part fitment, thus saving time and money.
How do users adjust templates or kits that do not fit correctly during installation?
When you encounter a situation where a template or kit doesn’t fit as expected during installation, here’s a streamlined process to make the necessary adjustments:
By following these steps, you can ensure your installation goes smoothly, even when initial templates or kits don’t align perfectly.
How do users feel about purchasing OEM sheet metal versus aftermarket parts?
OEM Sheet Metal: The Preferred Choice
Many users express a strong preference for OEM (Original Equipment Manufacturer) sheet metal due to its quality and fit. They assert that while OEM parts can be harder to find and more expensive, the assurance of an exact fit and original quality makes them worth the effort. Users often share experiences of scouring salvage yards or online marketplaces to find unused or gently used OEM parts, noting that these components are typically free from the fitment issues that plague aftermarket parts.
When it comes to aftermarket sheet metal, opinions are more varied. Some users recount negative experiences, highlighting issues such as poor fitment and lower quality. It’s common to hear about parts needing significant modification before they can be used, which adds extra time and cost to any project. Despite these concerns, aftermarket parts remain a popular choice for those on a budget or when OEM parts are unavailable.
Ultimately, the choice between OEM and aftermarket sheet metal comes down to a balance of budget, availability, and the importance of quality. For critical restorations where authenticity and precision are paramount, and for those willing to invest the effort, OEM parts are the clear winner. Conversely, for less critical applications or when OEMparts are impractically expensive or unavailable, aftermarket parts offer a viable though sometimes imperfect solution.
By weighing these factors, users can make an informed decision that best meets their project needs.
What alternative sources do users recommend for purchasing replacement bedsides?
If you’re in the market for replacement bedsides, you might be wondering where fellow enthusiasts source their parts. Here are some recommended alternatives based on user experiences.
Many users suggest checking with local auto parts suppliers and dealers. These sources often carry a range of replacement panels and can provide the convenience of immediate pickup, saving you shipping costs and time.
Specialized auto body parts stores are a frequently mentioned alternative. These retailers typically offer a robust selection of high-quality parts designed for specific vehicle makes and models.
Several users recommend exploring online retailers. These websites usually feature a wider selection and competitive pricing. Look for retailers with positive reviews and detailed product descriptions to ensure compatibility and quality.
Experienced users often find great deals at automotive swap meets. These events provide an opportunity to inspect parts firsthand and sometimes negotiate prices directly with sellers.
Another popular suggestion is salvage yards. They can be a goldmine for finding original parts that fit perfectly. Although it might require a bit more effort to find what you need, the authenticity of original parts can be worth it.
Some recommend buying directly from manufacturers. While potentially more expensive, it ensures that you’re getting parts made to the original specifications. This can be crucial for maintaining the integrity and value of your vehicle.
By considering these sources, you can find the right replacement bedsides that fit your needs and budget. Happy repairing!
How do users compare the prices of parts from different suppliers, including shipping costs?
When evaluating part prices from various suppliers, it’s crucial to adopt a comprehensive approach. Here’s a structured guide to help you make informed decisions:
Start by visiting the websites of multiple suppliers to note the listed prices for the same part. Ensure you’re comparing identical specifications to get an accurate comparison.
Investigate if different suppliers are offering parts from the same manufacturer. Sometimes, a price discrepancy arises because one supplier has branded parts while another offers generic ones.
Suppliers often list attractive prices that don’t include additional costs. Be thorough in checking for:
For large or bulky items, freight shipping is usually mandatory. This can be a substantial part of your total cost. Compare the freight charges:
Some suppliers may have hidden charges such as handling fees. Always read the fine print or contact customer service for clarification.
Combine the part price with shipping, taxes, and any additional fees to figure out the total cost:
Evaluate if the price includes value-added services like extended warranties, customer service quality, or return policies. Sometimes paying slightly more can save money in the long run due to better service or easier returns.
By systematically breaking down all associated costs and comparing them, you can ensure you get the best deal when purchasing parts from different suppliers.
What are the experiences of users with LMC replacement bedsides for shortbed conversions?
Users have shared a mixed bag of experiences when it comes to using LMC replacement bedsides for shortbed conversions. Here are the key points:
While some users report satisfactory experiences with LMC replacement bedsides, highlighting solid metal quality and free shipping incentives, a significant number of users face fitment issues and inconsistent quality. The industry-wide challenge of reverse-engineered parts affects not only LMC but other vendors as well. For those seeking guaranteed fitment and reliability, sourcing OEM parts remains a recommended approach.
By aggregating these insights, it’s clear that potential buyers should weigh the cost benefits against the possible need for adjustments and replacements when choosing LMC replacement bedsides for shortbed conversions.
What are the potential issues with the fit of LMC replacement parts?
When considering replacement parts for your vehicle, particularly from third-party suppliers, several potential issues with fit can arise. Here’s a closer look:
One of the most common problems reported with replacement parts is misalignment. For instance, parts like fender wells may not line up correctly with the existing structure of your vehicle. This can result in gaps, uneven surfaces, and a non-seamless appearance.
Many replacement parts are reverse-engineered, meaning they’re recreated based on existing parts rather than original manufacturer specifications. This process can introduce minor discrepancies in measurements and design, leading to parts that don’t fit as snugly as they should.
The quality of replacement parts can be hit or miss. Some manufacturers may produce parts that fit perfectly, while others may not. It’s essential to research and compare different manufacturers, as one brand’s panels might align much better than another’s.
Given that there are only a handful of manufacturers producing these parts, the issue often lies not with the seller but with the parts themselves. These compatibility issues can stem from the materials used, the precision of the engineering, or even the batch production quality.
By being aware of these potential issues and taking proactive steps, you can mitigate the risks and ensure a smoother experience with your replacement parts.
How well do LMC replacement parts line up during installation?
When it comes to the alignment of LMC replacement parts, experiences vary among users. While some have reported issues, others have been satisfied with the fit. Here’s a closer look:
In conclusion, while some LMC parts may present alignment challenges due to their manufacturing process, other parts can fit just right. It’s advisable to weigh the cost against potential installation difficulties and consider alternate brands if precision fitment is a priority.
What are the specific challenges faced when using Brothers conversion kits?
When it comes to converting shortbed trucks using third-party conversion kits, several specific challenges can arise. Here are some key issues to be mindful of:
One of the most common challenges is ensuring that all measurements are accurate. Many kits require exact relocations of cab mounts, and even a minor discrepancy can lead to improper fitting.
The process of converting a shortbed truck is generally straightforward but time-consuming.
Compatibility with the truck model is another significant concern.
The components included in the conversion kits can vary in quality, which directly affects the final outcome.
Instruction manuals can sometimes be vague or incomplete, making the process more complex.
In summary, while using conversion kits for shortbed trucks can be rewarding, it’s essential to approach the project with attention to detail and patience. Ensure you verify all measurements, take your time with the installation, check compatibility, scrutinize the quality of the components, and seek additional resources or support if the provided instructions fall short. By doing so, you’ll increase your chances of a successful and smooth conversion.
What is the general opinion on the quality of metal used by LMC for shortbed conversions?
Mixed Reviews with Overall Solid Metal Quality
The general consensus on the quality of metal used by LMC for shortbed conversions tends to be quite varied. On one hand, many users appreciate the robust and sturdy metal that LMC provides. They find it to be solid, and in some instances, the material has been described as being adequately durable for conversion purposes. For example, one user mentioned that the metal was nice and solid, despite a few scuffs on the wheel housing that could be easily rectified with paint.
However, a recurring issue for many customers is the fitment of these parts. It’s important to note that LMC does not manufacture the parts themselves—they source them from third-party suppliers. This third-party production process often involves reverse engineering, which can lead to inconsistencies in fitment. One customer pointed out that the fitting issues are not directly LMC’s fault since they do not produce the parts, but the reverse-engineered nature of these components can sometimes result in ill-fitting parts.
To put things into perspective, some have had better experiences with other suppliers when it comes to fitment. For instance, bedsides from other manufacturers have been reported to line up perfectly, suggesting that there may be alternatives to LMC that offer more precise engineering.
Despite the mixed reviews, it’s not all negative. Some customers have had satisfactory experiences with specific components from LMC. For instance, one person highlighted that a fleetside header panel purchased from LMC fit perfectly and had a gauge quality comparable to the original part.
While the metal quality for LMC’s shortbed conversions is generally considered solid, there are notable concerns regarding the fitment of these parts due to the nature of their third-party sourcing and reverse engineering. Individual experiences vary, and some have found satisfactory alternatives through other suppliers.
What are the user experiences with AMD bedsides compared to LMC bedsides?
When it comes to user experiences with AMD and LMC bedsides, opinions are varied. Here’s a breakdown based on collective feedback:
In summary, while AMD bedsides generally receive higher marks for fit and material quality, LMC bedsides can still be a viable option if carefully selected and verified for quality.
What feedback do users give on the fit and quality of fleetside header panels from LMC?
Users have shared mixed reviews regarding various products, but the fleetside header panels stand out positively. Many commend the panels for their precise fit, noting that bolt holes align perfectly, making installation straightforward.
What are common concerns users have after reading negative posts about LMC products?
It’s not uncommon for users to experience anxiety after encountering negative reviews about third-party products they’ve purchased. Here are some of the most common concerns:
Many people find themselves in a similar situation: they’ve already placed an order and then come across negative feedback, leading to immediate concern and even regret. Posting on forums or seeking advice from other users is a common way to alleviate these worries and gain some peace of mind.
What are the costs associated with purchasing a complete bed kit from LMC?
When purchasing a complete bed kit, it’s essential to account for a few key expenses beyond the kit price itself. Here’s a breakdown of the typical costs you might encounter:
By accounting for these components, you ensure a comprehensive preparation for building or upgrading your vehicle’s bed, avoiding unexpected costs along the way.
What are the advantages or disadvantages of purchasing parts directly from AMD?
When considering whether to purchase auto parts directly from manufacturers like AMD, it’s crucial to weigh both the advantages and disadvantages. Here’s a breakdown to help you make an informed decision:
While purchasing auto parts directly from a manufacturer ensures high quality and authenticity, it can also be more costly and involve higher shipping fees. However, the trade-off might be worth it for the assurance of a quality product backed by a solid warranty and reliable customer service. Evaluate your priorities and budget to determine the best purchasing route for you.
What are the experiences with the fit and quality of drip rails purchased from GMC Paul’s?
When it comes to the fit and quality of drip rails from GMC Paul’s, experiences tend to vary. Many customers find that these parts, like many aftermarket components, often do not fit as precisely as the original equipment manufacturer (OEM) parts.
In sum, while GMC Paul’s offers a range of products, potential fitment issues are something to be prepared for, and it might be worthwhile to explore OEM alternatives if perfect fitment is essential.
How does the shipping cost factor into the overall expense of ordering parts from LMC?
When evaluating the total expense of ordering parts, it’s crucial to consider shipping costs. For a comprehensive example, let’s break down the numbers:
When tallying up expenses, using suppliers that offer free shipping on larger orders can lead to substantial savings. This approach helps keep your overall project budget in check, allowing any additional costs to focus on modifications and labor rather than shipping fees.
What advice do users offer for those undertaking a shortbed conversion project?
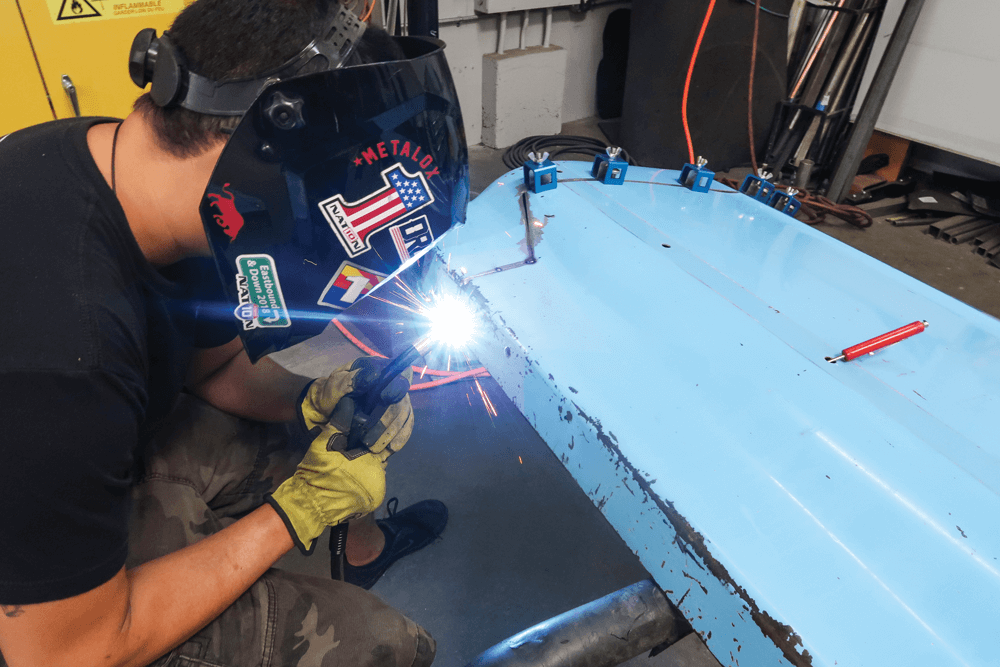
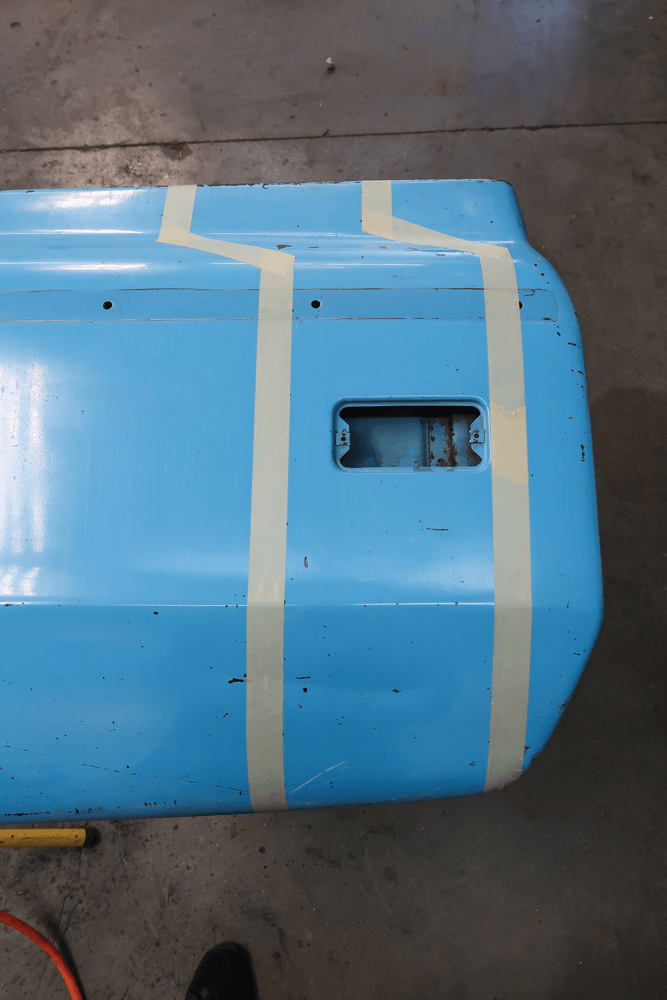
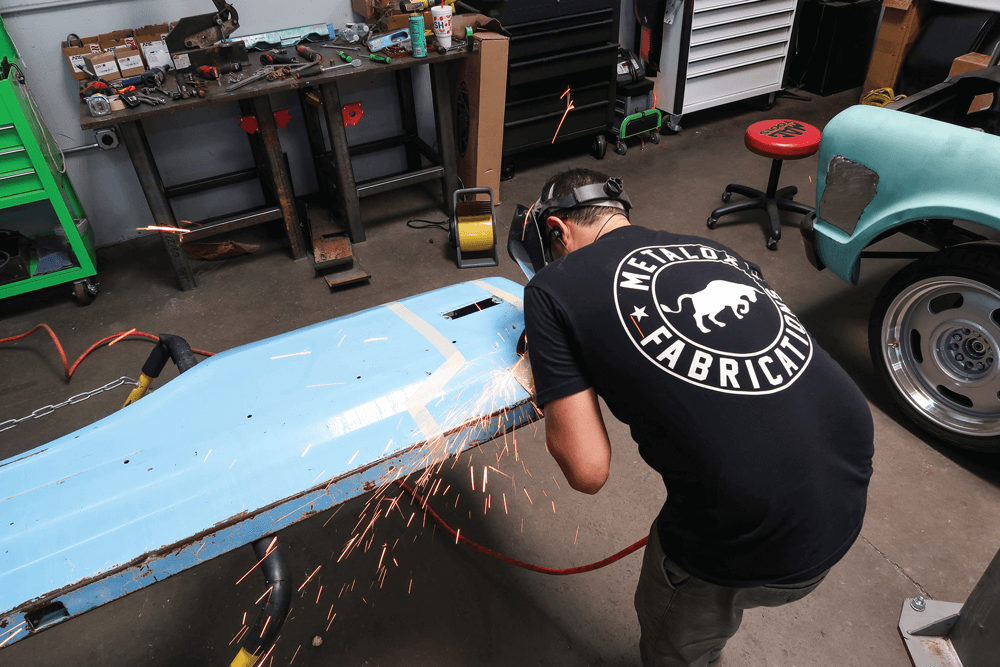
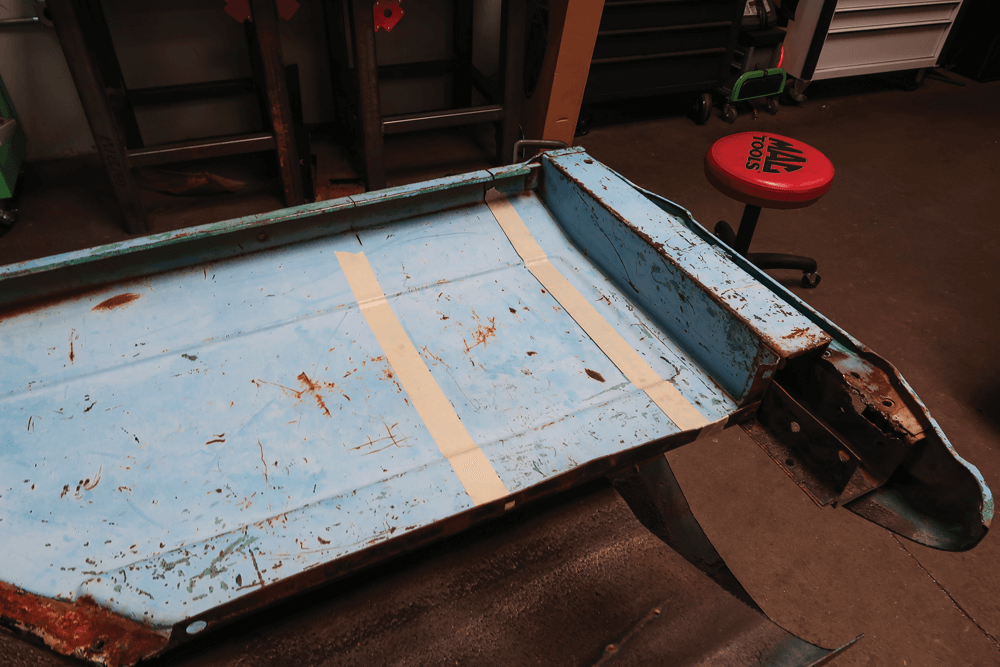
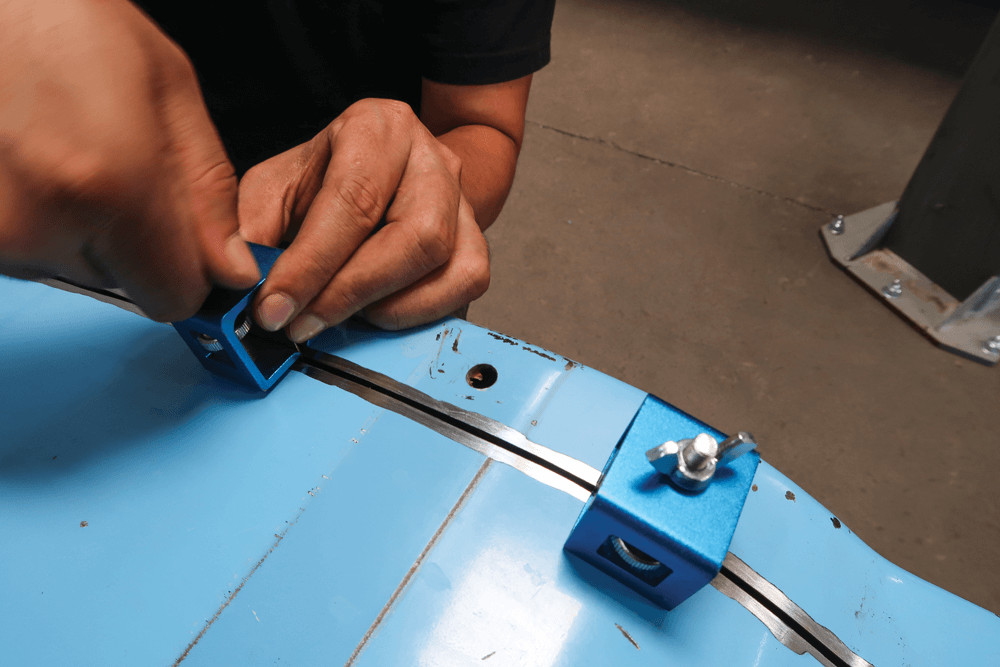
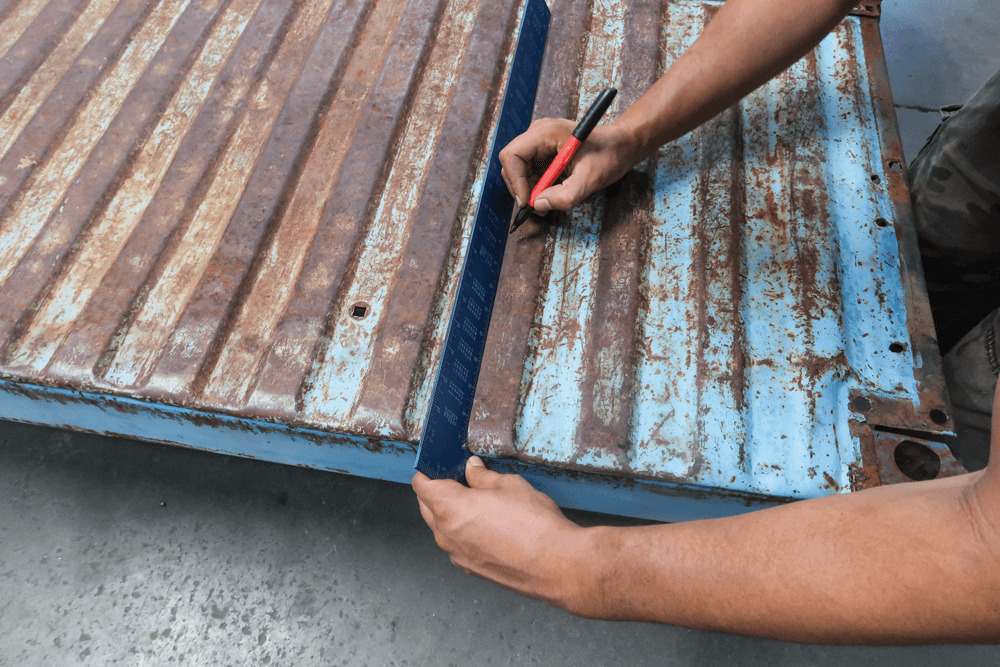
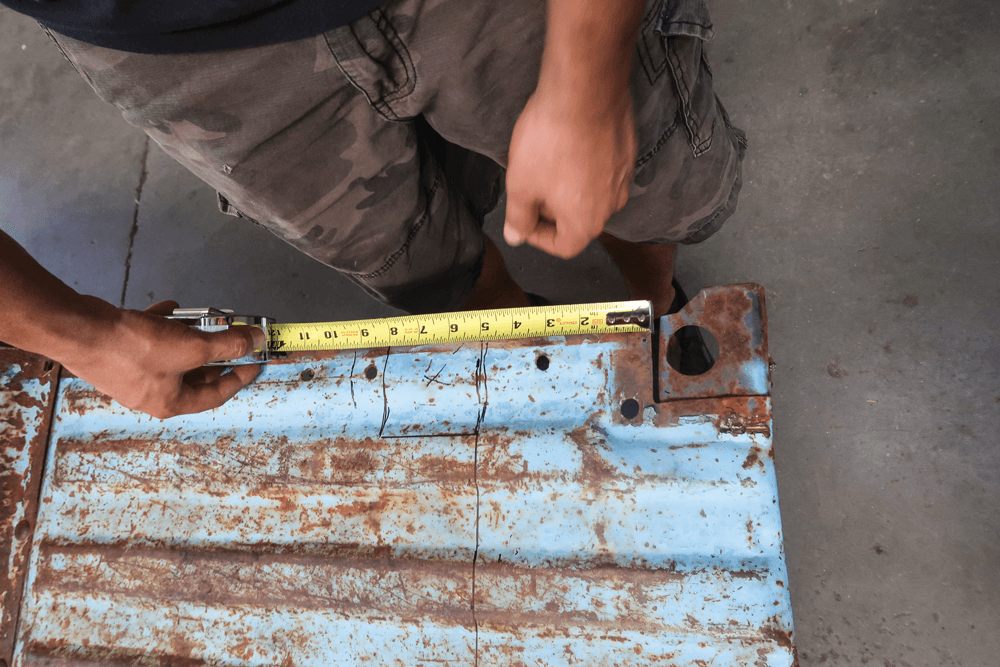
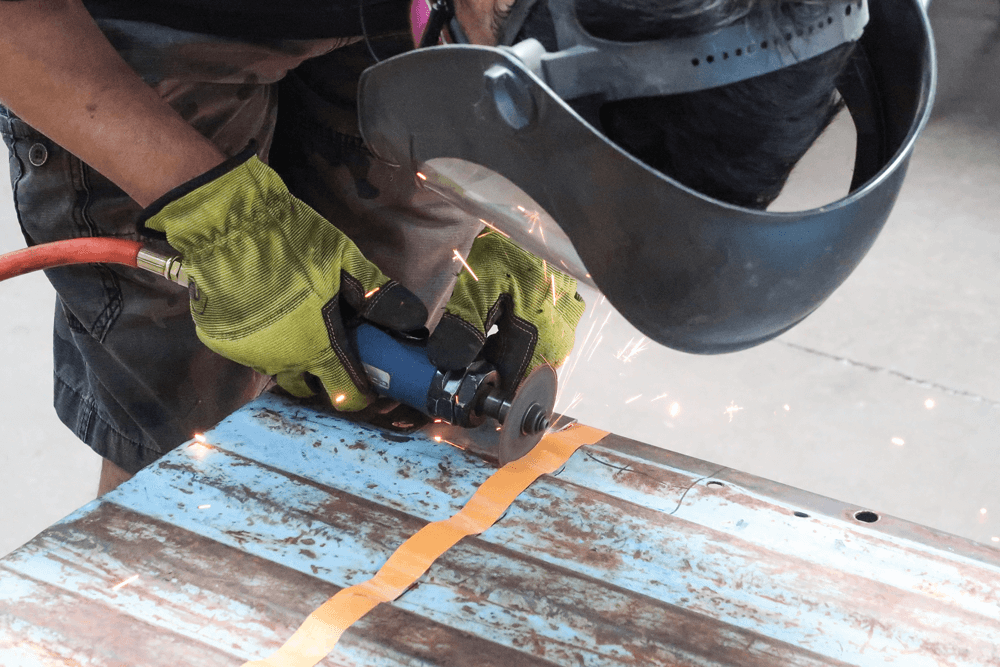
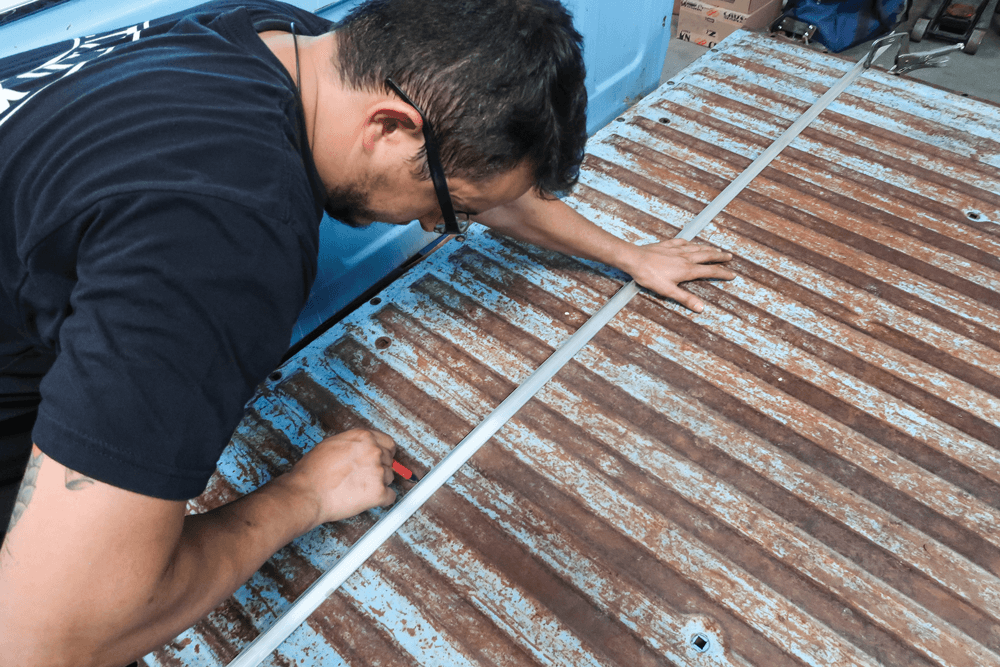
07 Kyle marked out the bedsides for the cuts. You need to take 8 inches out of the rear of the bedside and 12 inches out of the front. And that jog in the tape? That’s to compensate for the bodyline that slopes down by the tailgate. Using a die grinder, Kyle cuts the outer skin on the bedsides. Once the outside is cut, he tapes and cuts the inside of the bed. The bed now needs to be welded back together, so Kyle places everything using these sheetmetal clamps that provide just the right amount of gap.
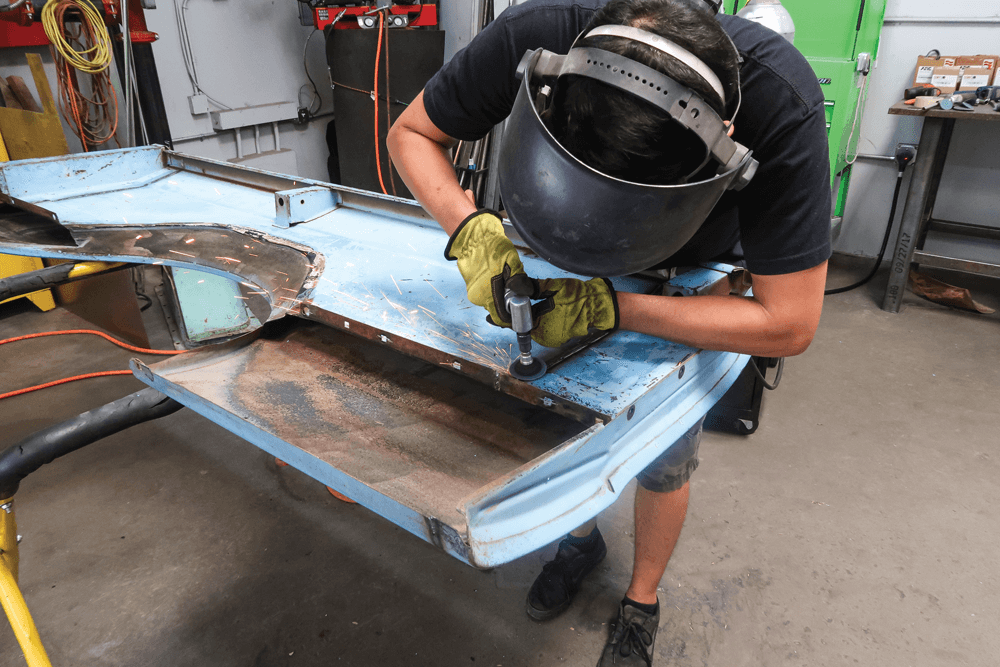
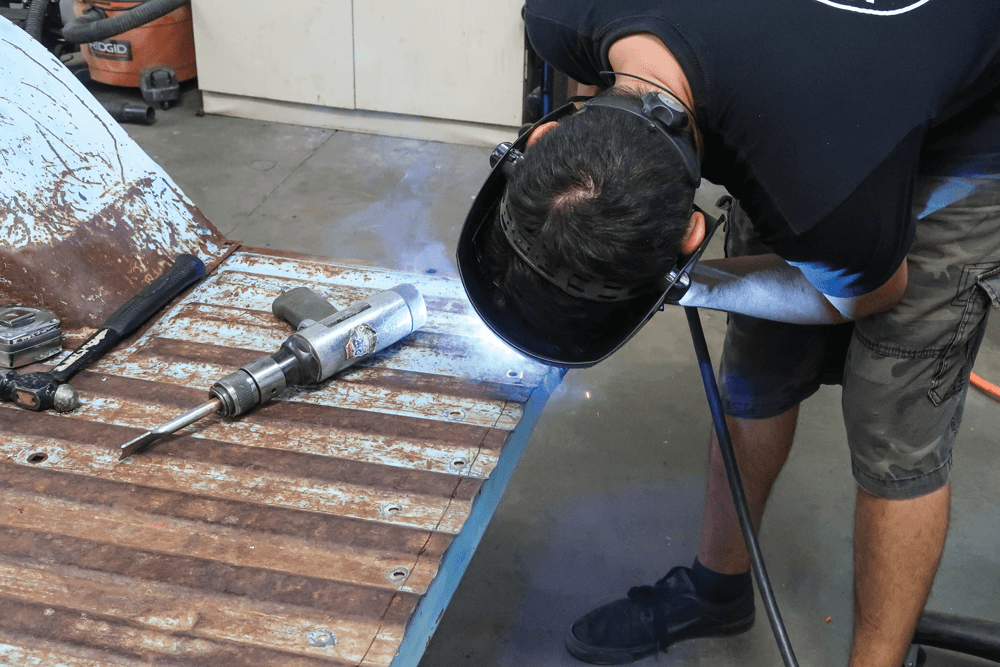
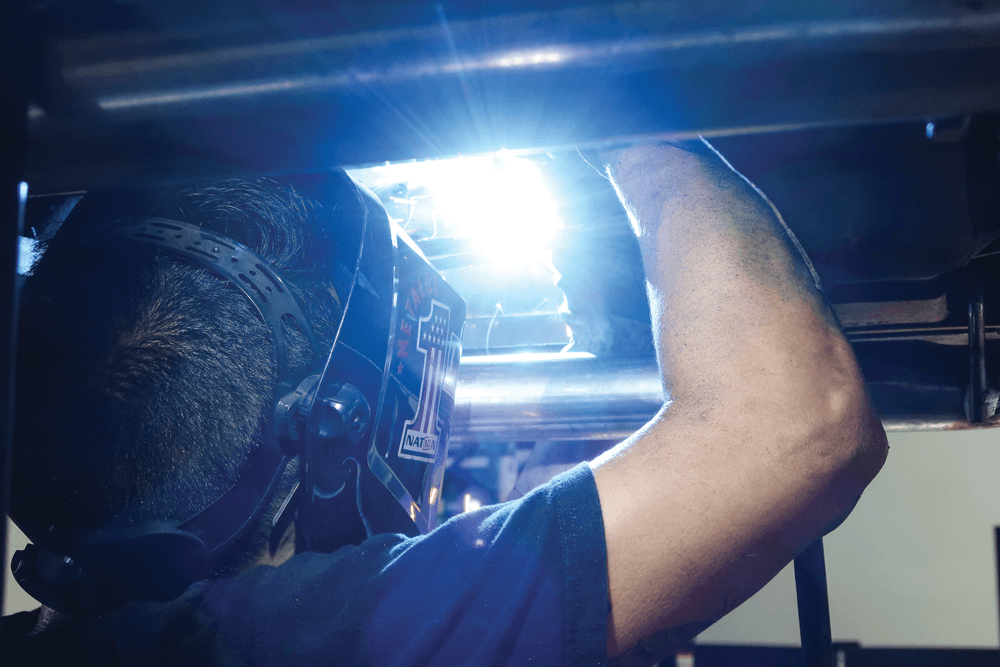
Now it’s time to weld everything back together. It’s a tedious process, but it needs to be done right; otherwise, the metal will need a ton of bodywork. The way Kyle does it, everything turns out perfect. Using a series of sanding discs, Kyle grinds down the welds so they’re flush with the surrounding metal.
It’s an easy procedure; just take your time. One important adjustment to note is with the cab mount relocation. While the template might suggest moving it 11 1/2 inches, it’s more accurate to move it 12 inches. This small correction will save you from potential alignment issues later on.
Many users have shared their experiences with various products used in shortbed conversions. Some have had issues with specific kits, but others have found certain products to be reliable. For instance, one user mentioned purchasing a fleetside header panel that fit perfectly, with all bolt holes lining up correctly and the material being as heavy-gauge as the original.
When undertaking a shortbed conversion, attention to detail is paramount. Take your time with each step, from cutting and welding to making necessary adjustments. Listen to advice from those who have gone through the process before, and trust tried-and-tested products to make your project a success.
What other parts are involved in a shortbed conversion project?
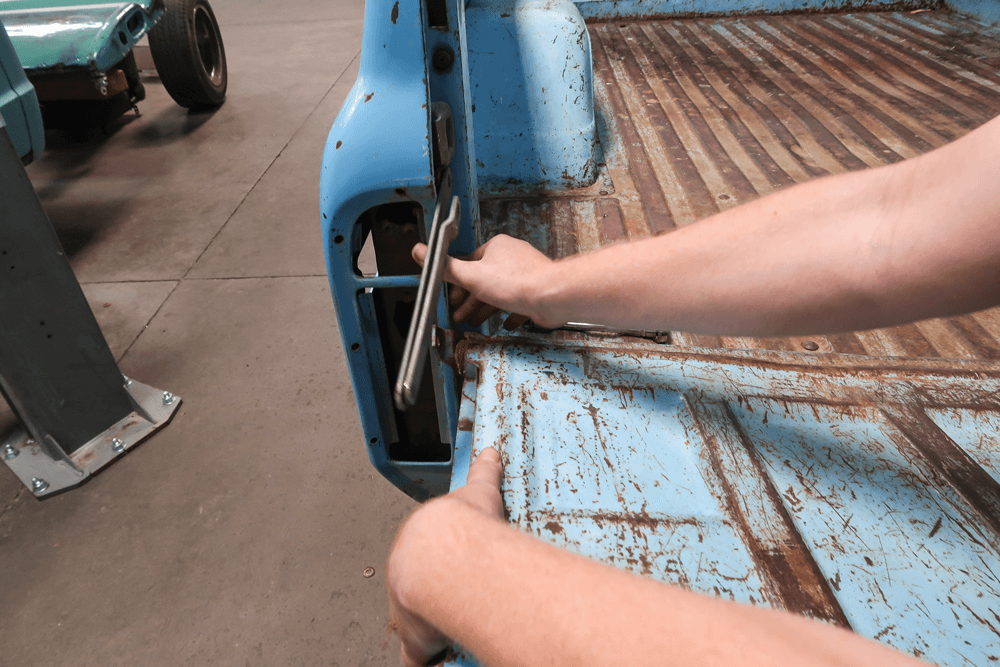
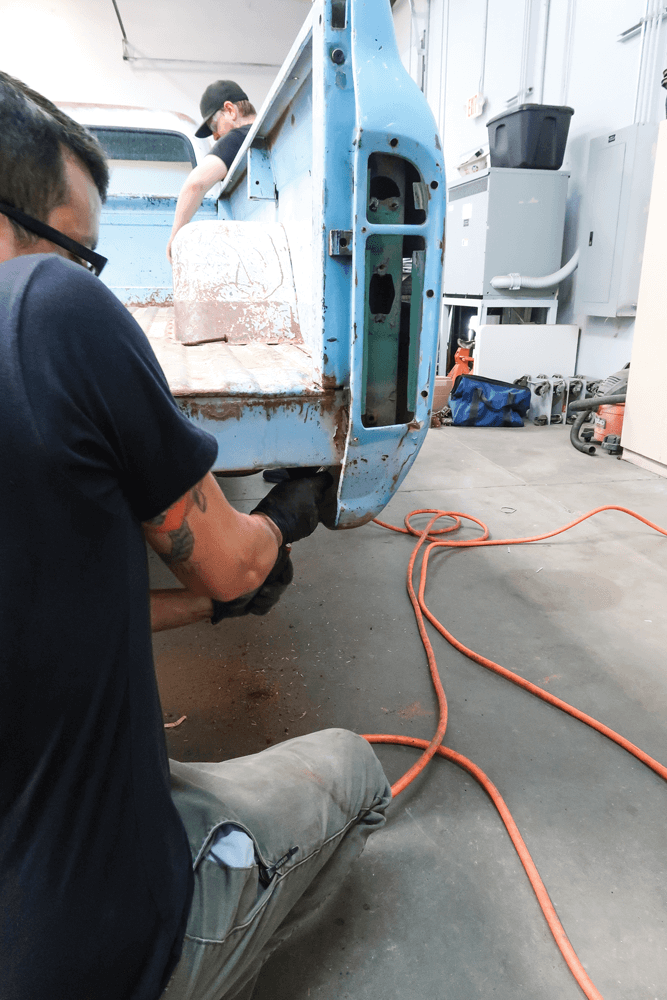
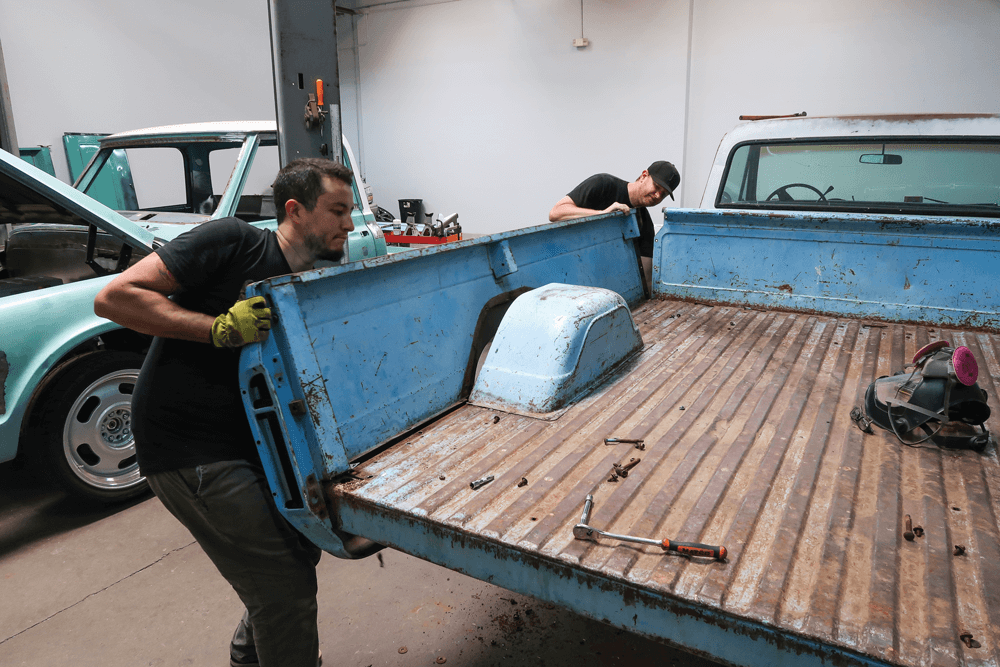
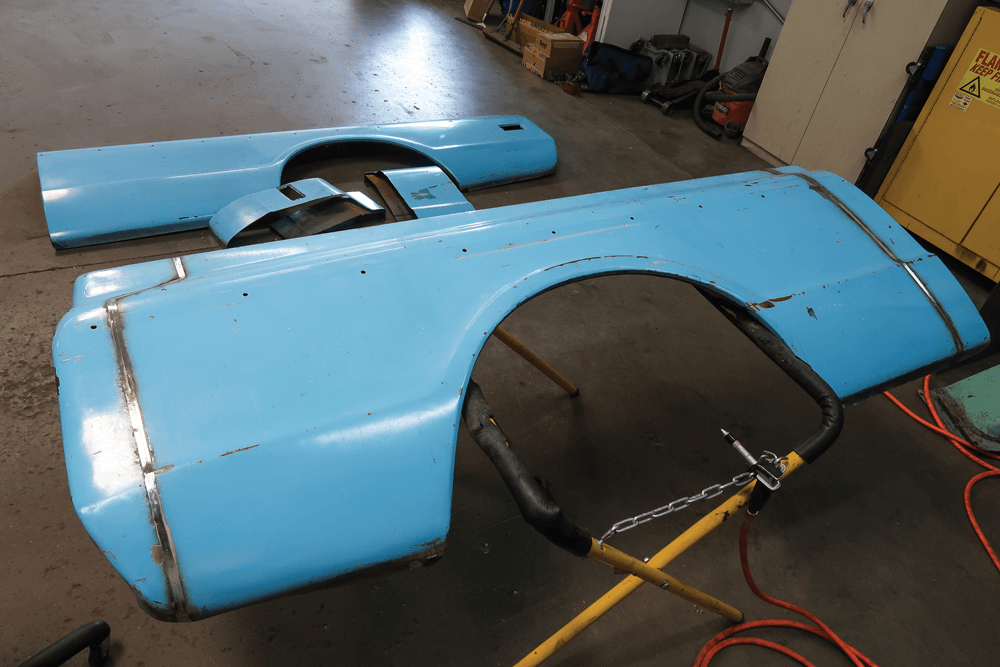
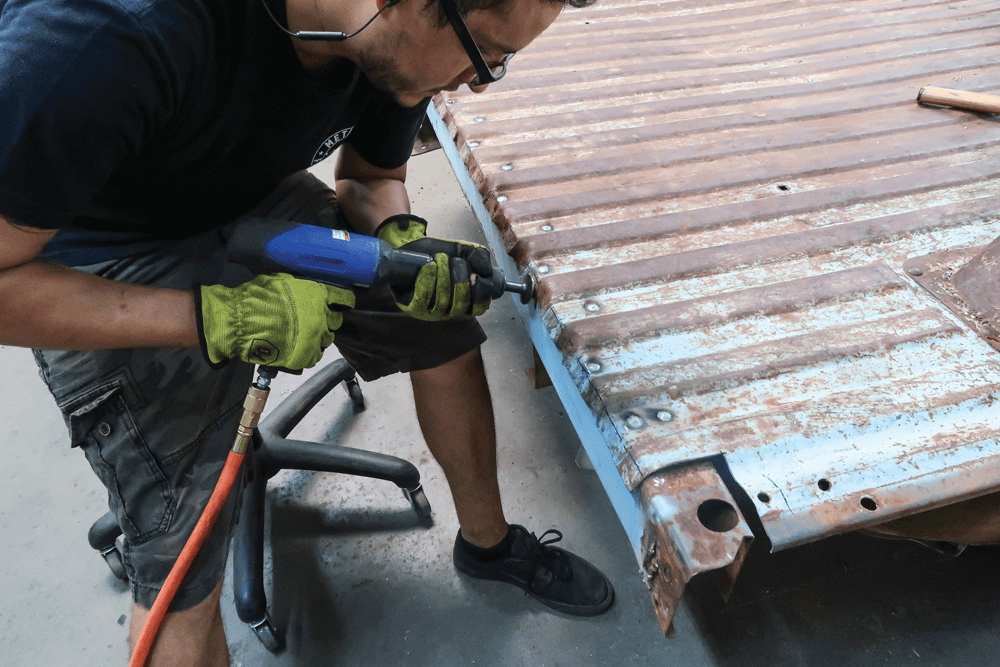
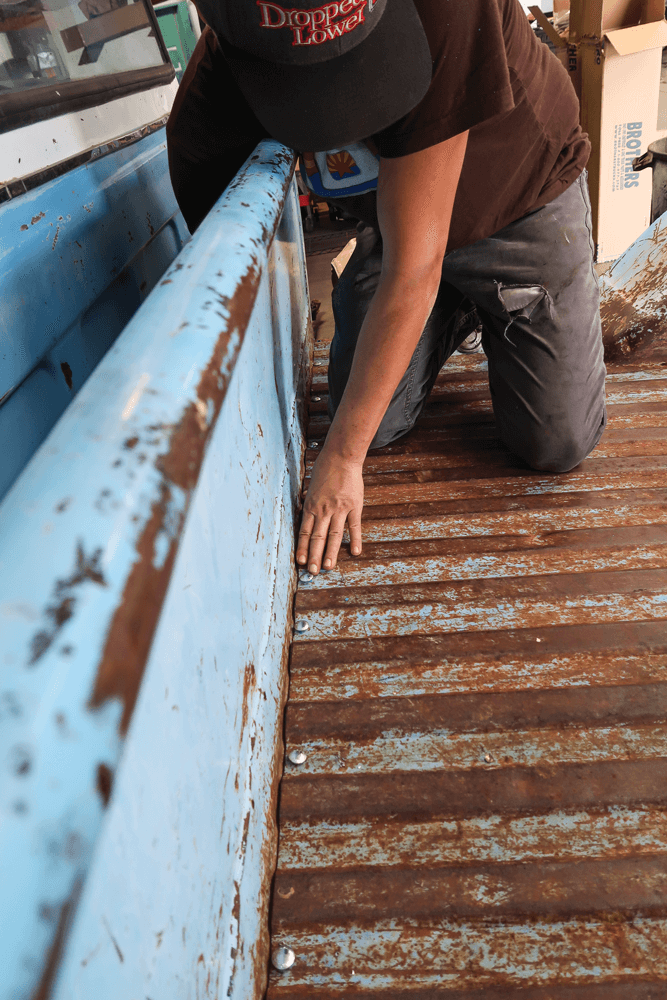
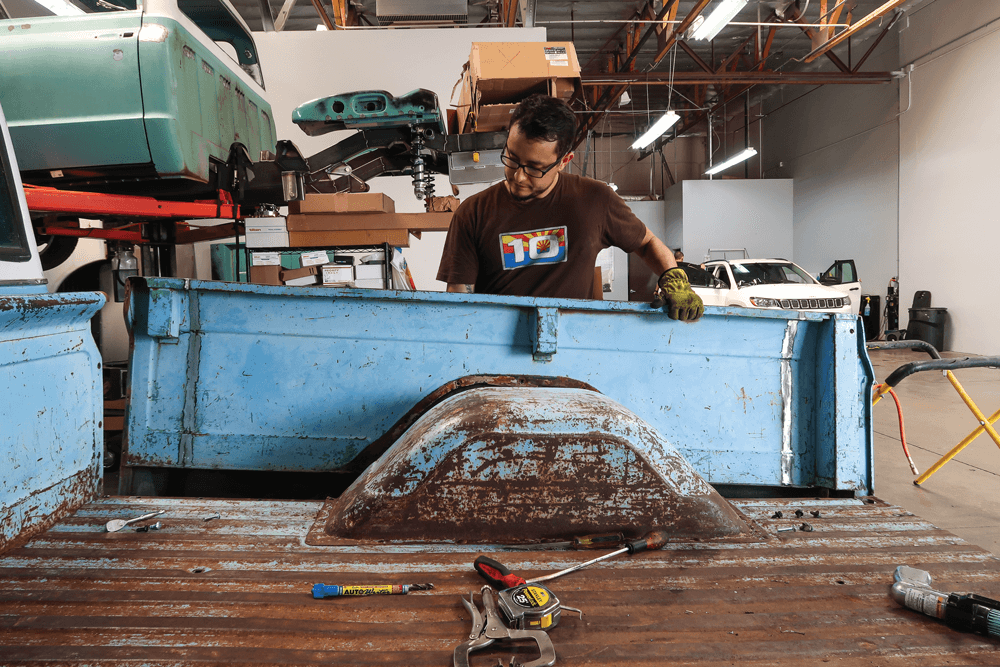
The bed floor and sides are bolted together, so from here on out it’s just about unbolting the sides. And just like that, one bedside is down. The header panel and passenger bedside are next, and they’re all placed on the bed floor for now. Kyle marked out the bedsides for the cuts. You need to take 8 inches out of the rear of the bedside and 12 inches out of the front. And that jog in the tape? That’s to compensate for the bodyline that slopes down by the tailgate.
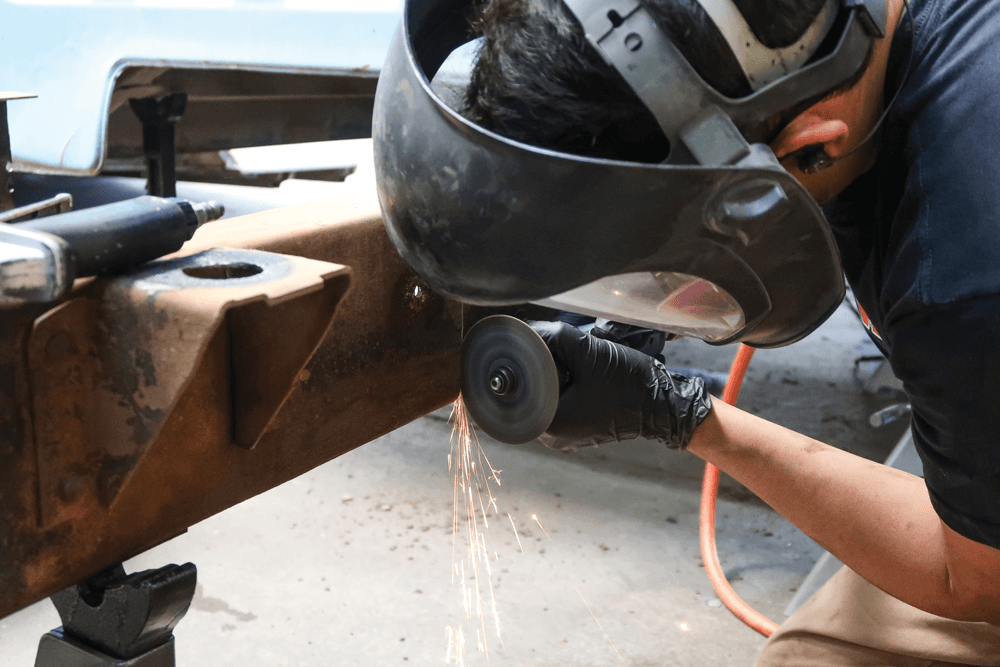
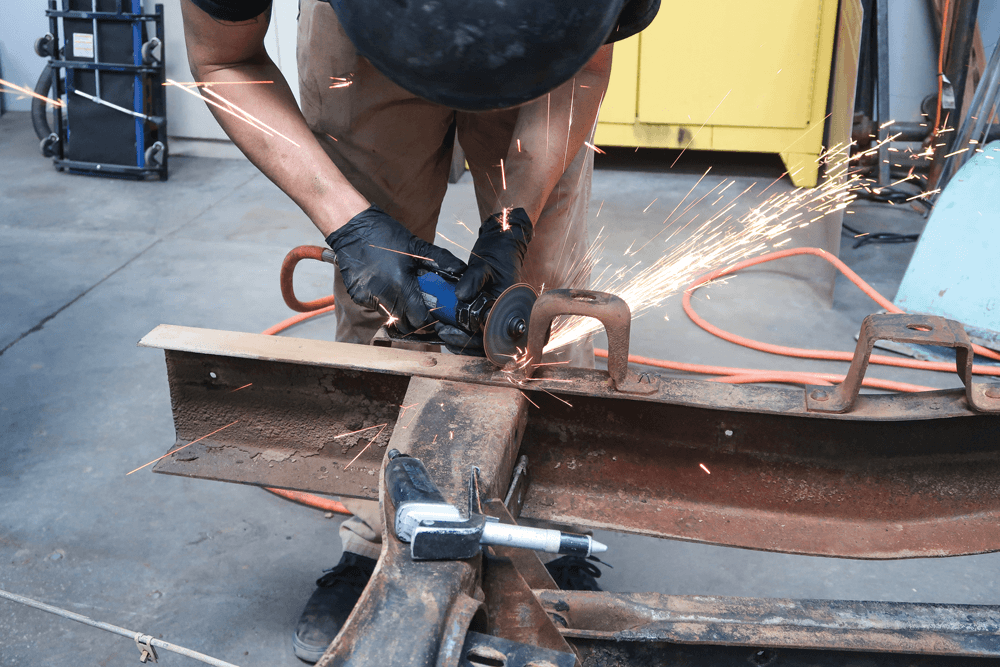
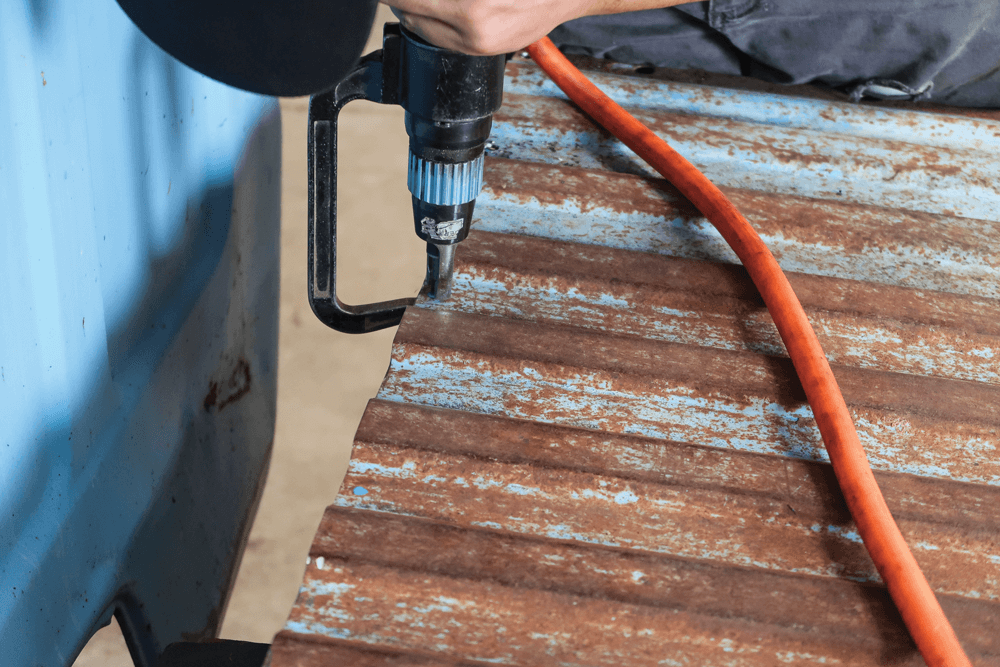
Using a die grinder, Kyle cuts the outer skin on the bedsides. Once the outside is cut, he tapes and cuts the inside of the bed. The bed now needs to be welded back together, so Kyle places everything using these sheetmetal clamps that provide just the right amount of gap. Now it’s time to weld everything back together. It’s a tedious process, but it needs to be done right, otherwise the metal will need a ton of bodywork. The way Kyle does it, everything turns out perfect. Using a series of sanding discs, Kyle grinds down the welds so they’re flush with the surrounding metal. The resulting ‘scars’ are ready for some clear coat or body and paint. In this case, the owner’s opting for clear.
Moving to the bed floor, Kyle marked out 8 inches from the tailgate side of the bed. He does the same thing with the square notches next to the stake pockets. This will ensure that the floor lines up perfectly with the bedsides once everything is bolted back together. Now the floor is cut using a die grinder—Kyle’s favorite tool in the world. The rear cross rail on the bed floor has been drilled out and is now spot welded to the new shorter bed floor. To give the edge a perfect look, he hammers it down with an air hammer. The resulting metal looks factory.
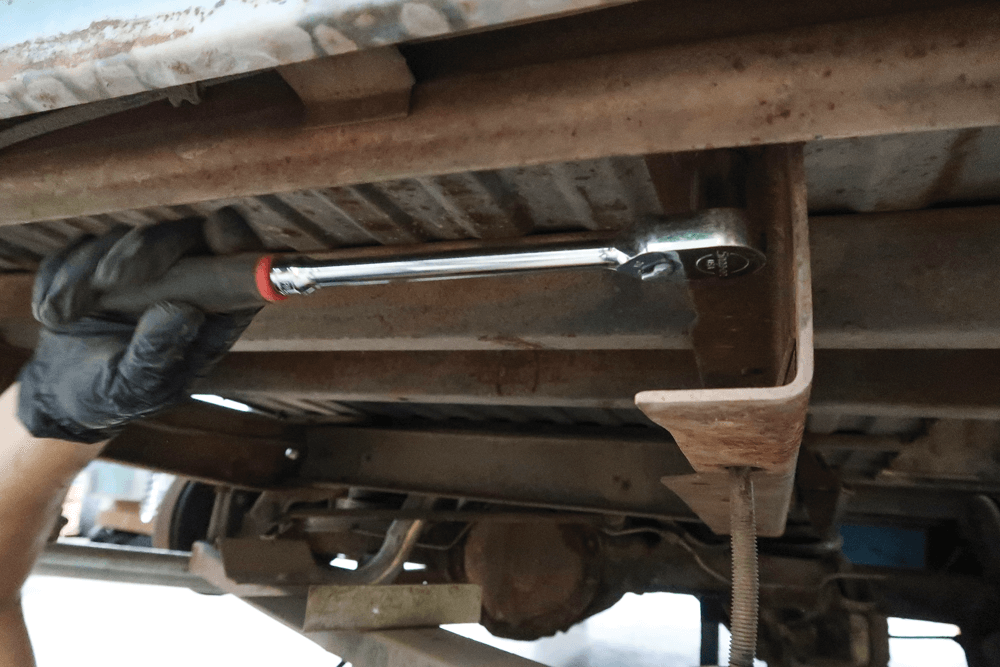
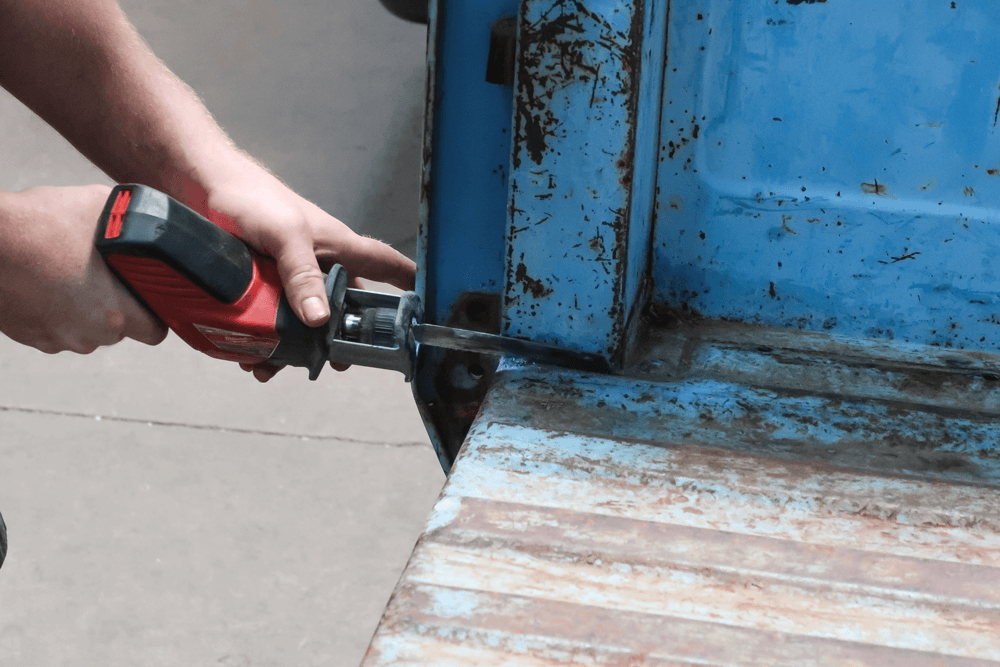
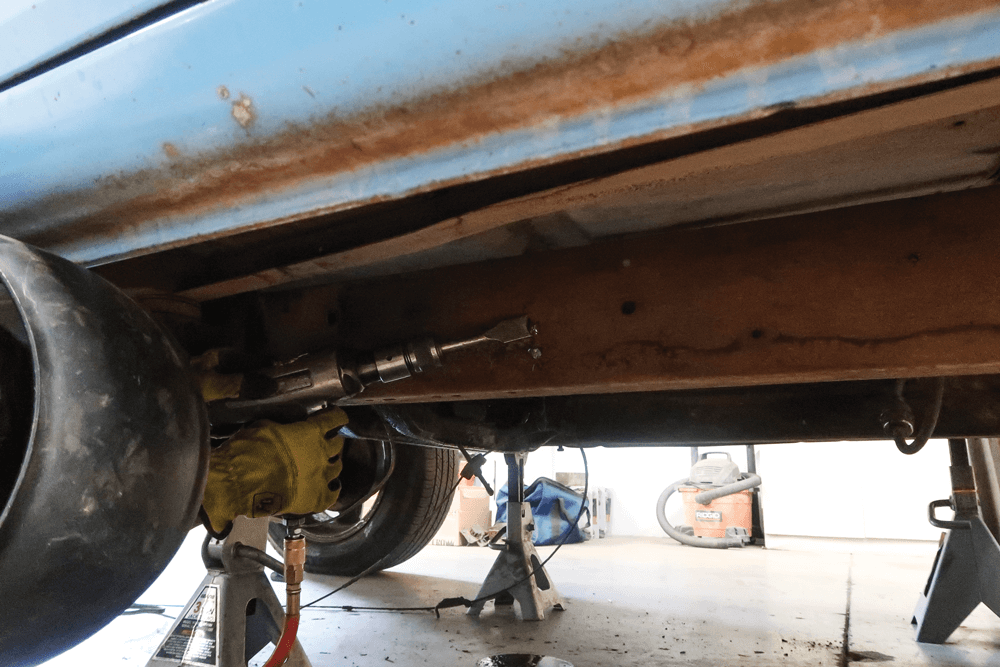
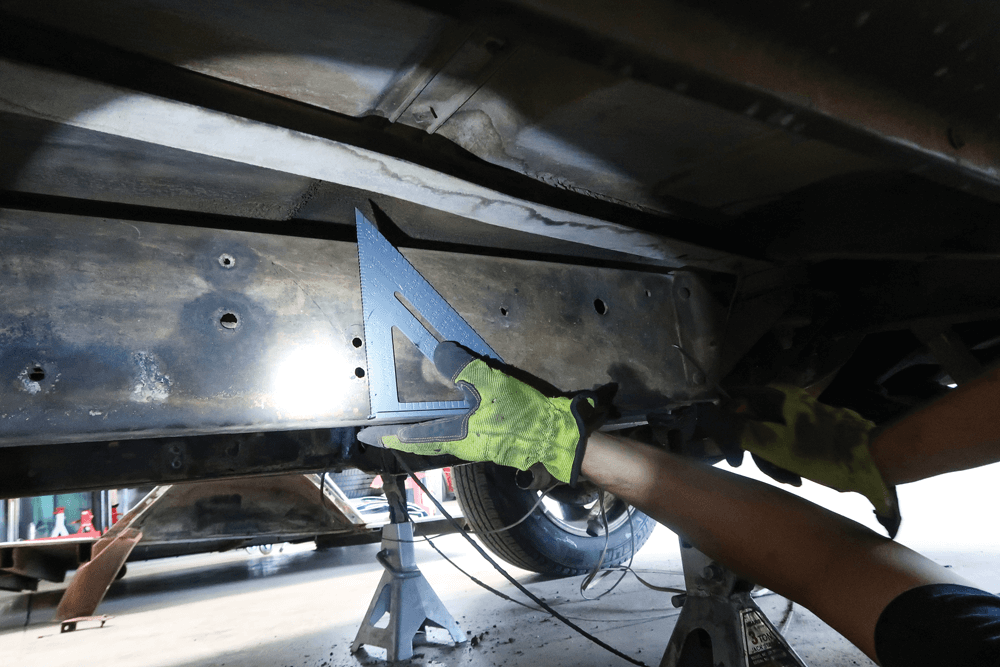
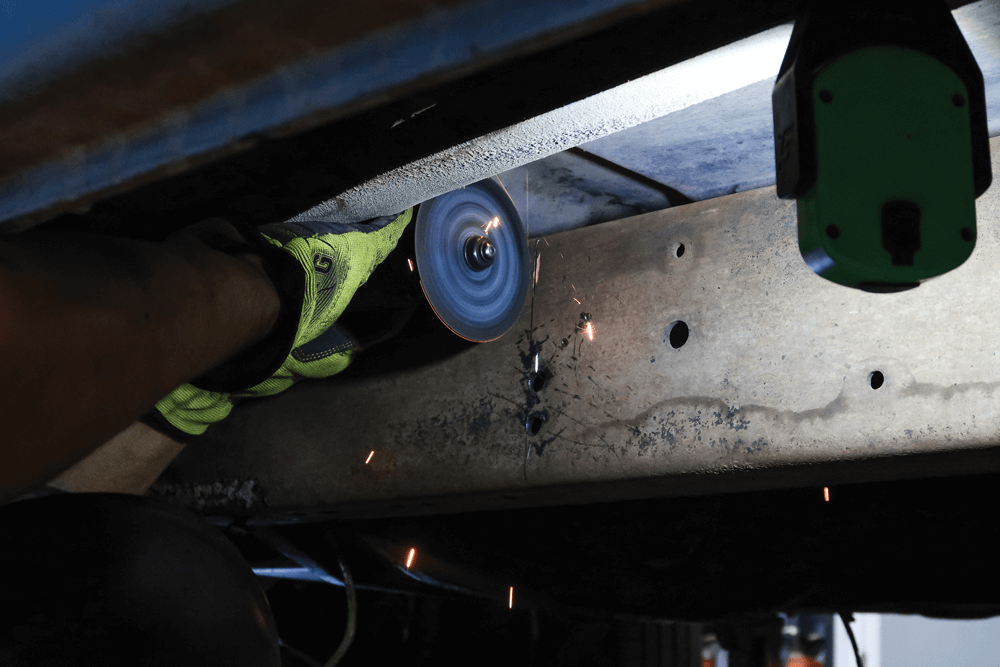
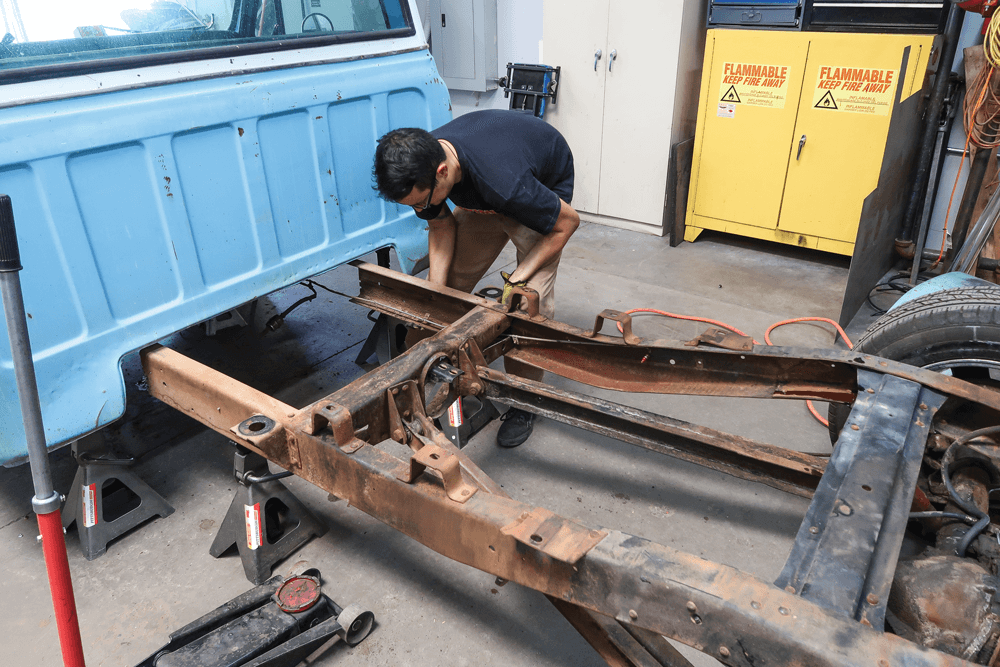
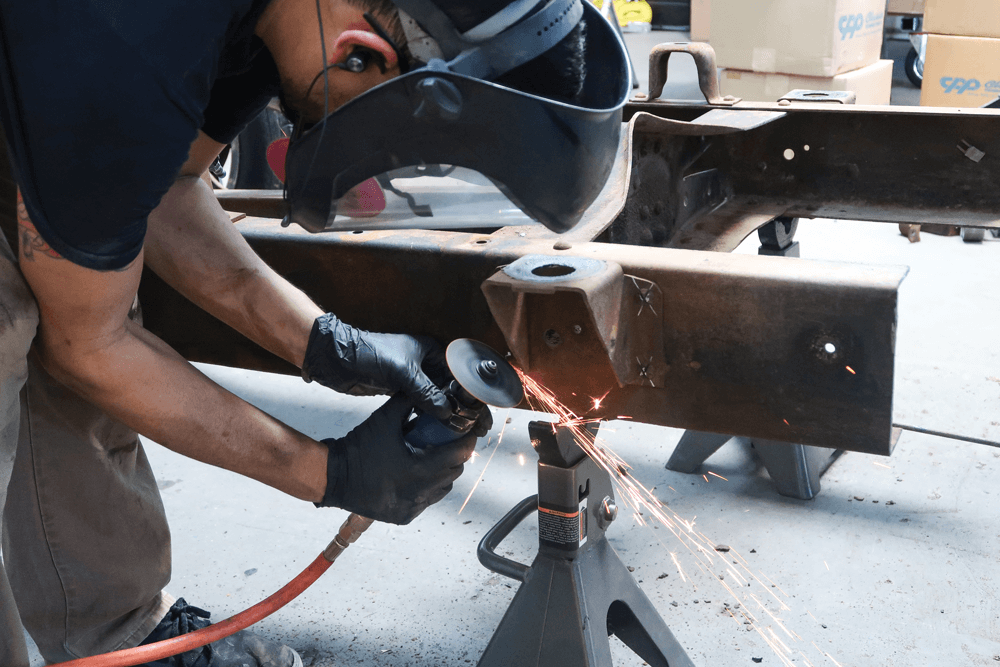
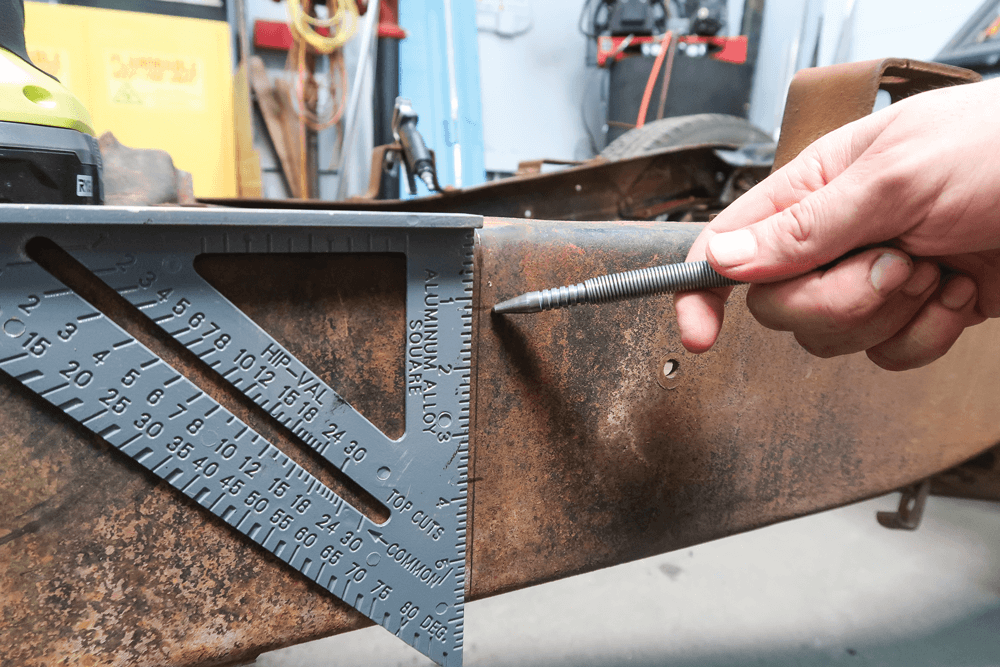
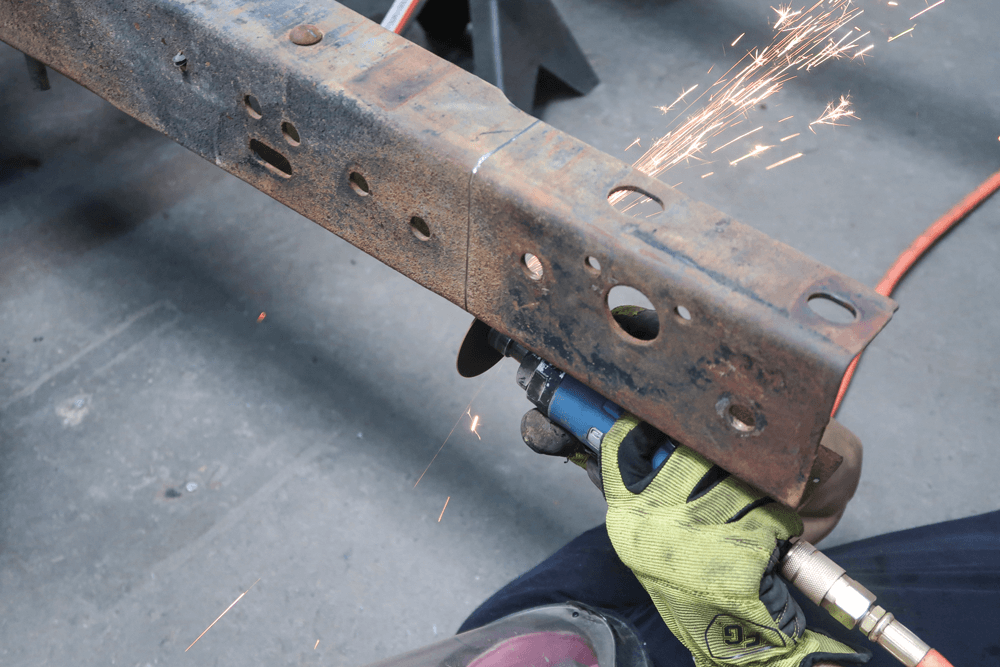
Moving to the front of the bed, Kyle marks out 12 inches to remove from the floor, then cuts it off. With the truck on jack stands, Kyle locates the rivets on the frame just forward of the rear cab mounts. Then he uses an air chisel to knock them off. Using those rivets as a point of reference, Kyle marks a spot on the frame where he can remove 12 inches. Then Kyle cuts the frame with a die grinder. The rear part of the frame pulls back relatively easily, just like a very large wheelbarrow. With clear access to the frame, Kyle lops off the remaining 12 inches with a die grinder. The forward-most bed mount won’t be needed anymore, so the rivets are cut and punched out. The rear cab mount comes off next using the same procedure: Cut the heads of the rivet into an X, then use an air chisel to knock them out.
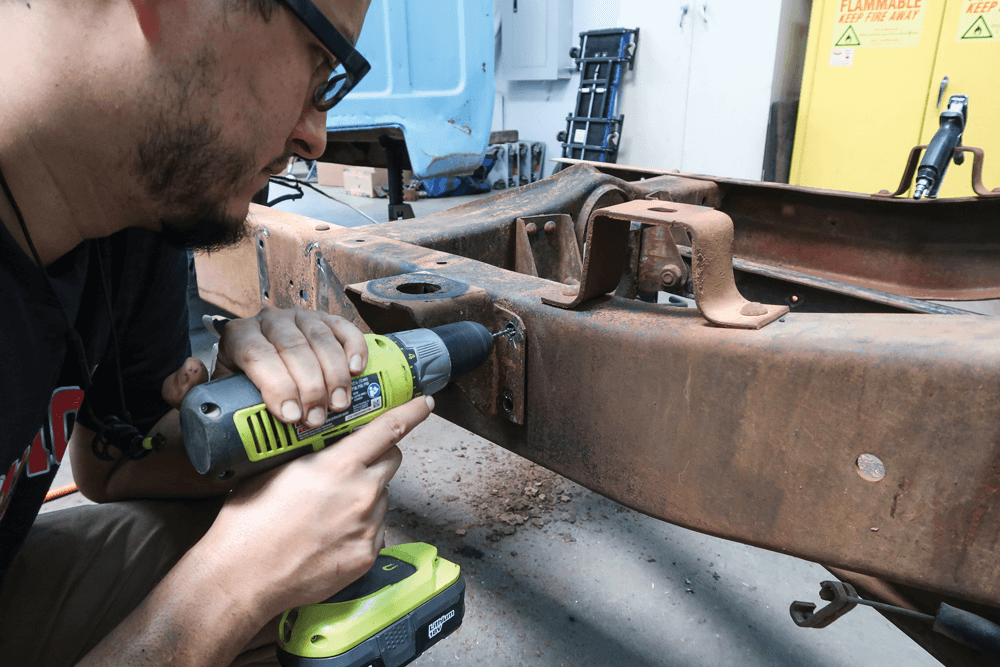
The new holes for the cab mounts are then measured out 12 inches farther back. Mounting up the cab mounts is as easy as drilling some new holes and bolting them up. Now the frame is moved back into place and welded up nice and tight. It’s not quite done yet, though, there’s more to come.
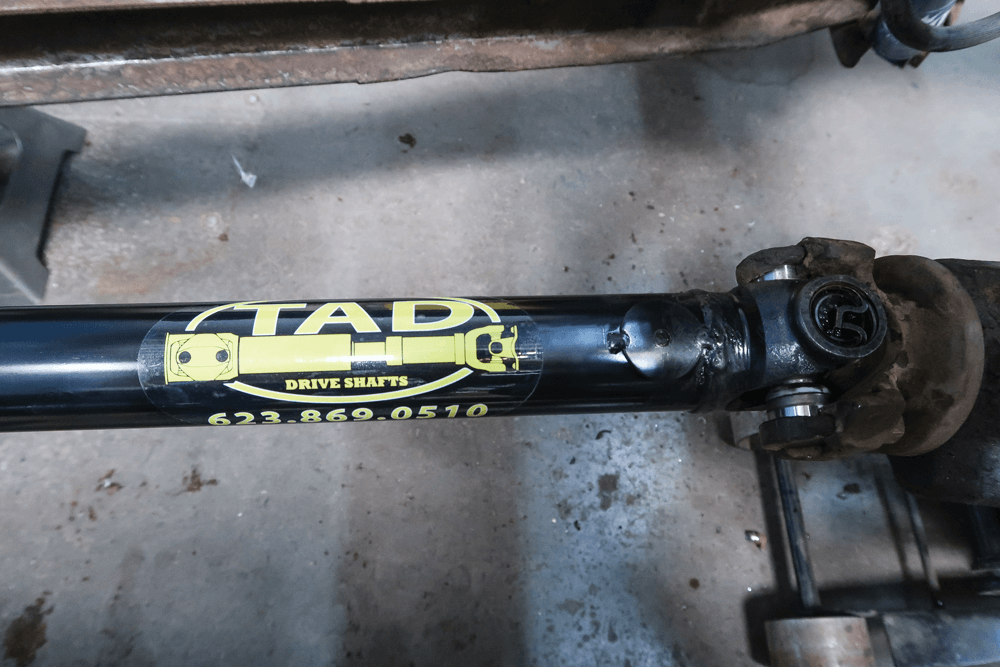
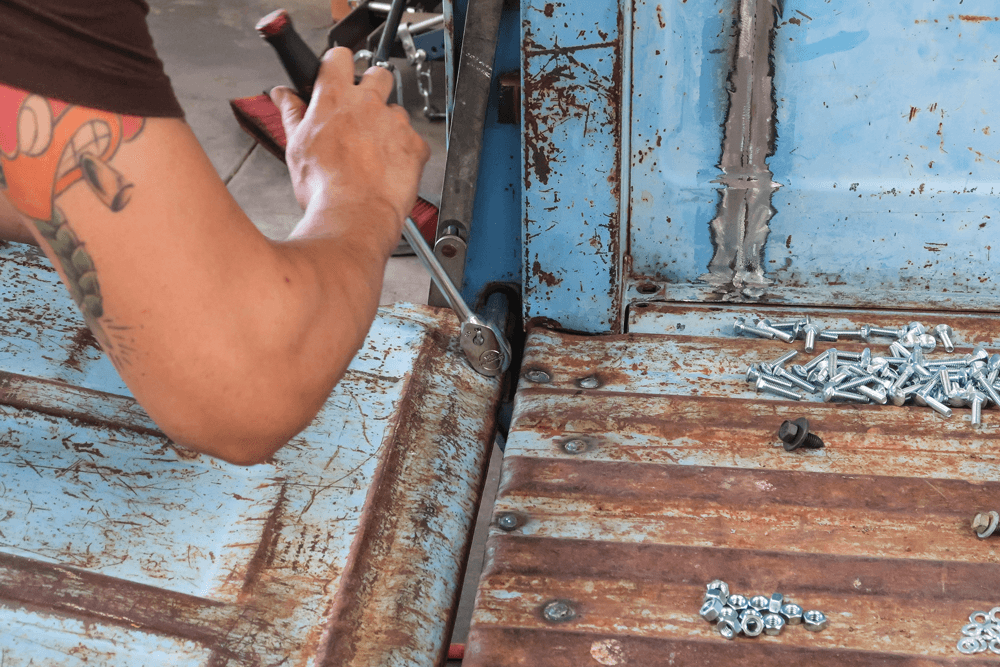
Moving to the back of the frame, Kyle measures and cuts eight inches out of the rear. The team at TAD Drive Shaftshooked Kyle up by shortening the driveshaft 12 inches in record time. It turned out great. Moving back to the bed, Kyle marked and drilled holes in the bed floor for the header panel. The header panel is bolted to the floor now using a bed bolt kit sourced locally. Now it’s time for the bedsides, which get bolted up using that same bed bolt kit. The tailgate goes on next.
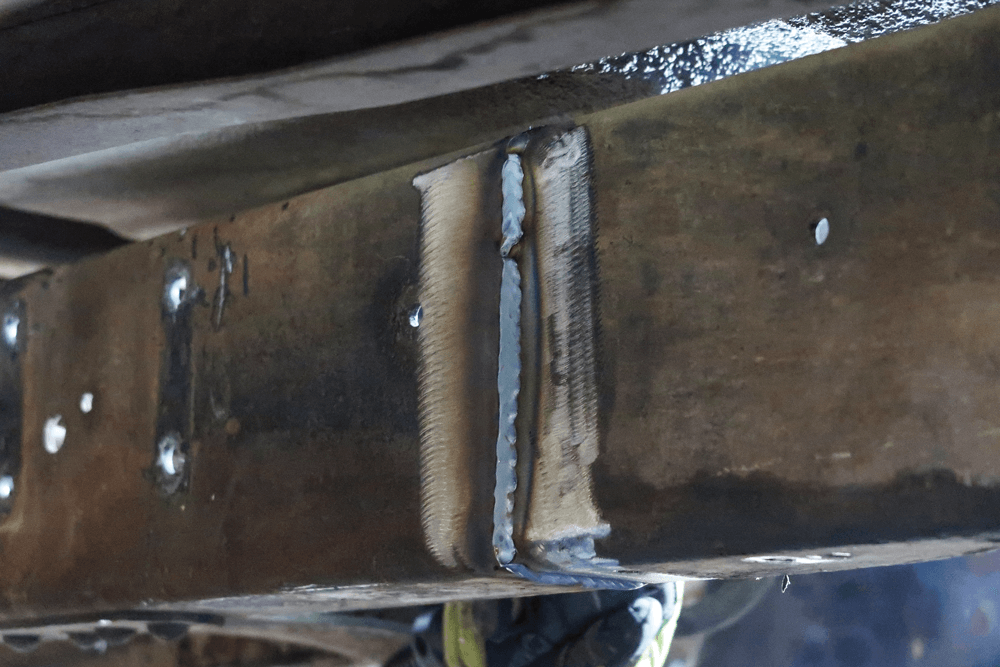
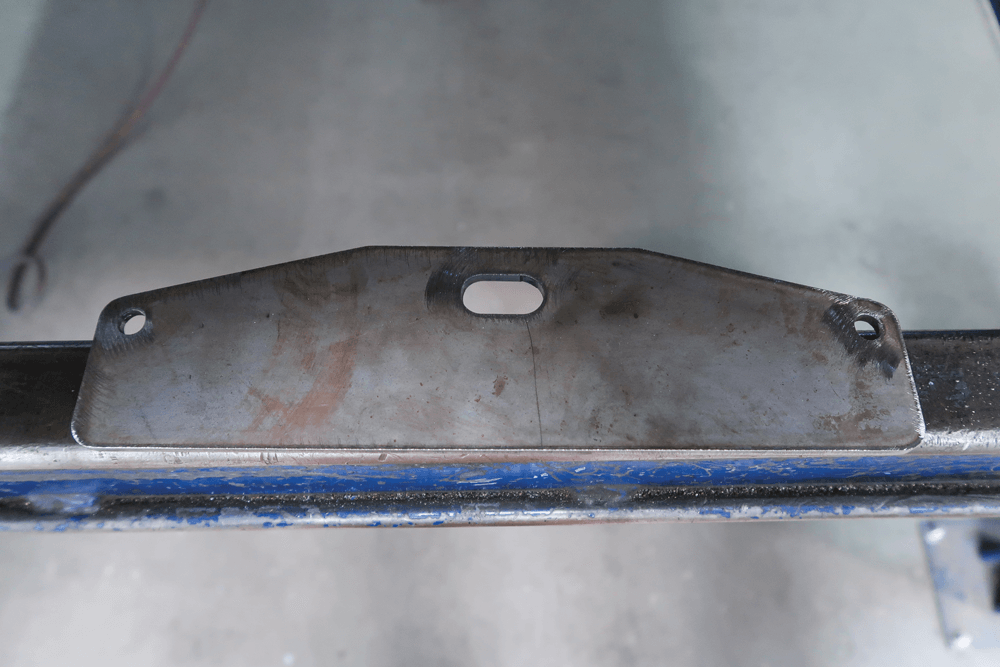
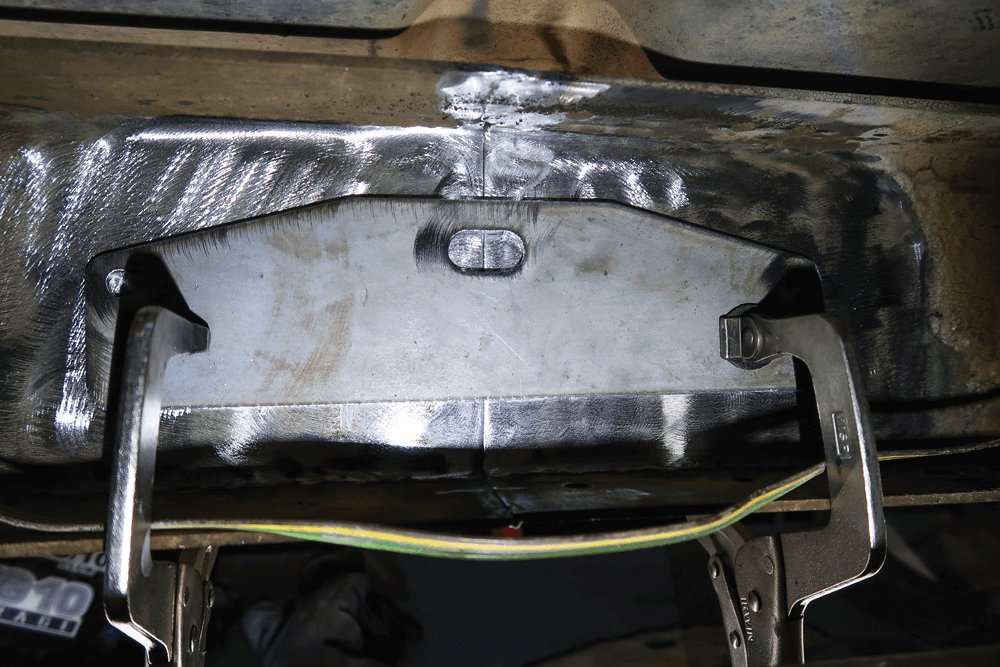
Remember we said that we weren’t done with the welding yet? These fish plates were designed by Kyle to sit on the inside of the c-channel. They’re designed to sit right over the seam, then get plug and stitch welded to the frame. This will tighten up the joint substantially. Kyle burns them in, ensuring that the frame is solid as a rock.
To give you a better idea of the parts and costs involved in a shortbed conversion, here’s a quick rundown:
These parts are essential for the project and can be sourced from various suppliers. Keep in mind that the final expenses may vary depending on the specific requirements of your vehicle and the quality of parts you choose.
Are there any additional expenses to consider?
The only remaining expense to consider is getting the front drive shaft shortened.
Where can the parts be purchased from?
The parts can be purchased from LMC and Brothers.
What are the costs of individual parts involved in the conversion?
The shortbed conversion kit costs around $425, and the bed bolt kit is priced at $70.
What is the total cost of the shortbed conversion project?
The total cost of the shortbed conversion project is approximately $2550.
Share Link