Prepping Your Truck for the Ultimate Road Trip: Essential Upgrades and Tips
Chris Hamilton . February 20, 2025 . Features
Share Link
Save ArticleLogin to save it
Ultimate Upgrades for a Cross Country Roadtrip
As we prepare for our yearly trip out to the world-renowned SEMA Show in Las Vegas, a few items have popped up that need to be addressed this year that we don’t normally have to consider.
Generally, our plans include a simple flight, hotel, and rental car package to handle all our needs. However, this year, we are not only driving the 2,276 miles from our house in Ocala, Florida, to the Trump Hotel in Las Vegas where we stay each year, but we are also going to add a layer of complications by towing Project Rocky all the way to our booth in the Hot Rod Alley section of the Las Vegas Convention Center. This will be a long trip with lots of challenges, so we need to be sure our driver/tow rig is up for the task.
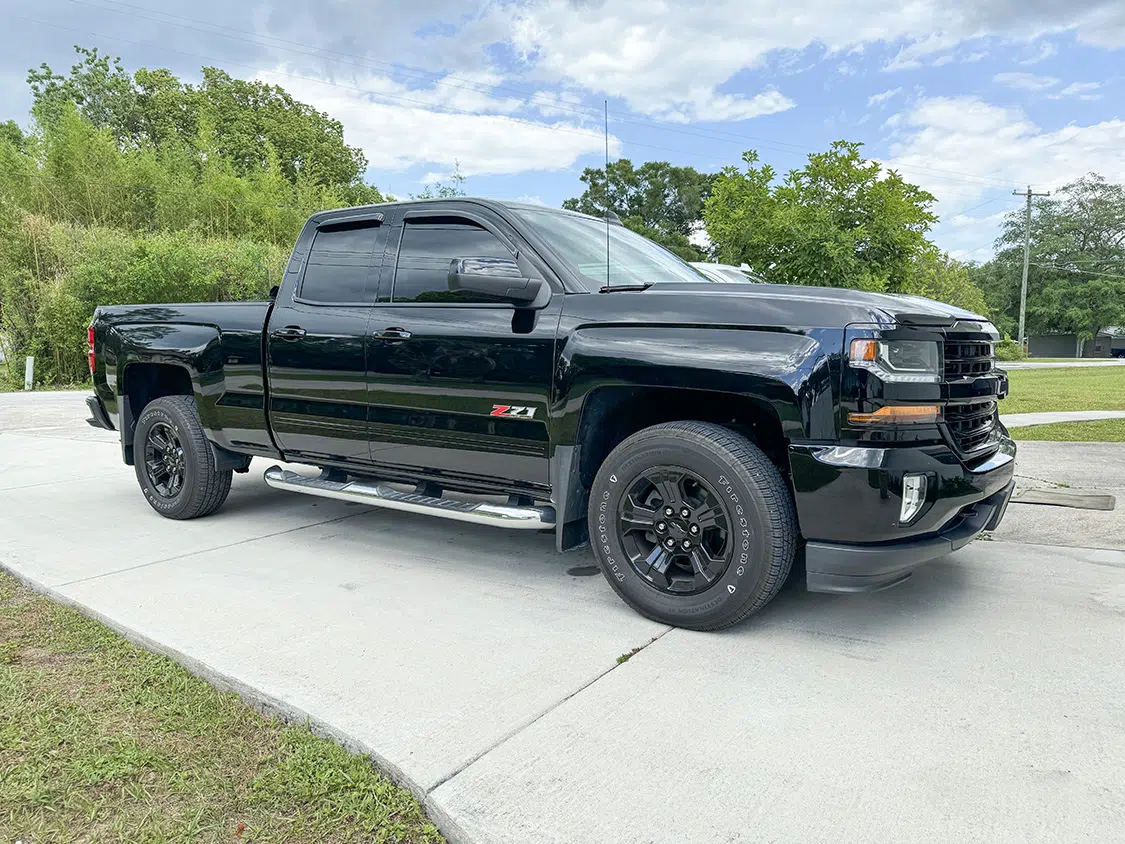
One of the most obvious items we need to work on is the incredible amount of added weight that our 2018 Chevy Silverado will be required to carry. Even though this truck is a Z71 Off-Road Package, we will get quite a bit of sag in the rear of the truck from the load. Luckily for us, Air Lift Company has created a really simple fix for this concern, which only requires a few hours of wrenching.
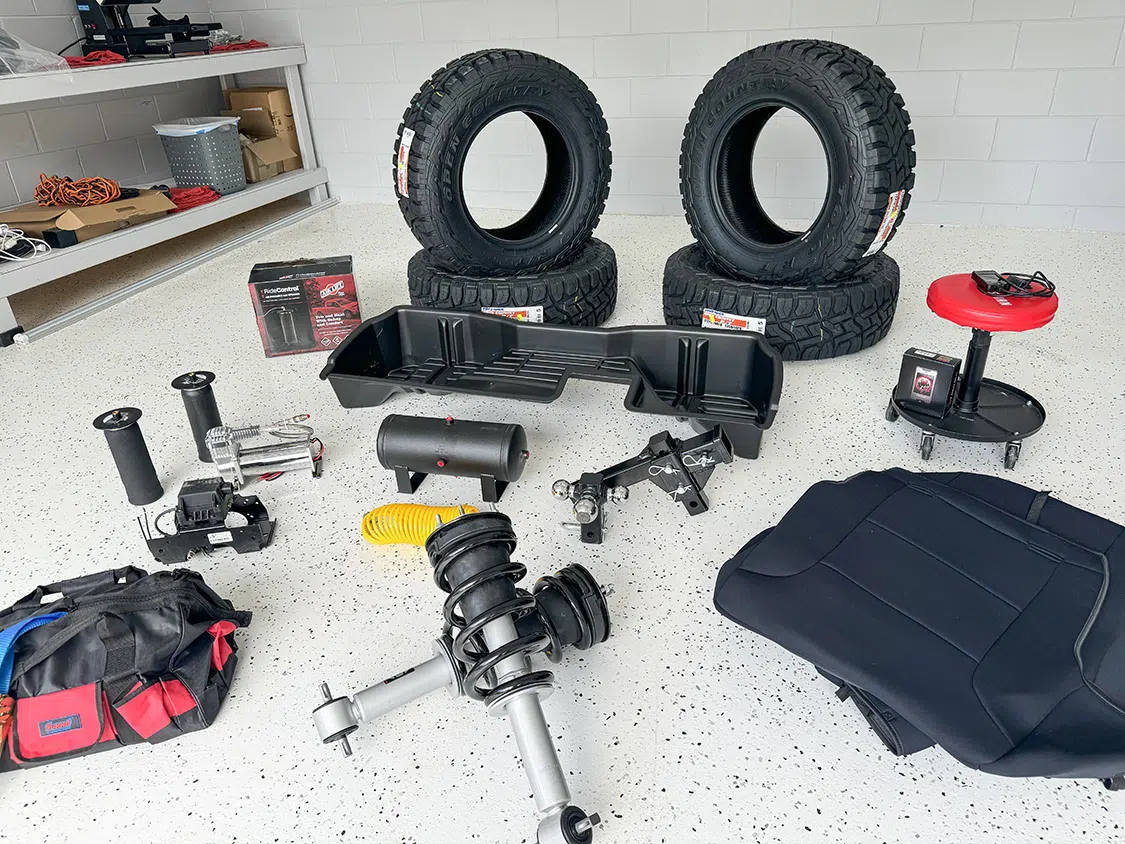
Additional items we need to cover include new tires, which in our opinion, bigger is better. We’ll also need to properly secure our load, add some additional storage space, and update our truck’s internal computer to be aware of these upgrades. The goal is to have at least one of our vehicles completed well before the departure date. If you’ve been through the SEMA crunch, you know the booth vehicle is usually the one with to-do items still on the checklist as you drive in to the big show. So let us break down the top 10 things we did to our truck to prepare it for the Las Vegas push.
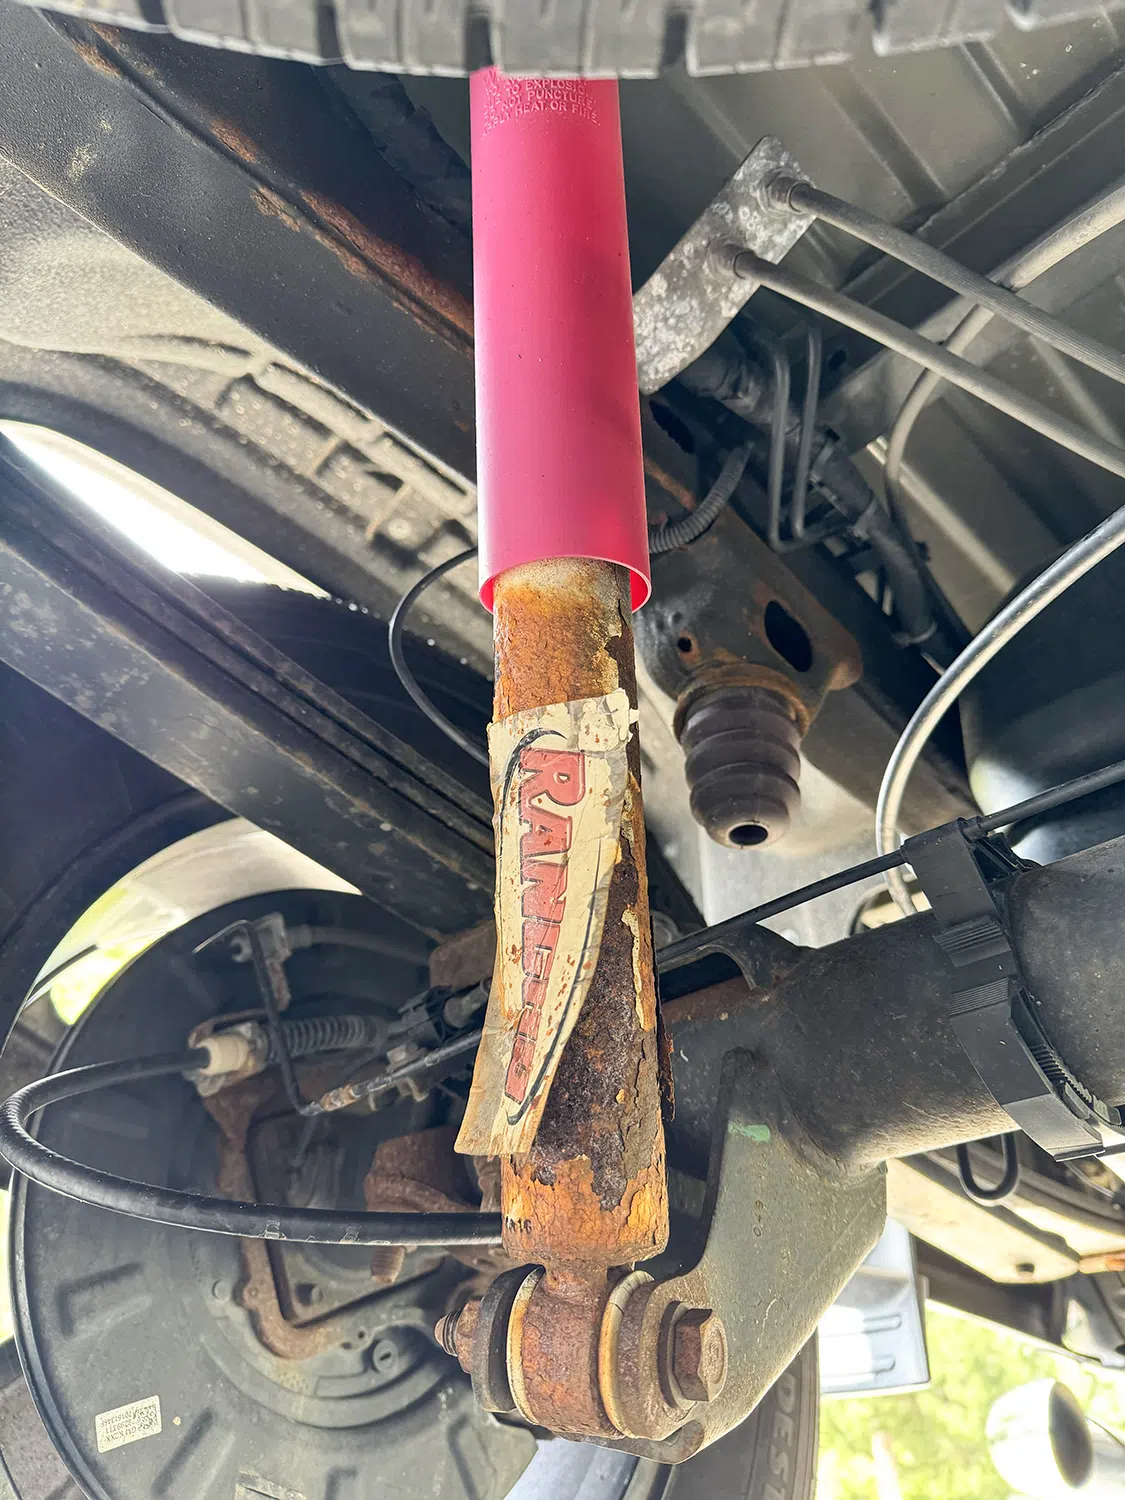
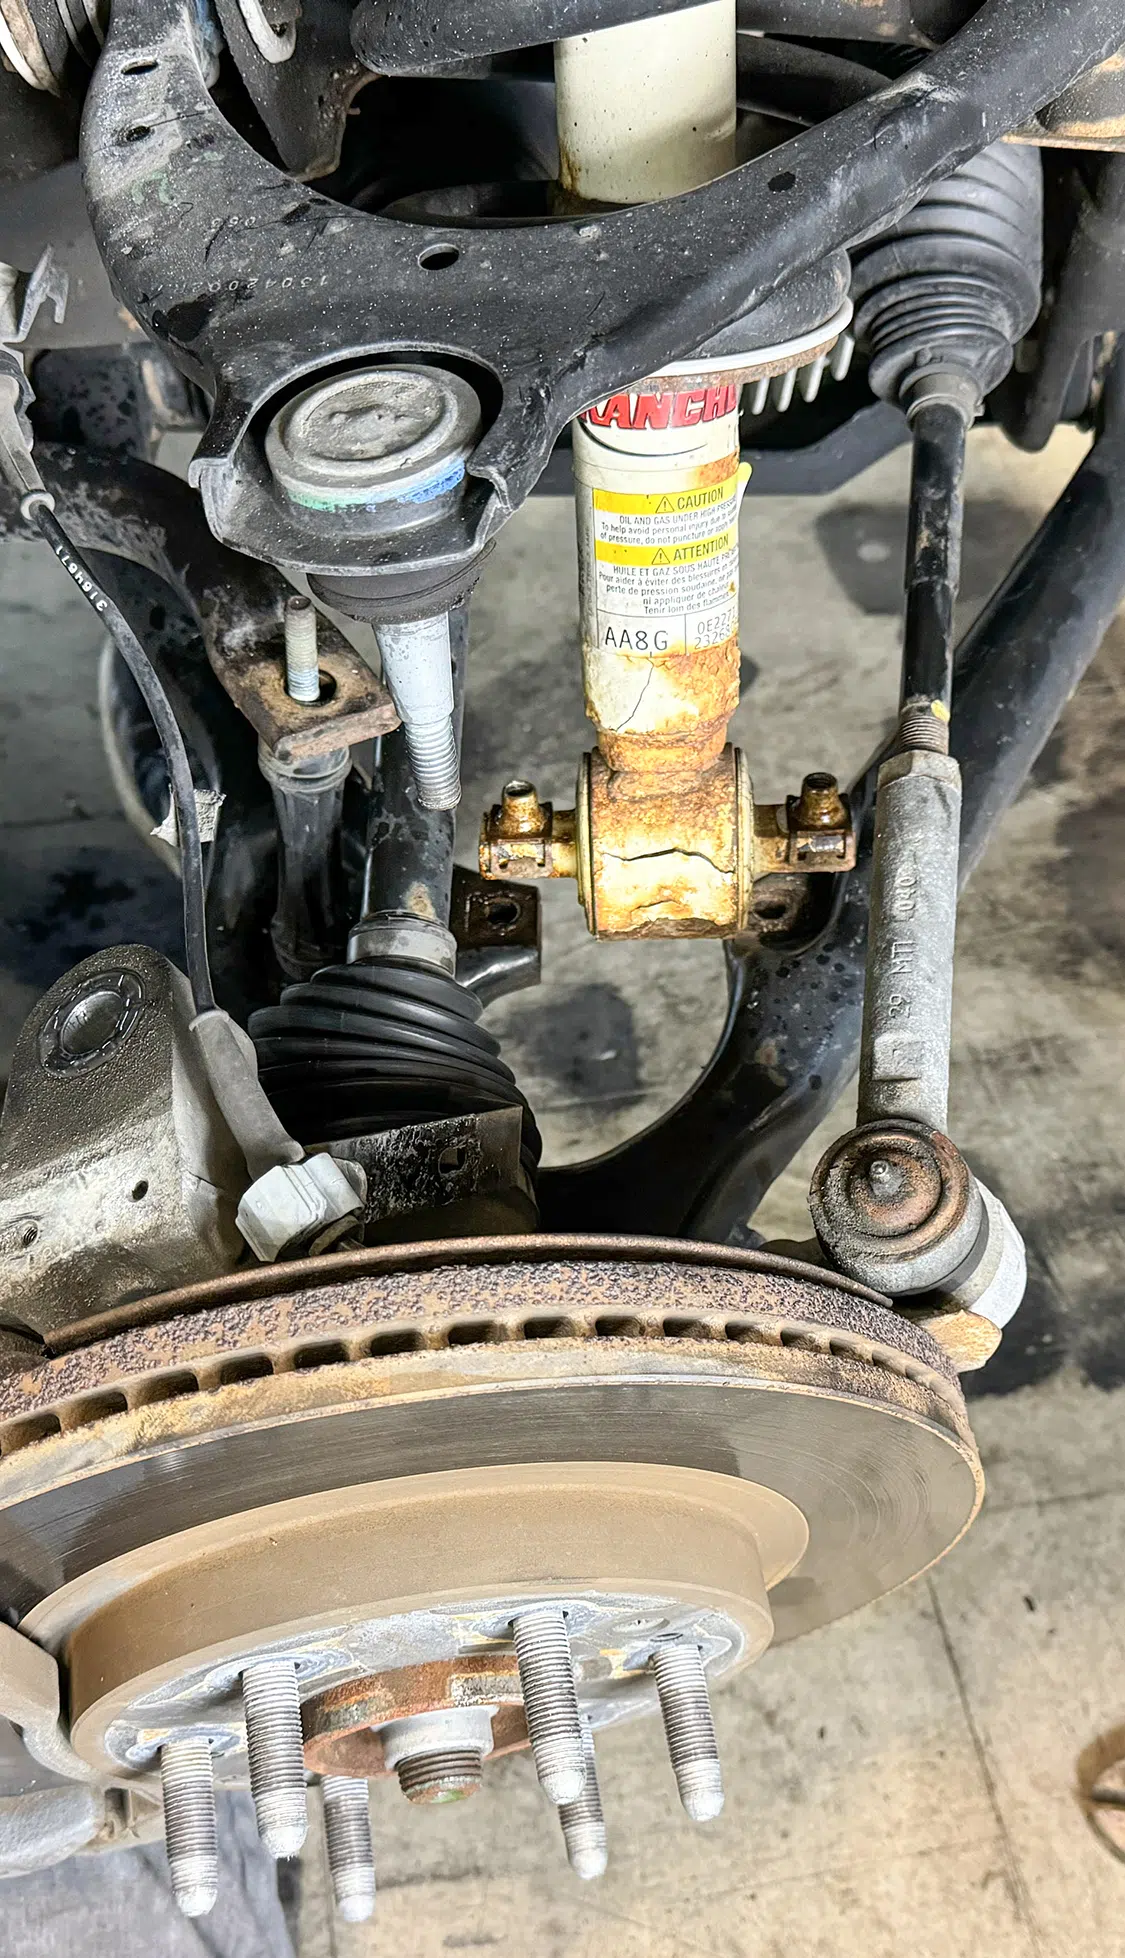
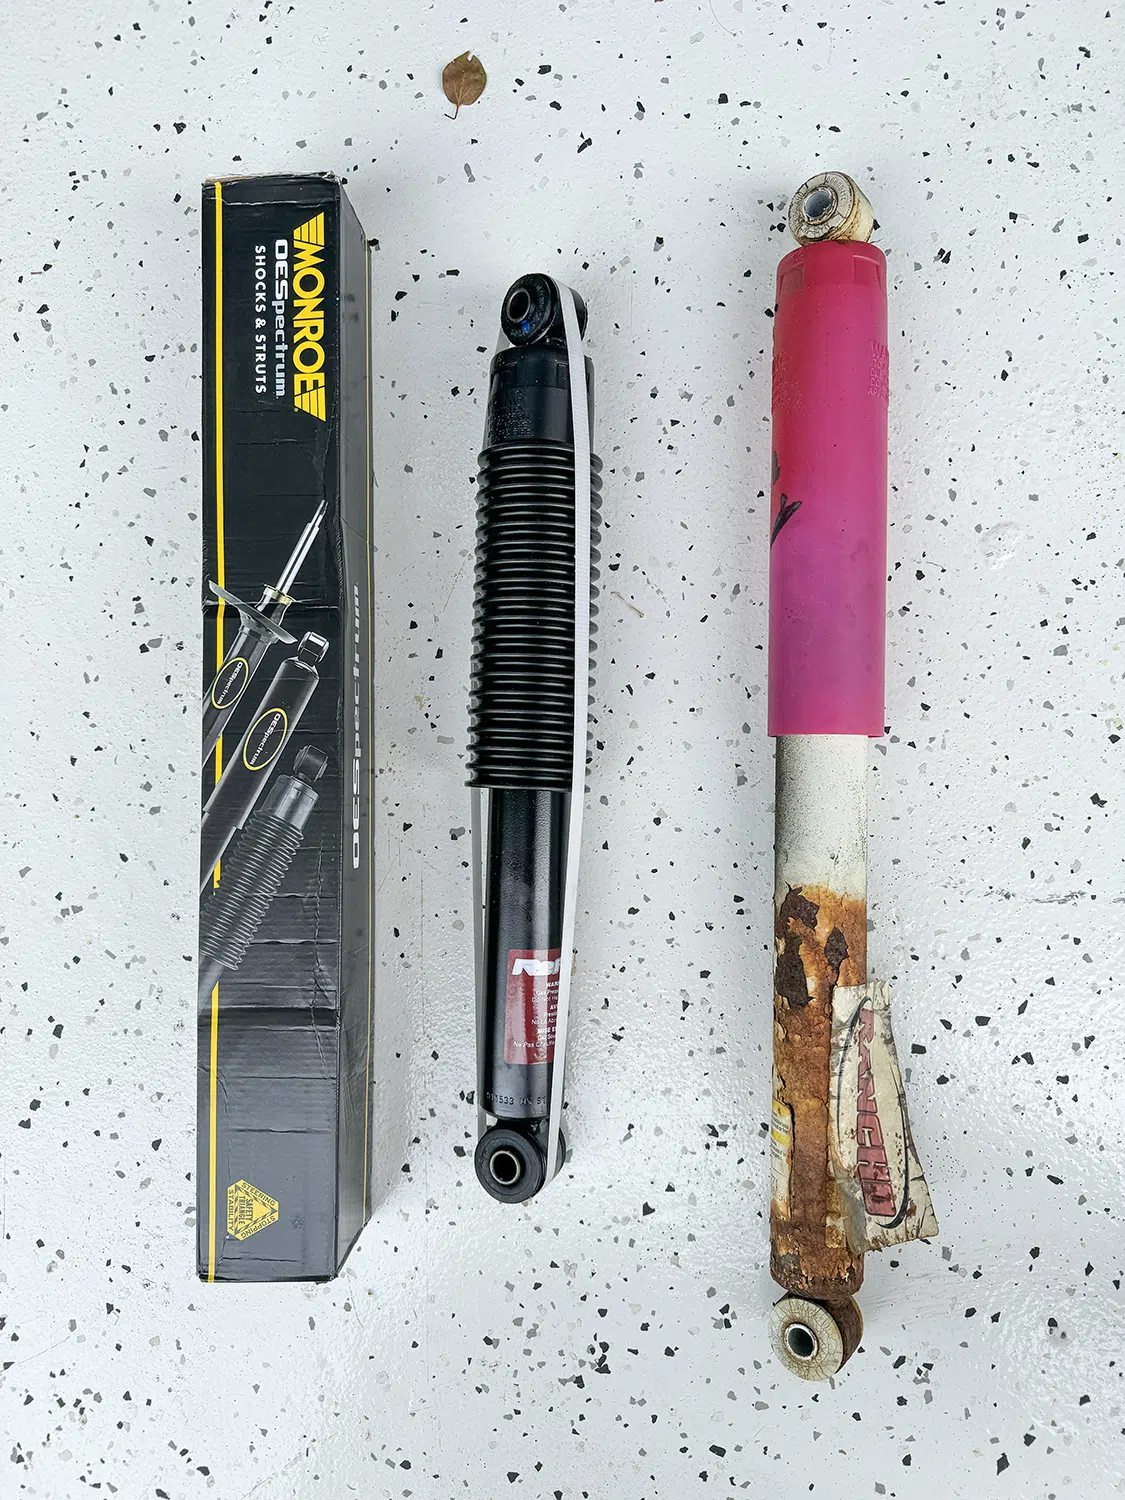
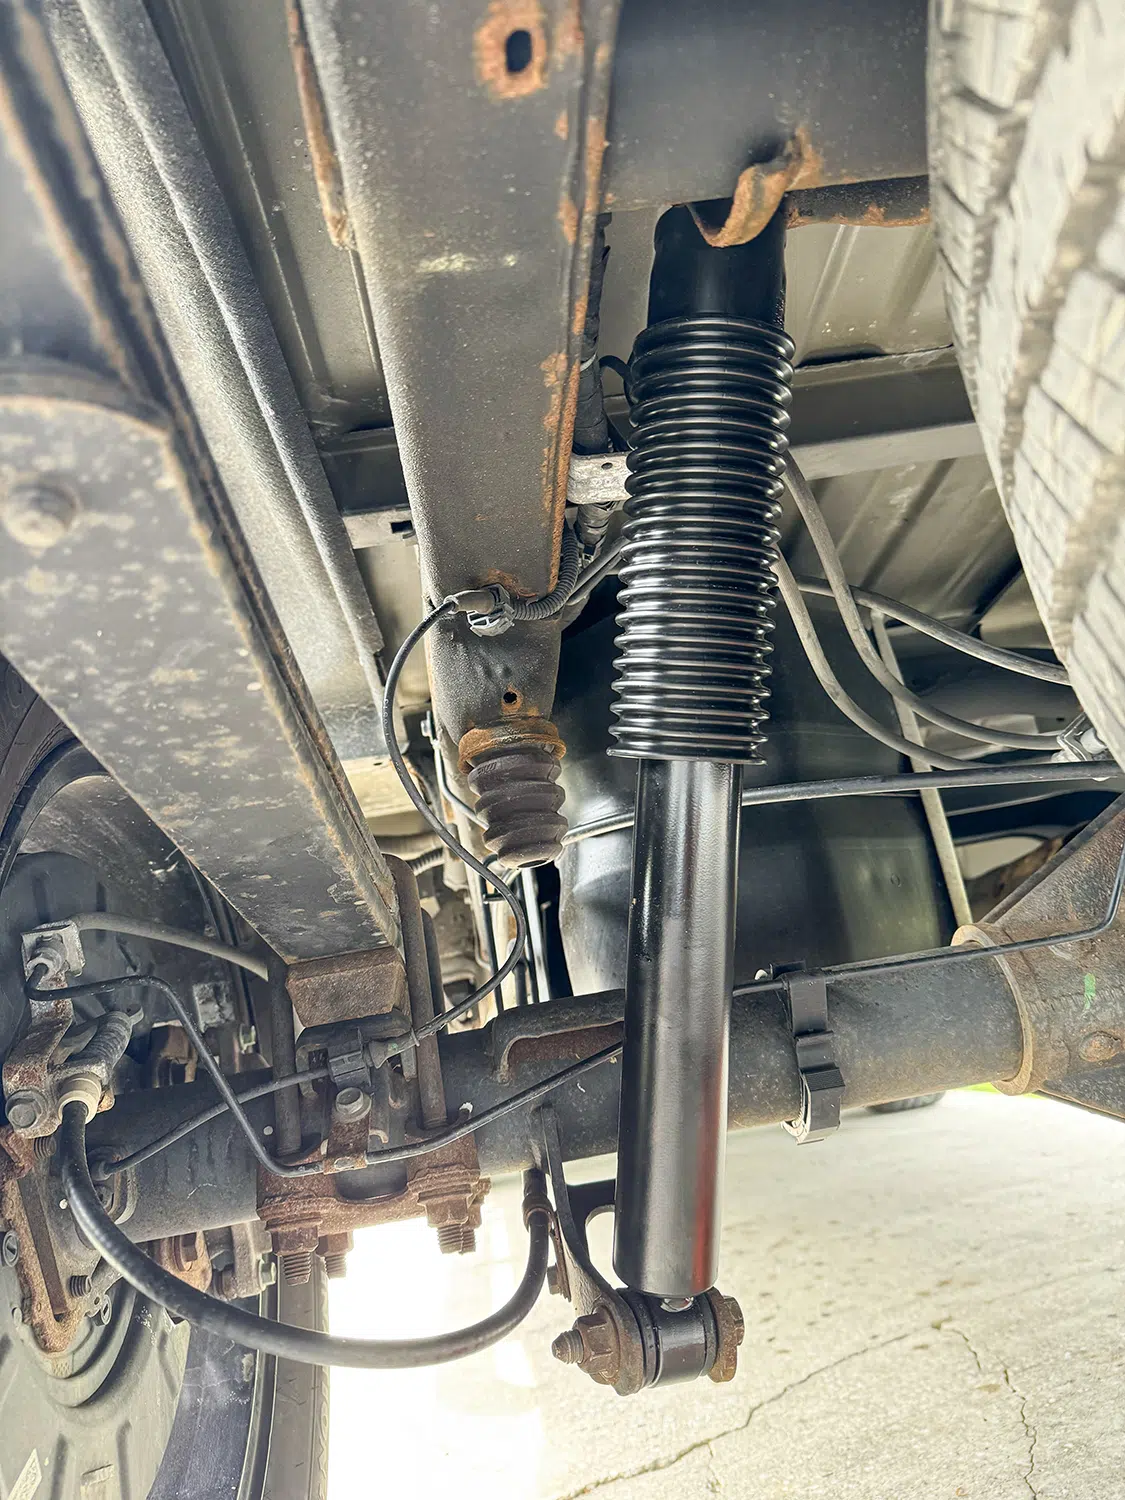
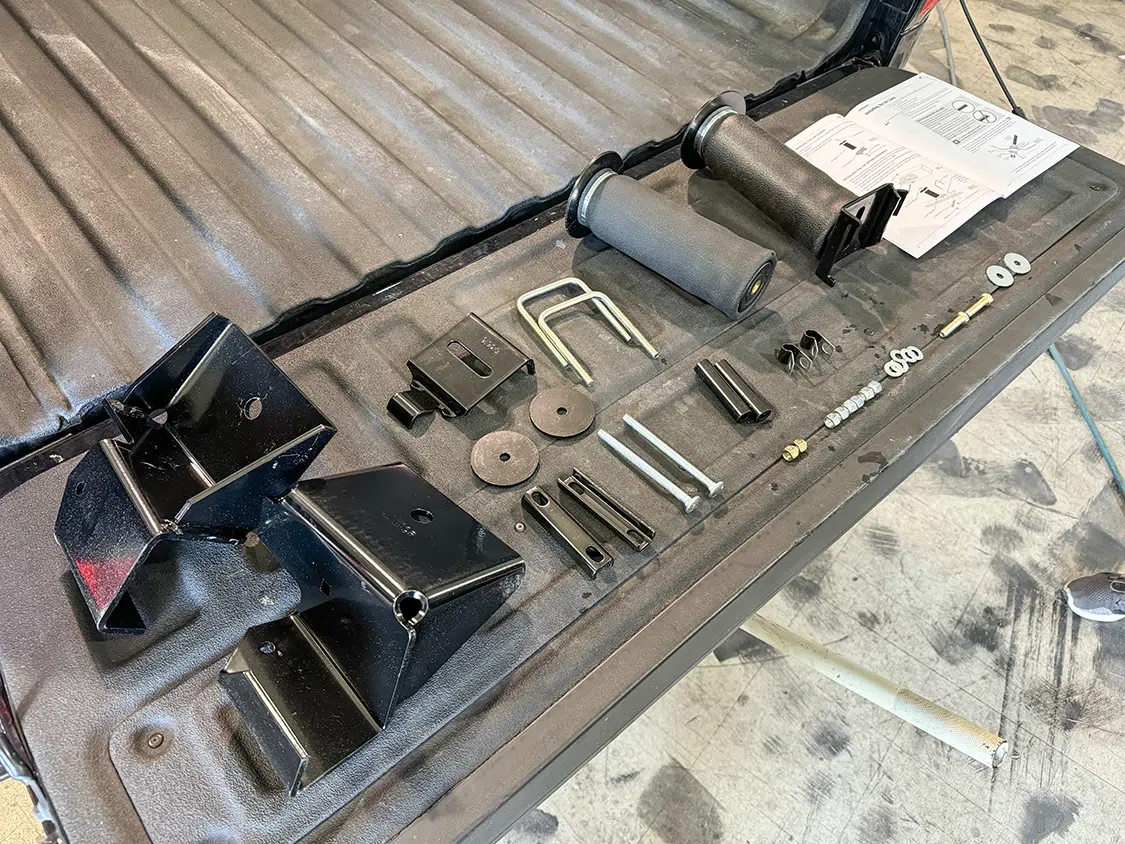
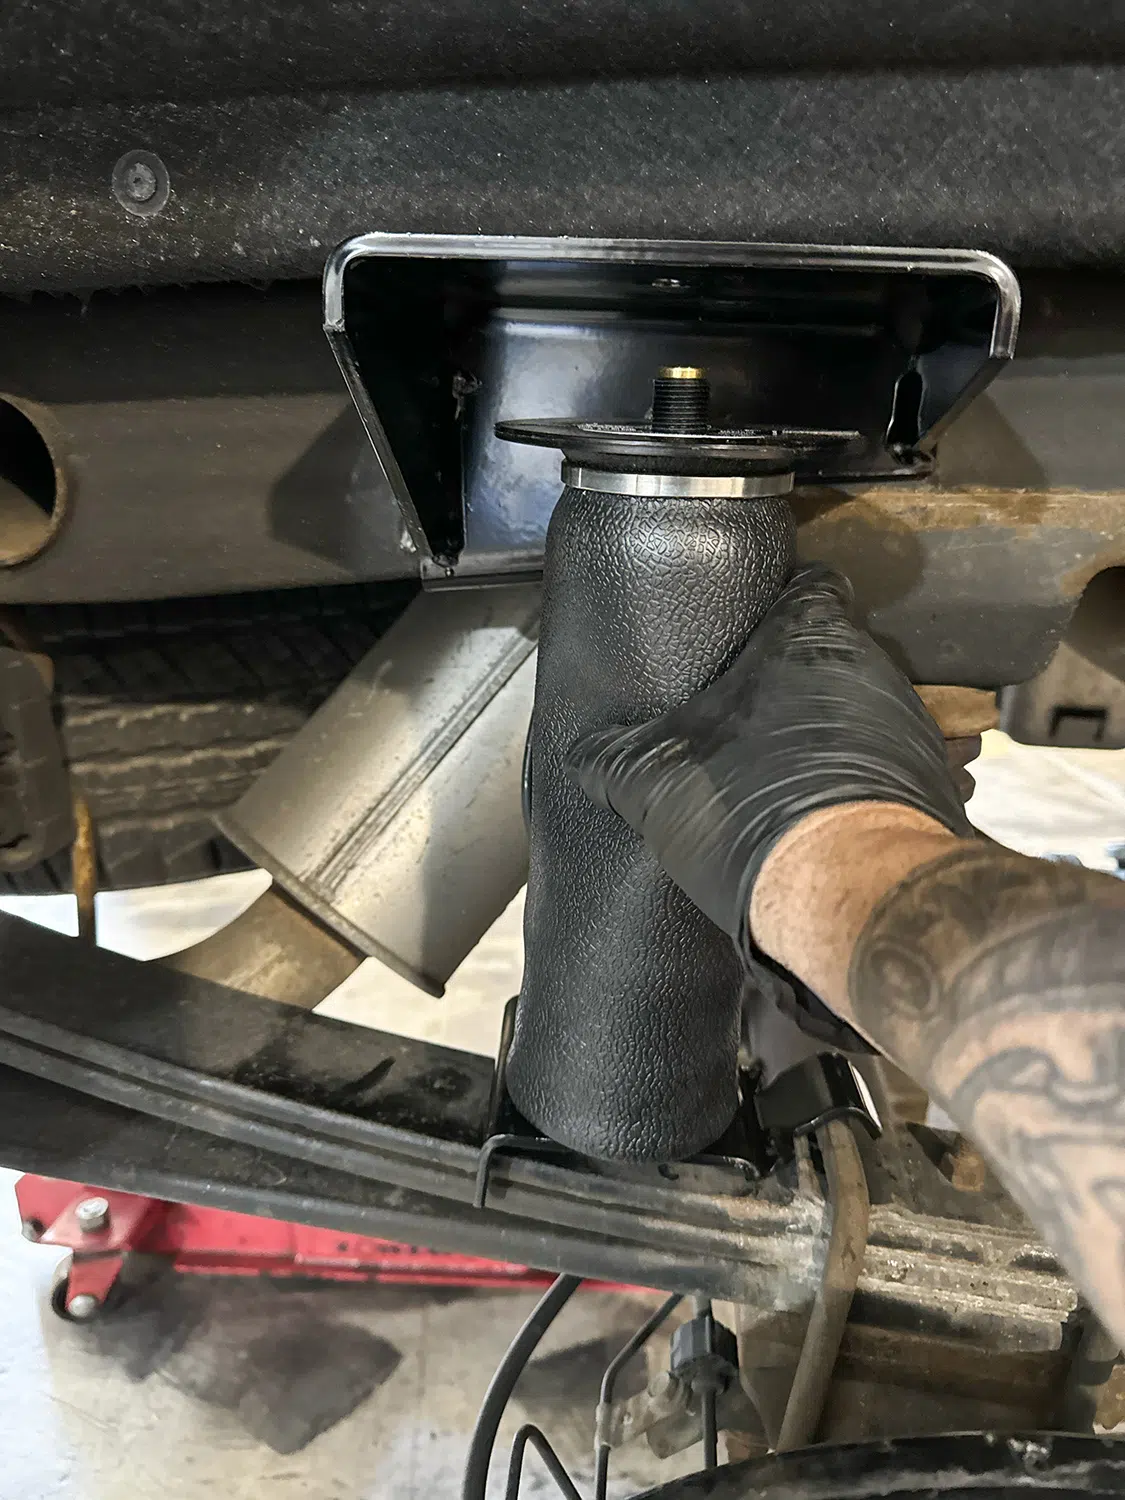
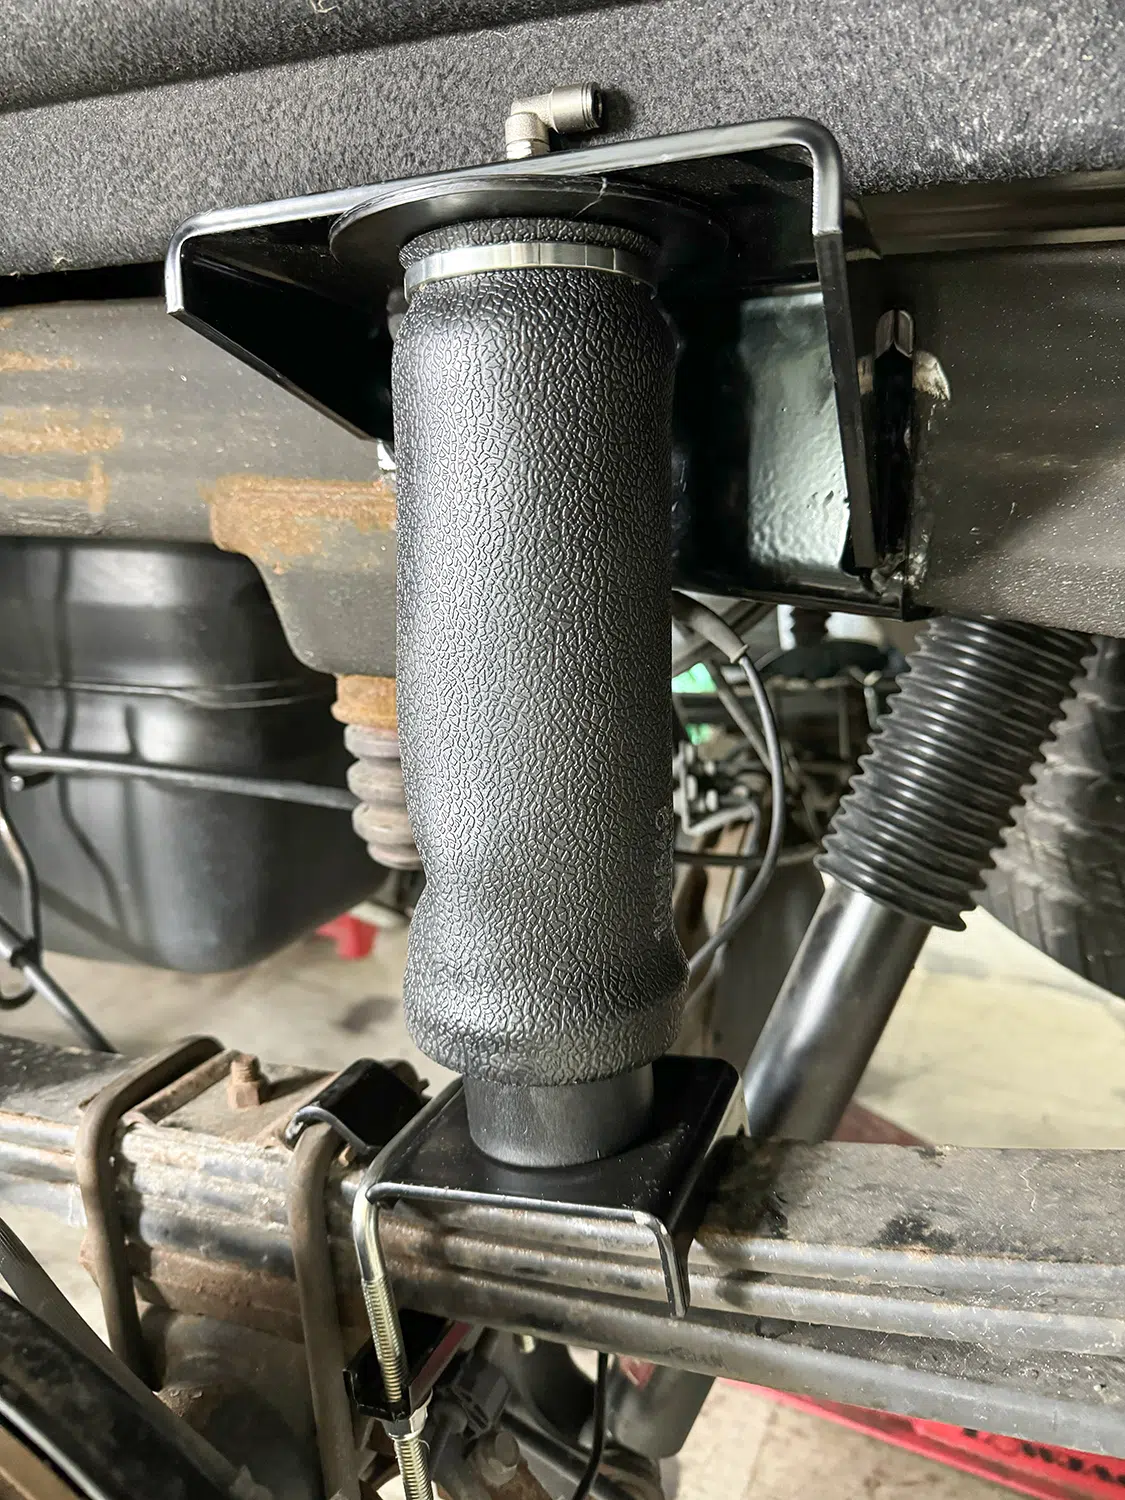
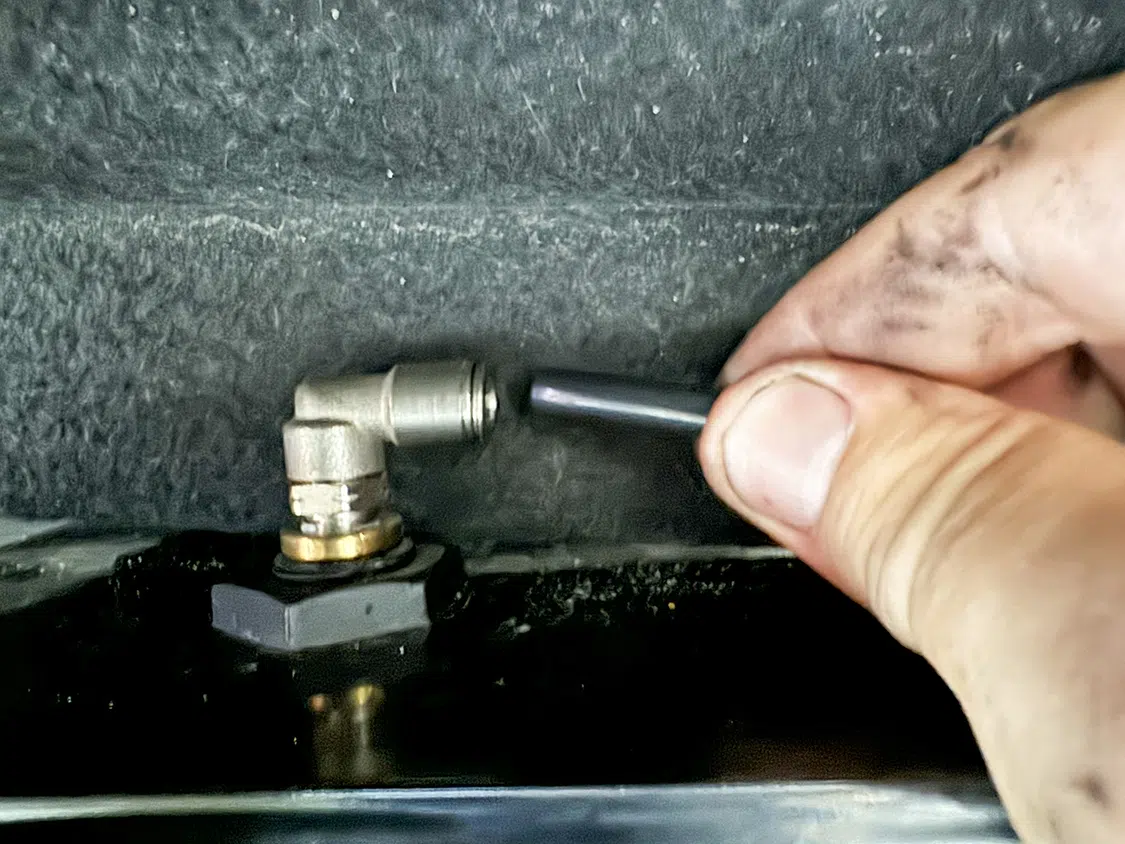
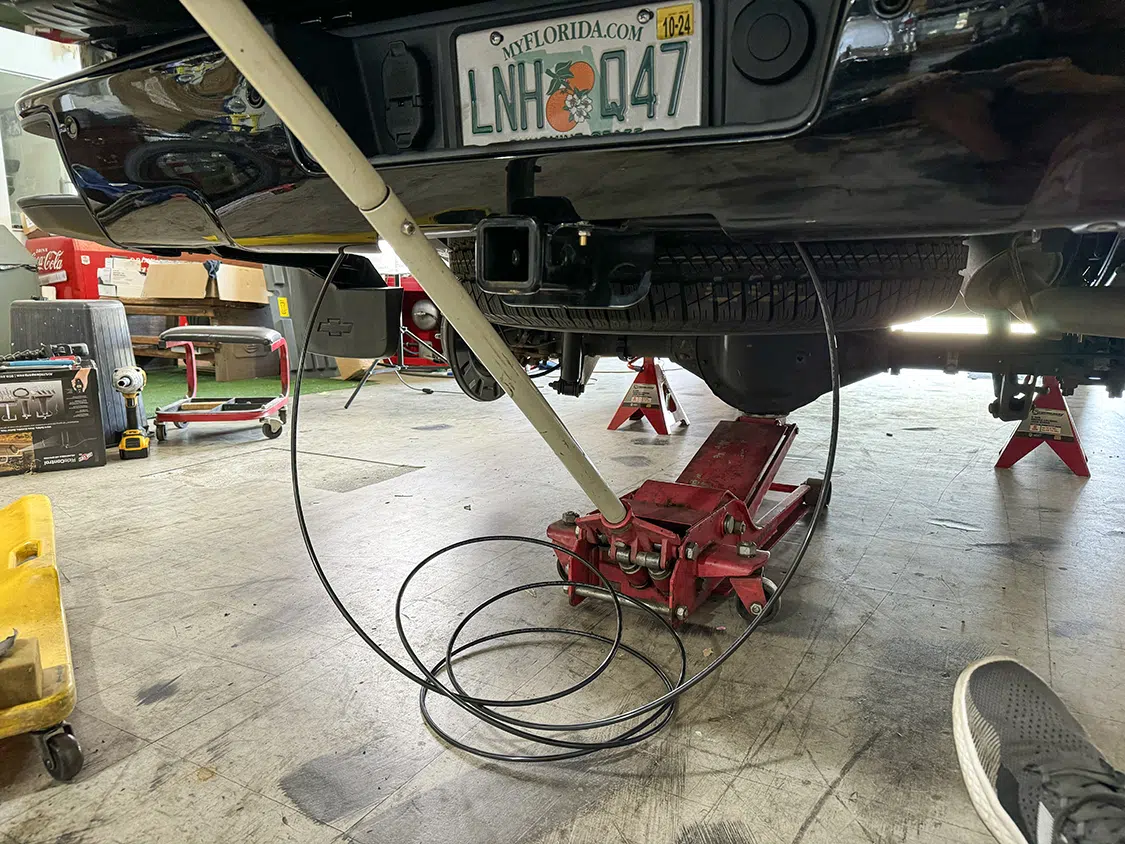
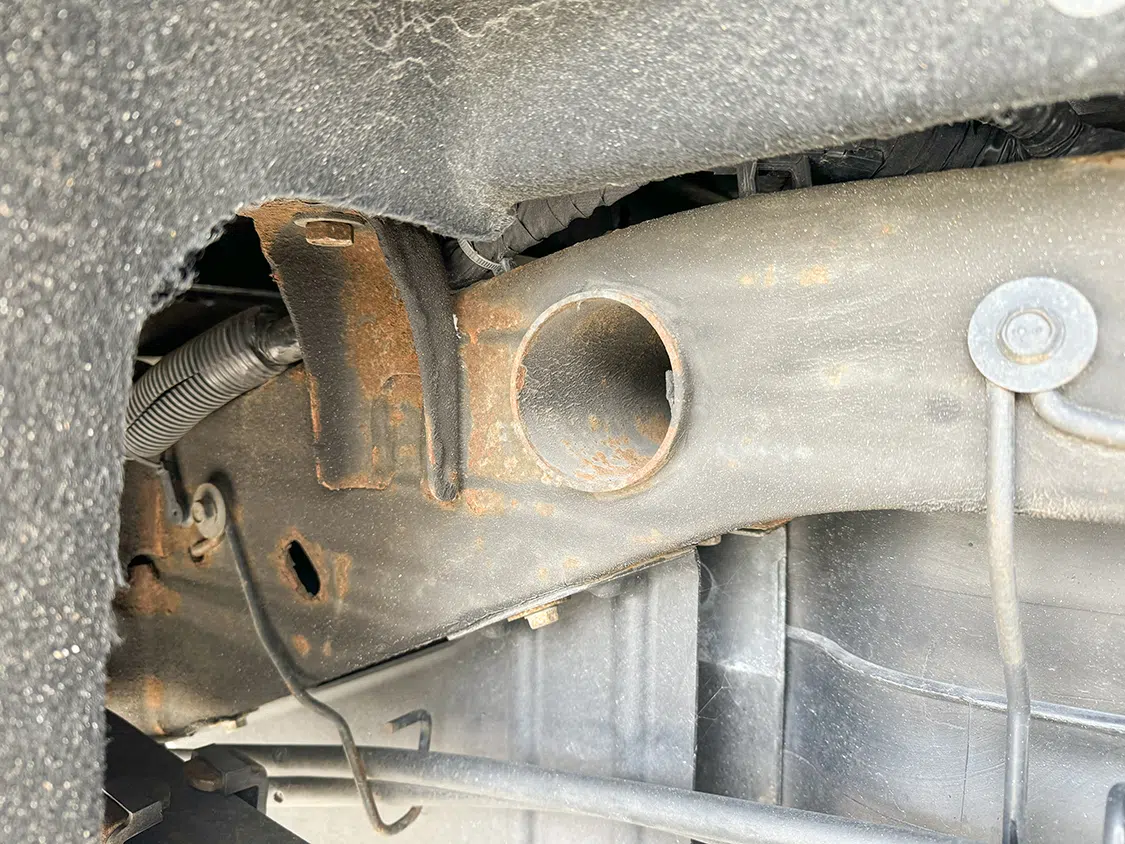
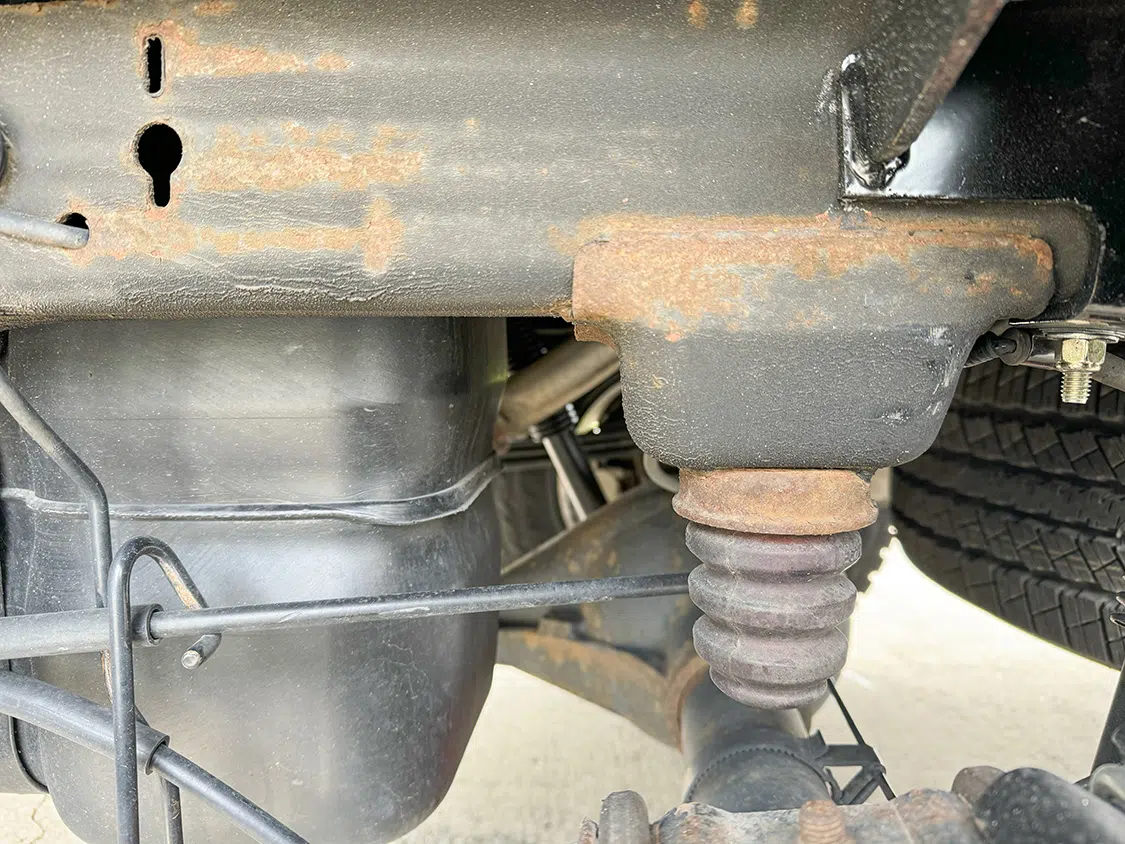
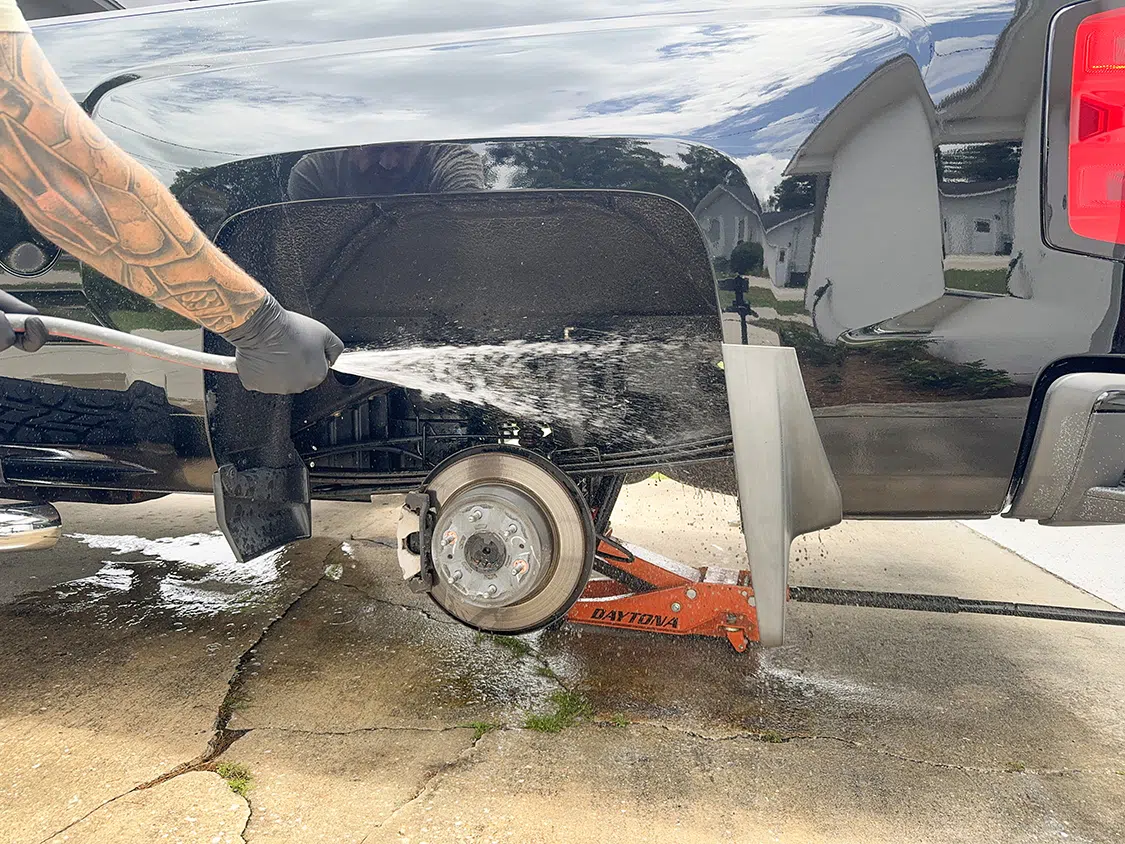
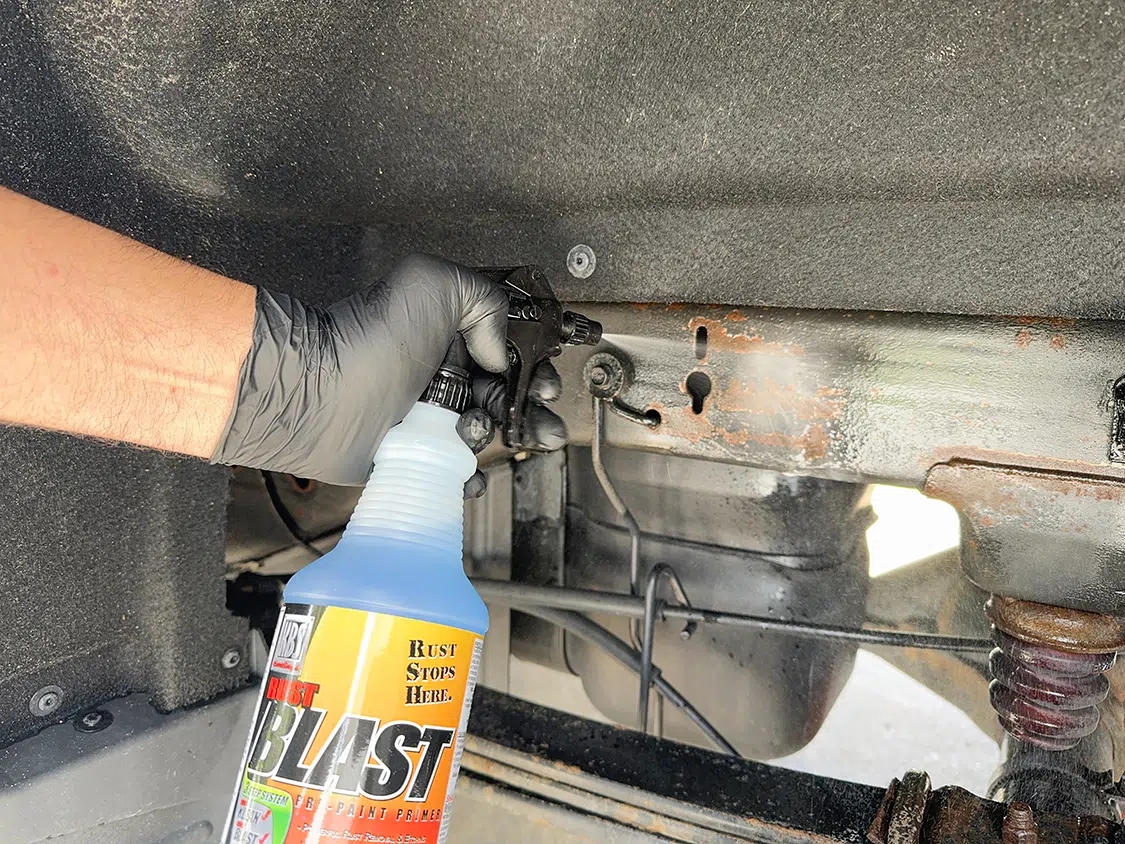
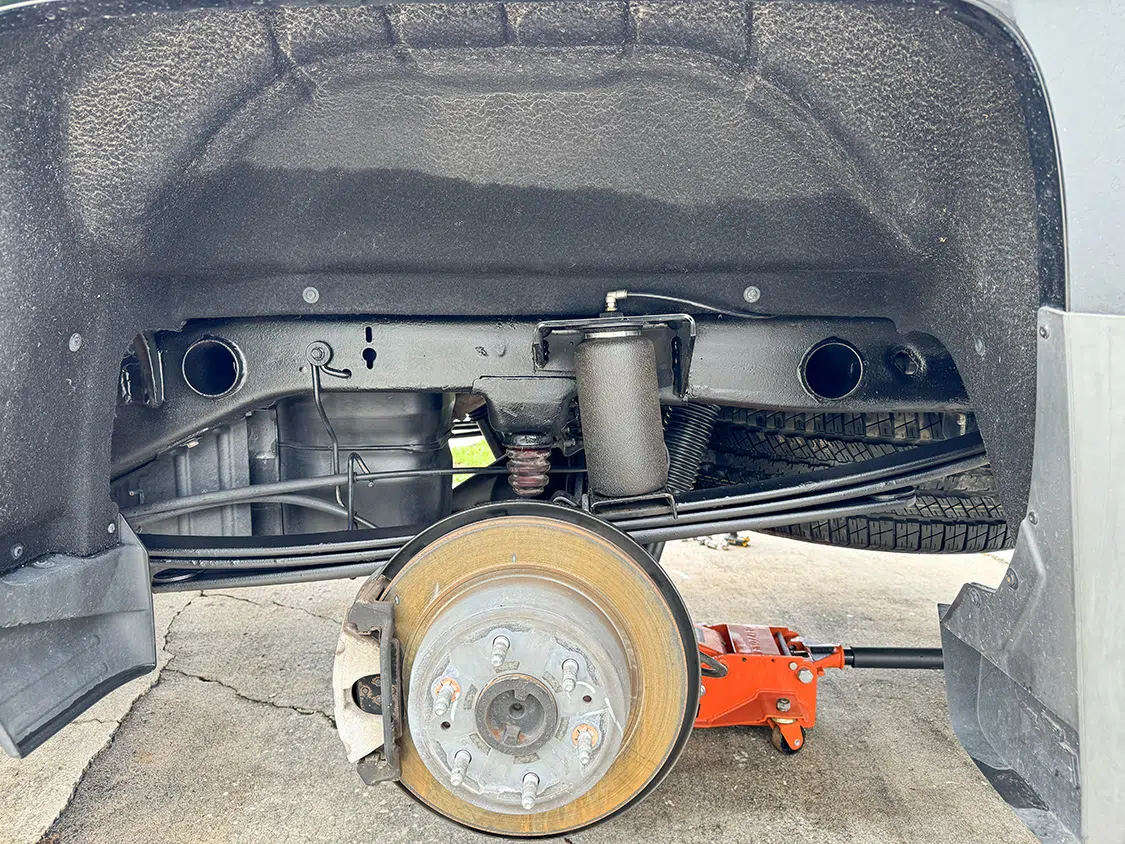
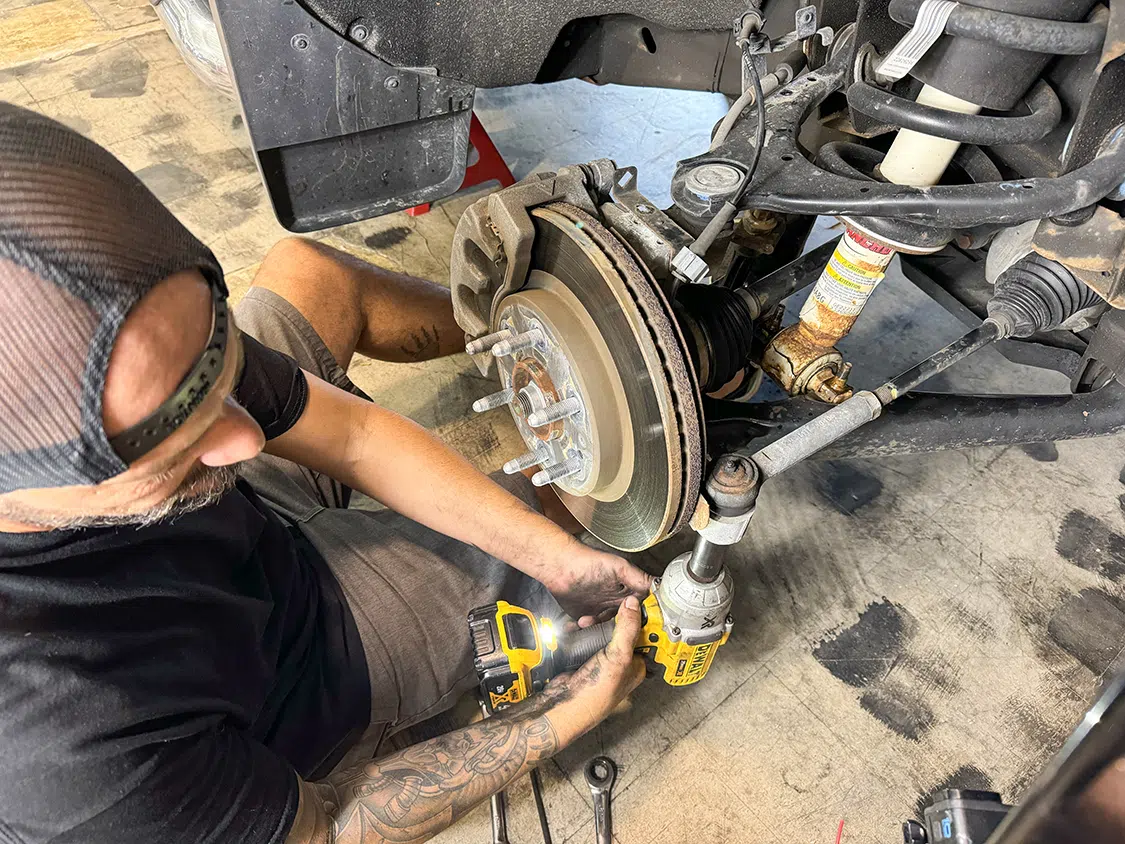
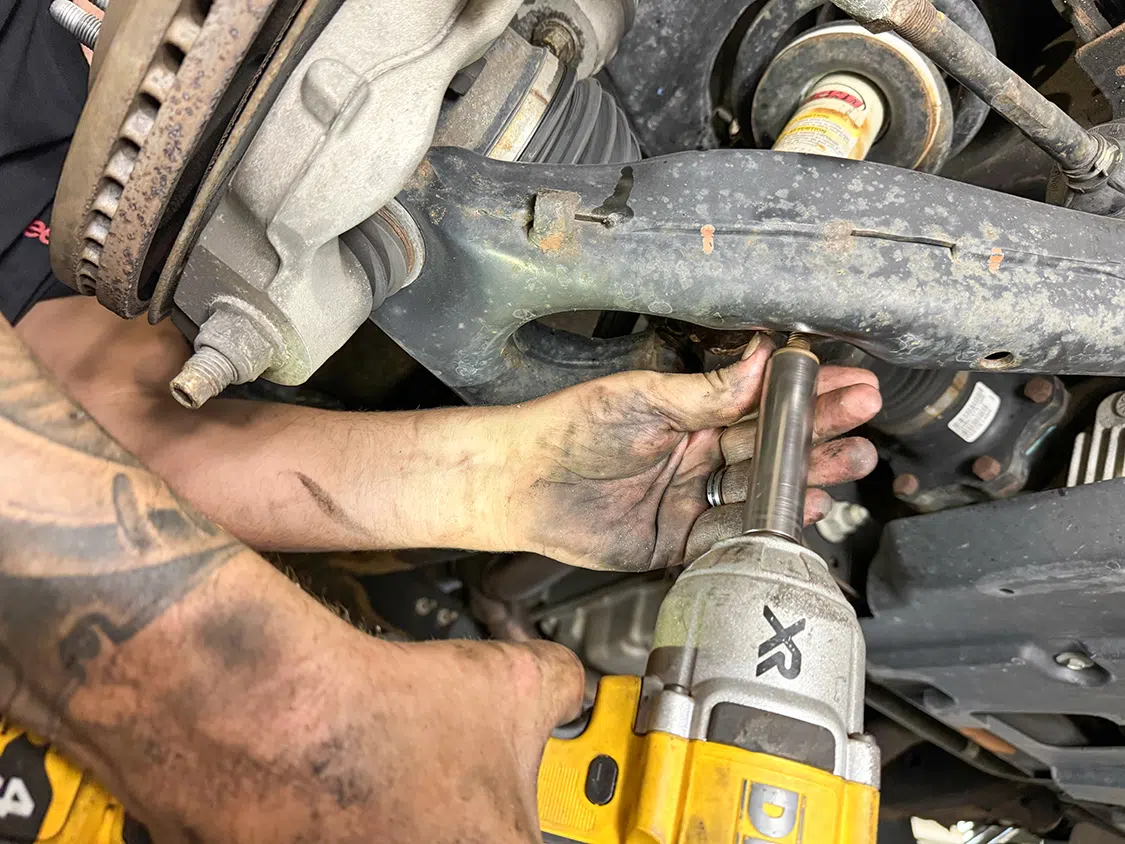
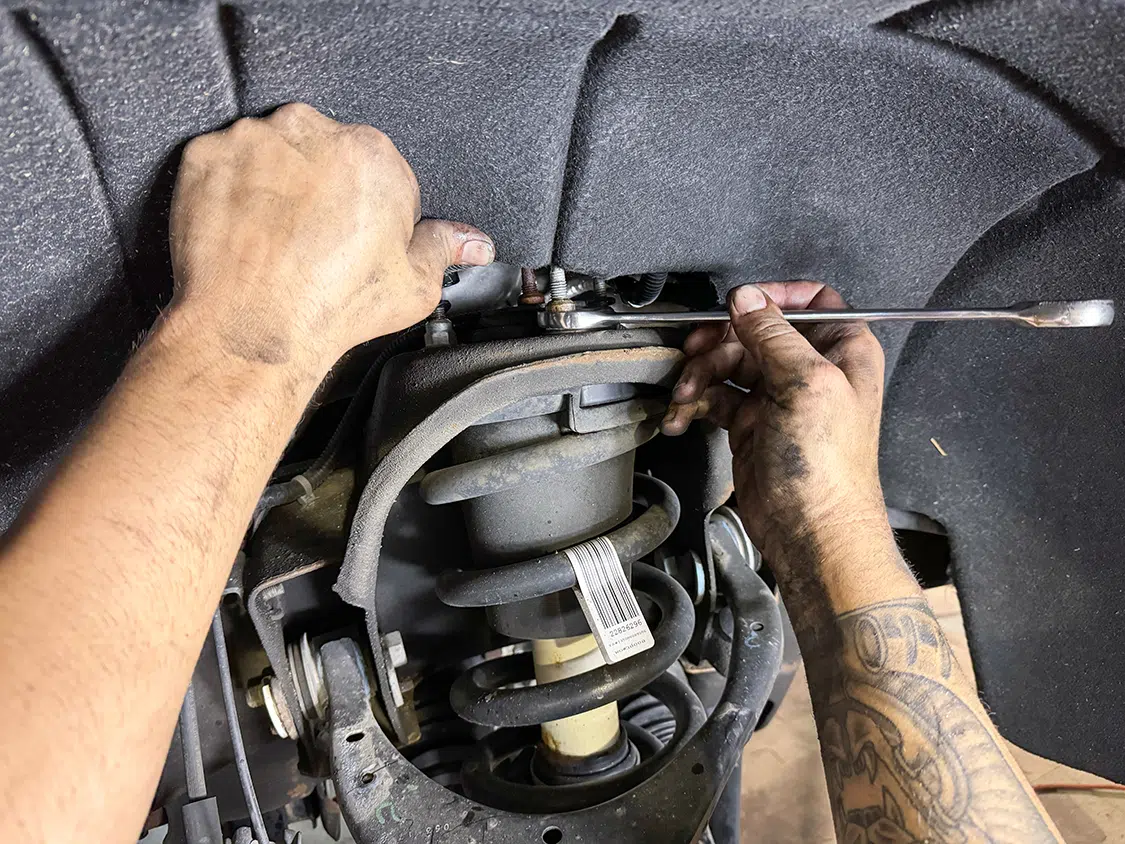
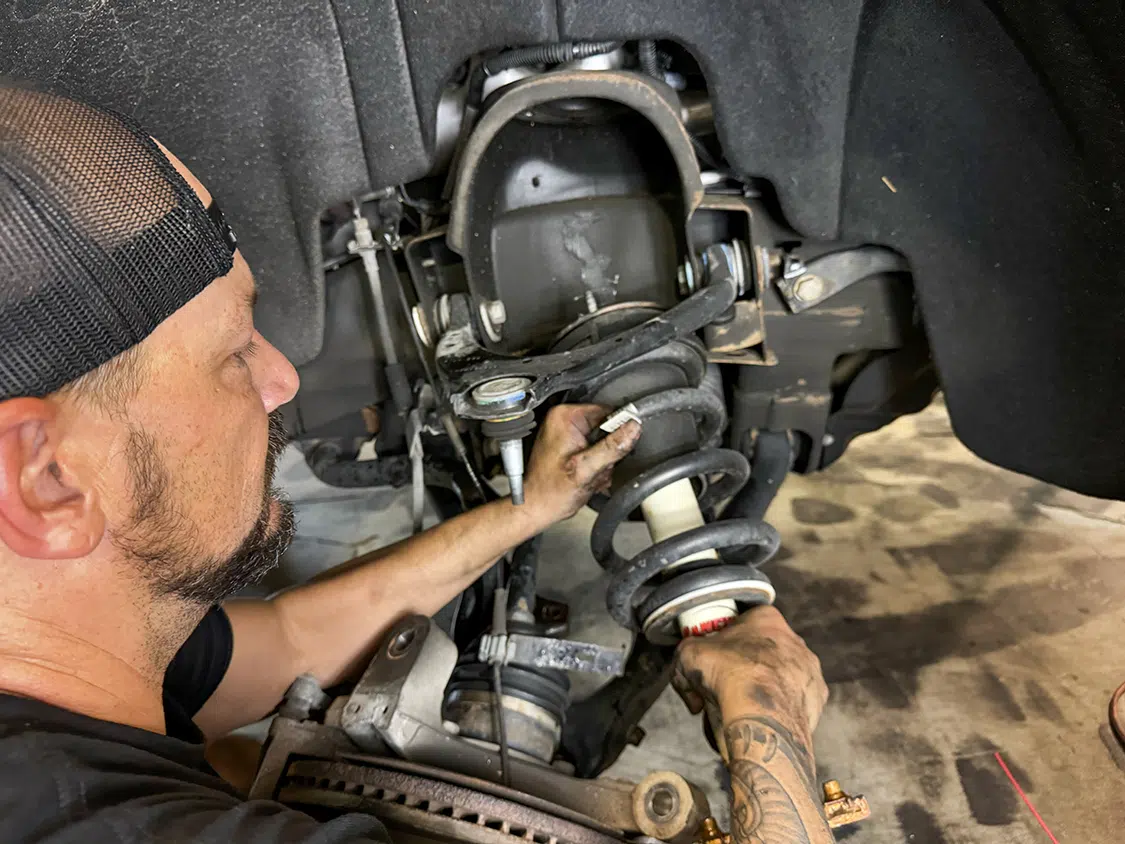
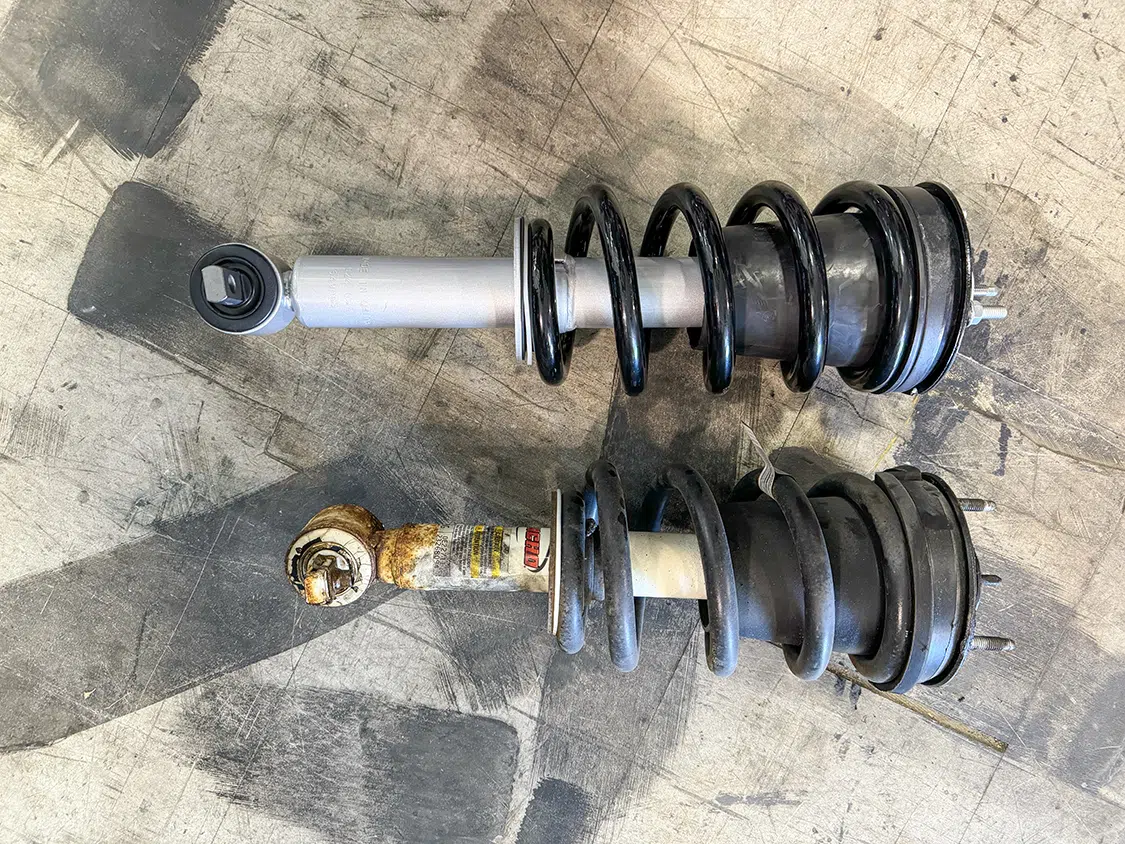
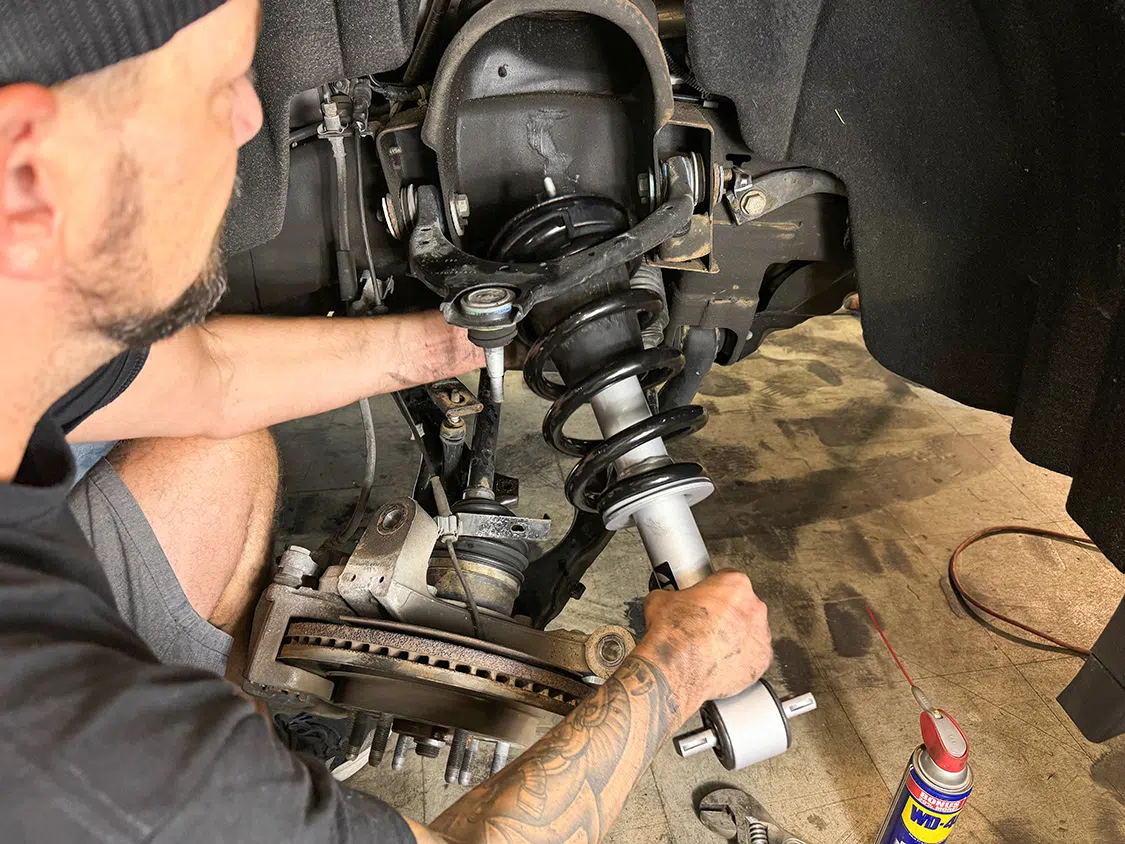
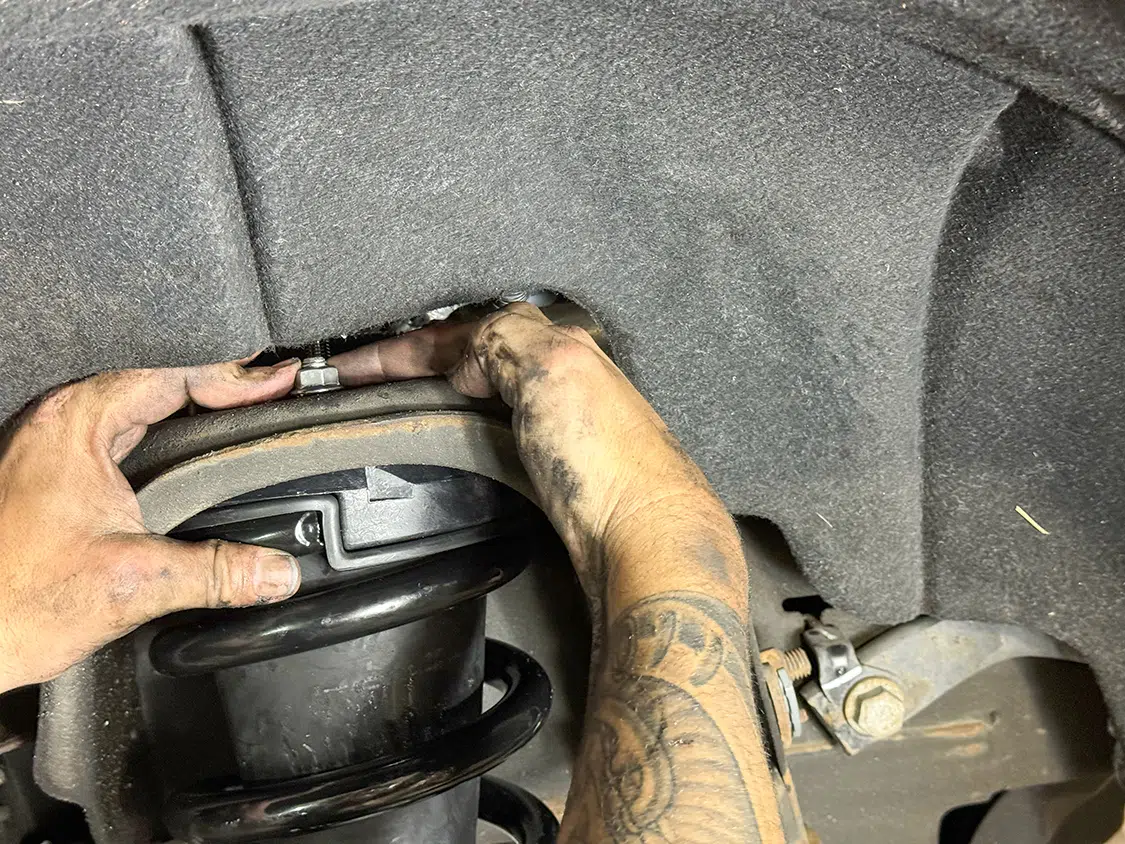
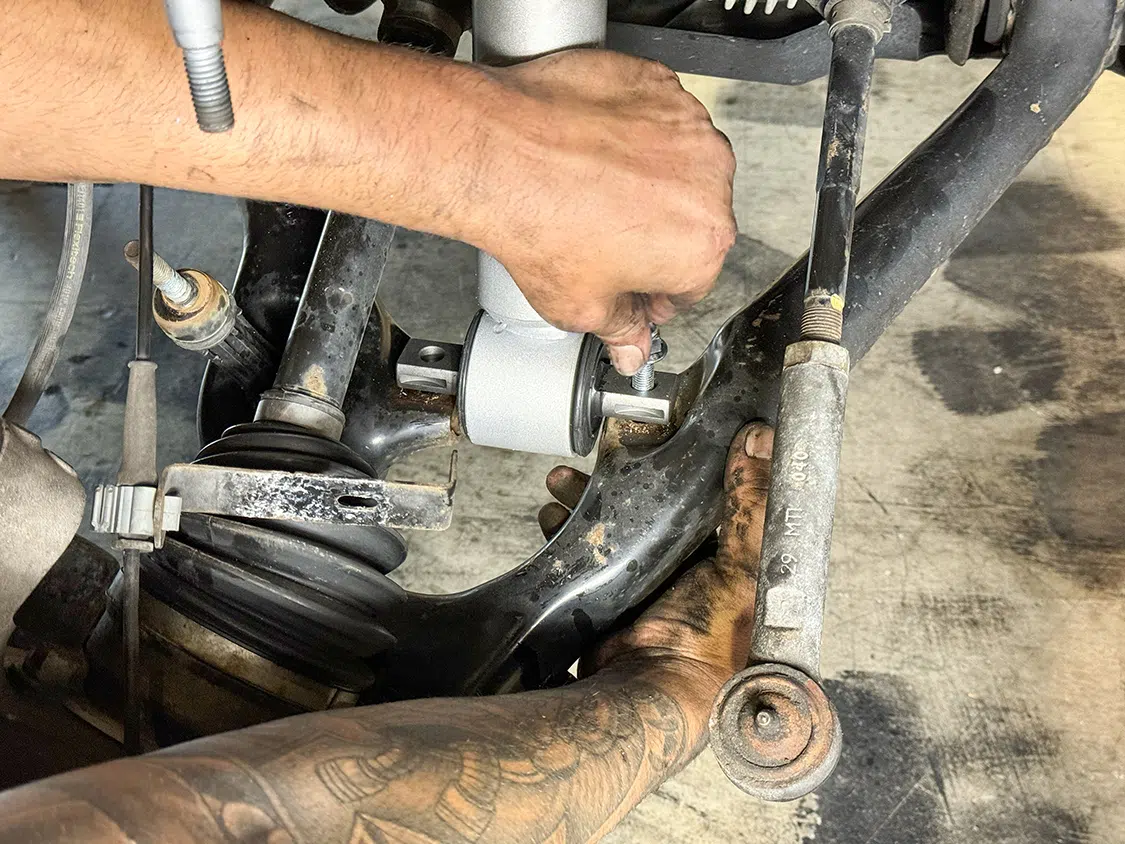
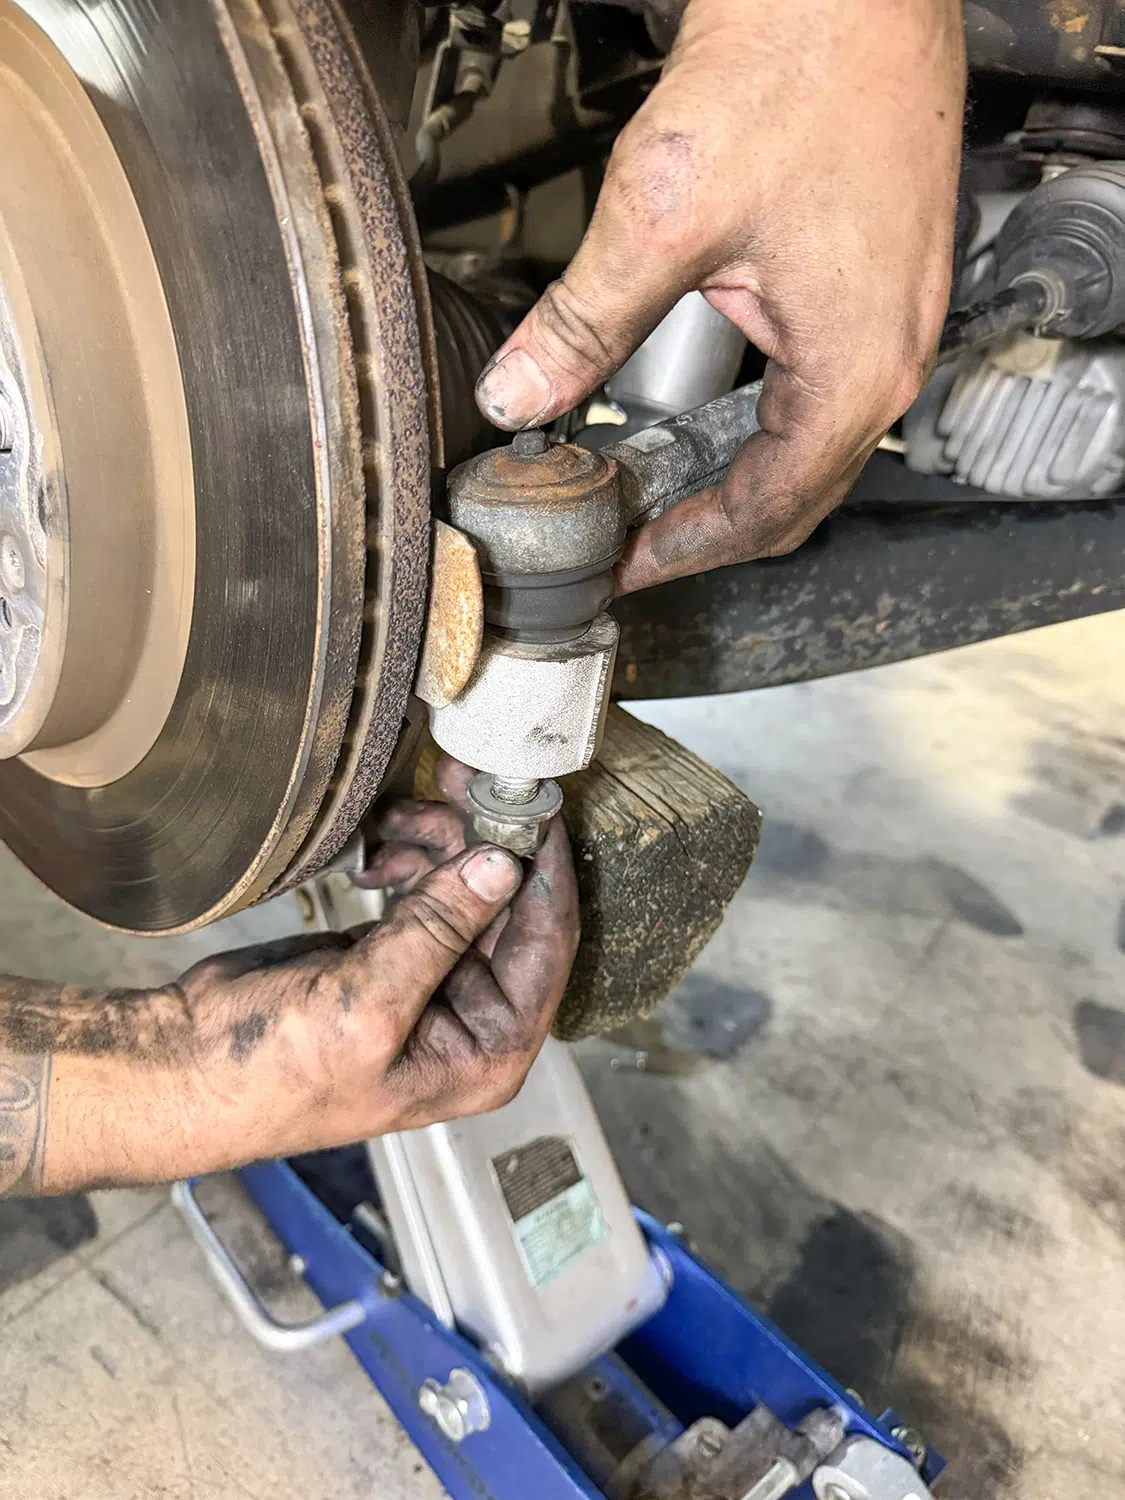
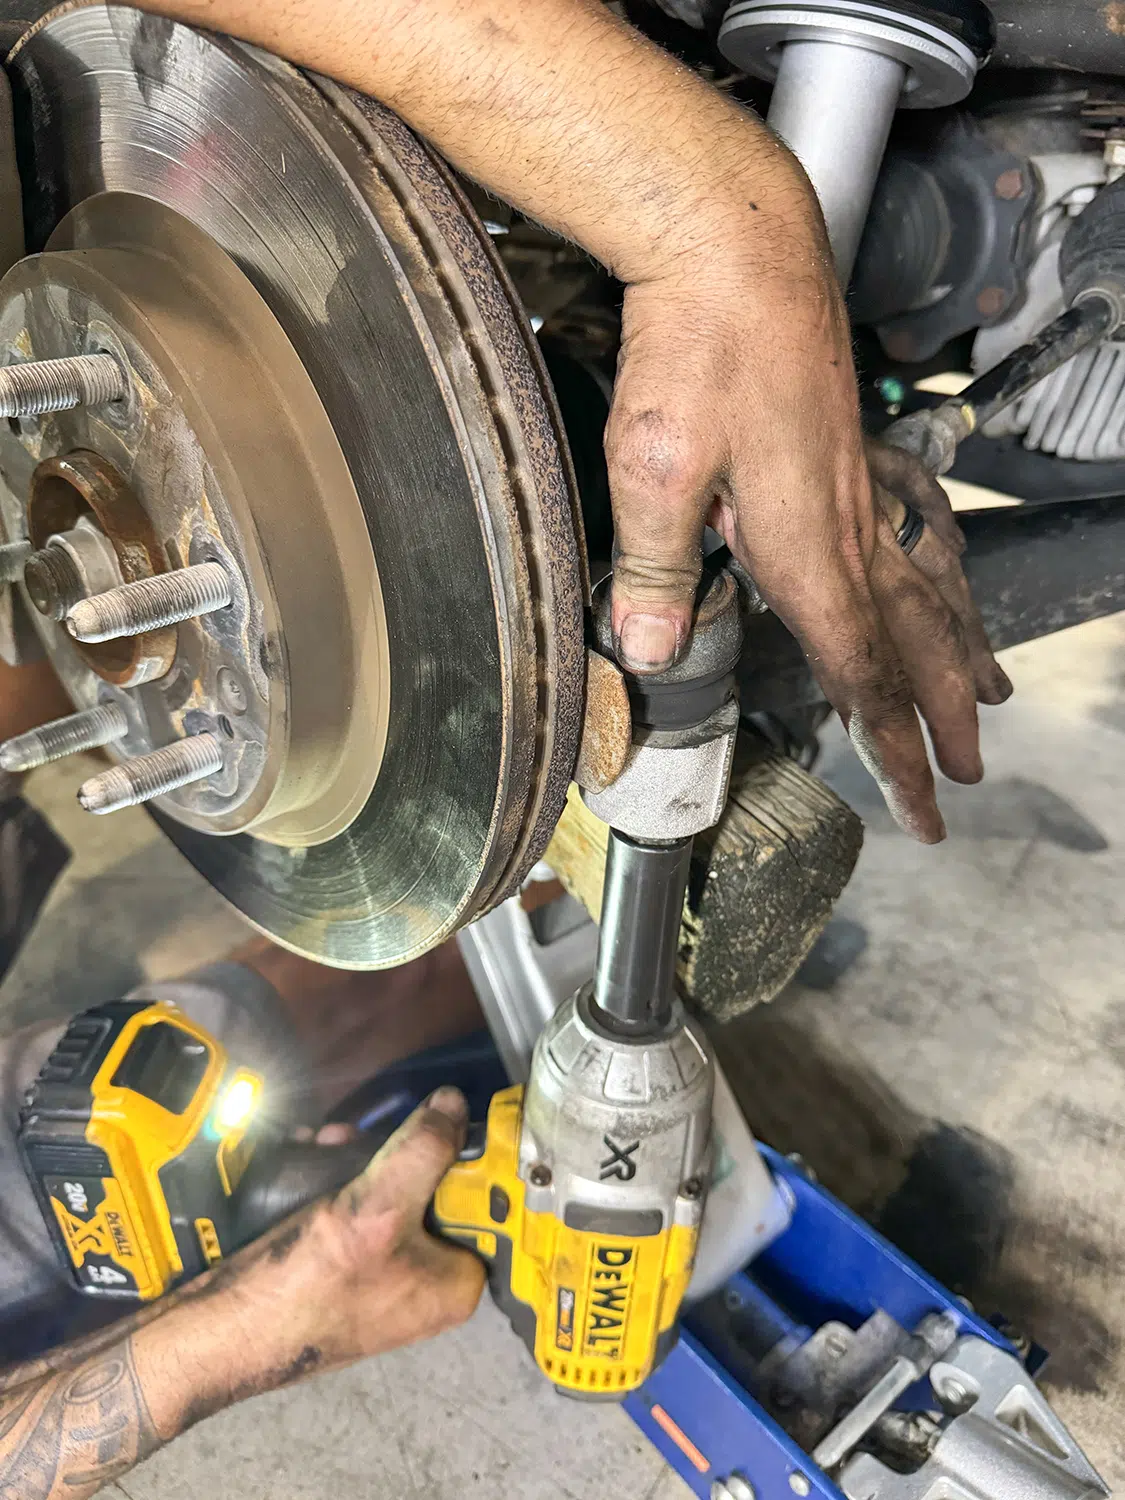
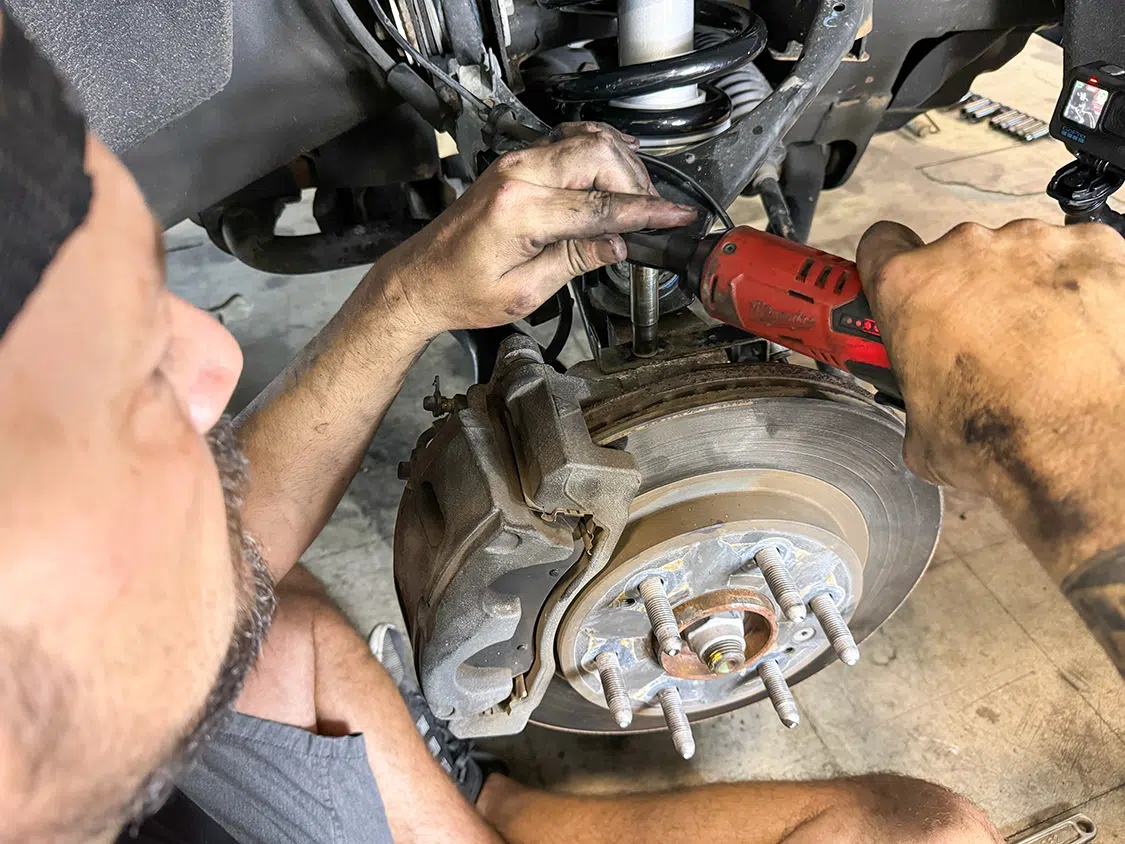
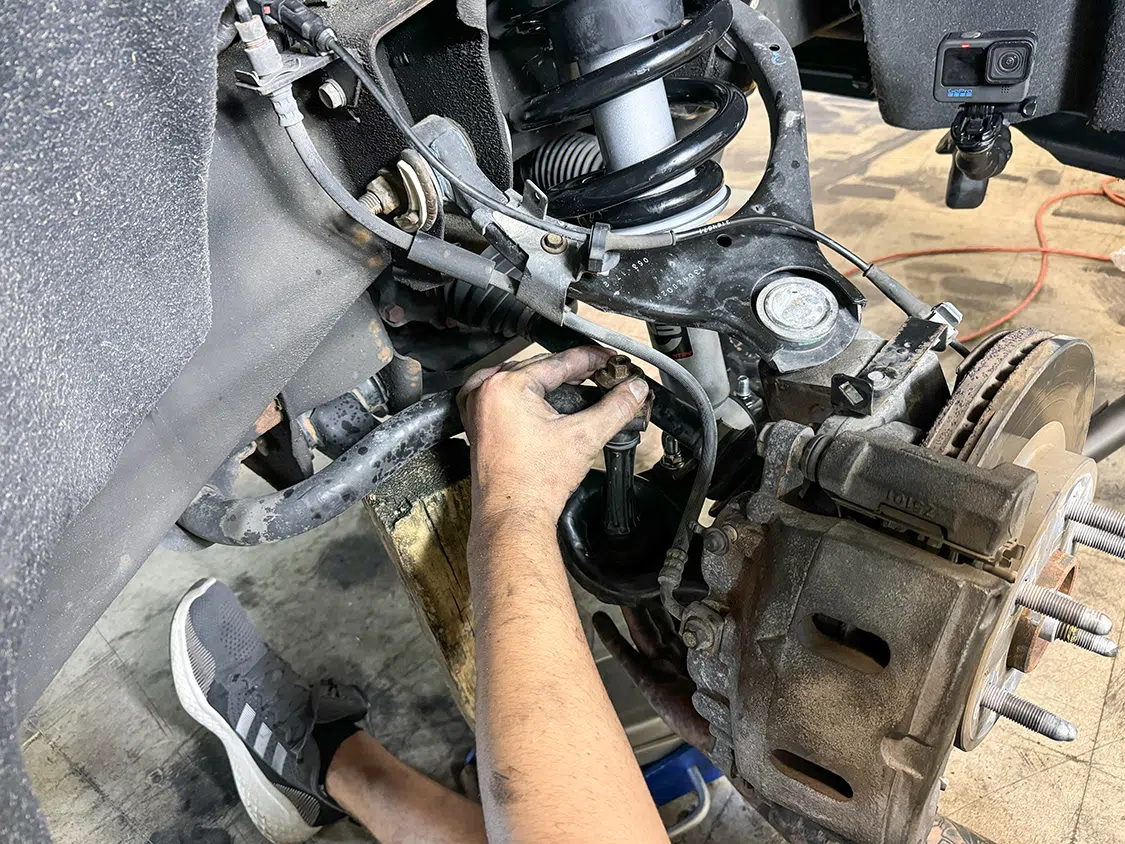
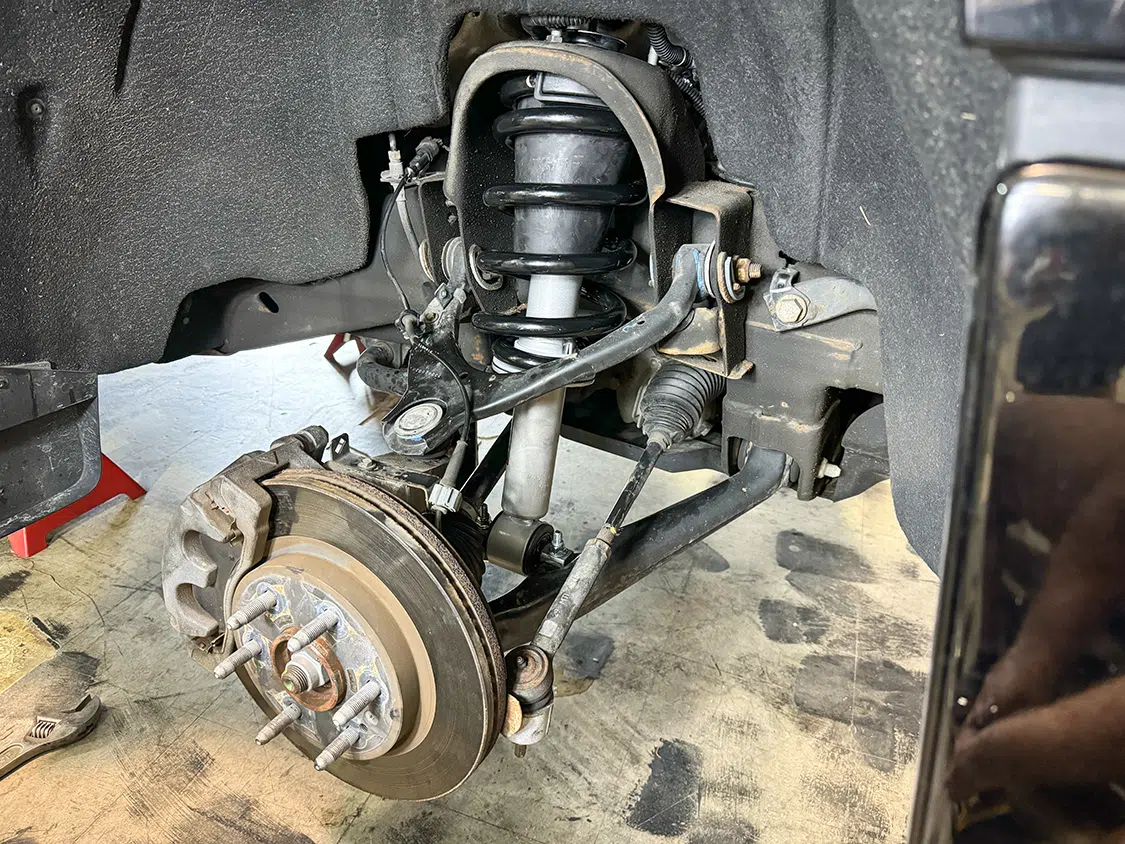
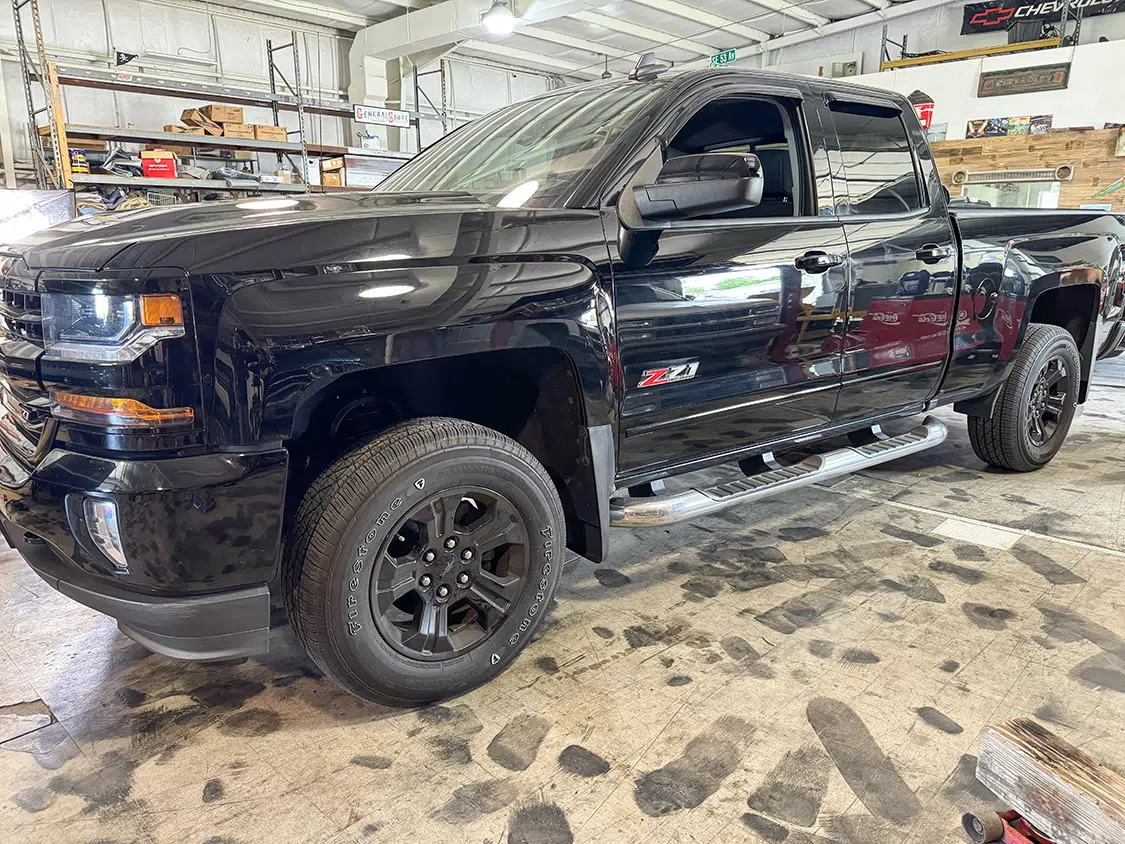
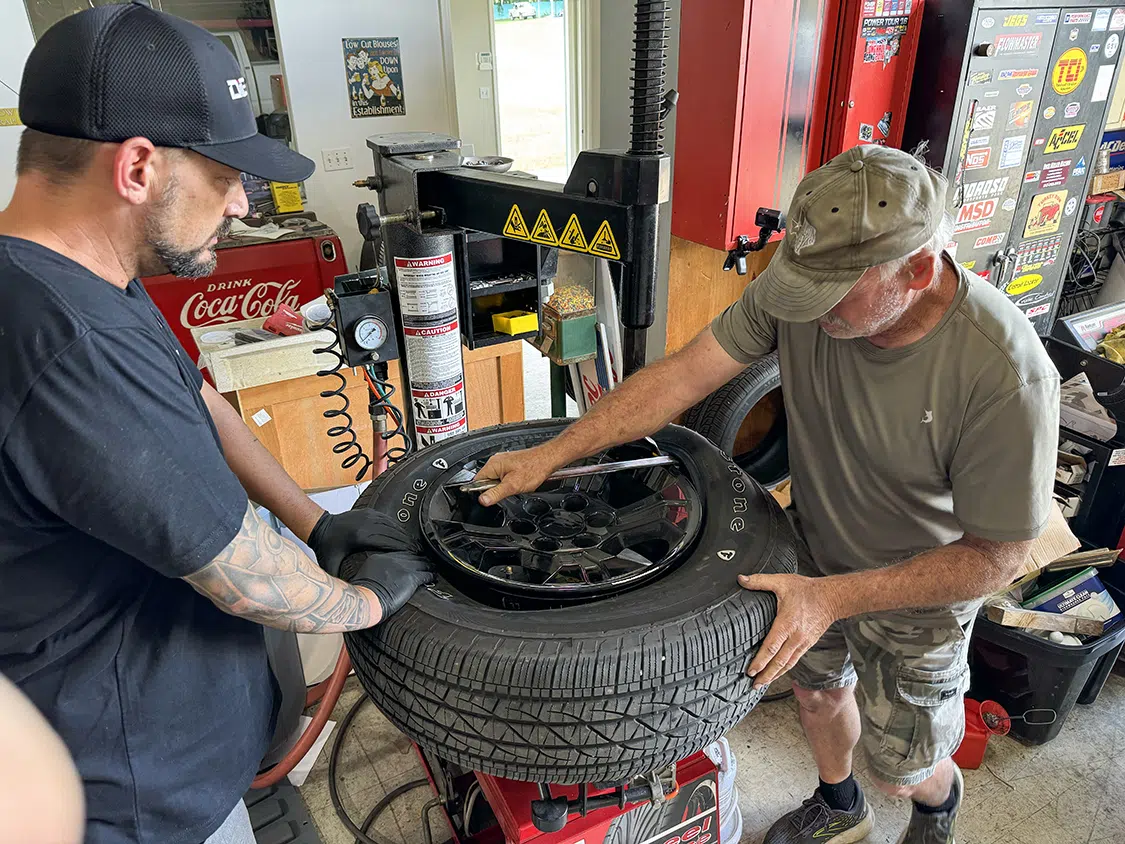
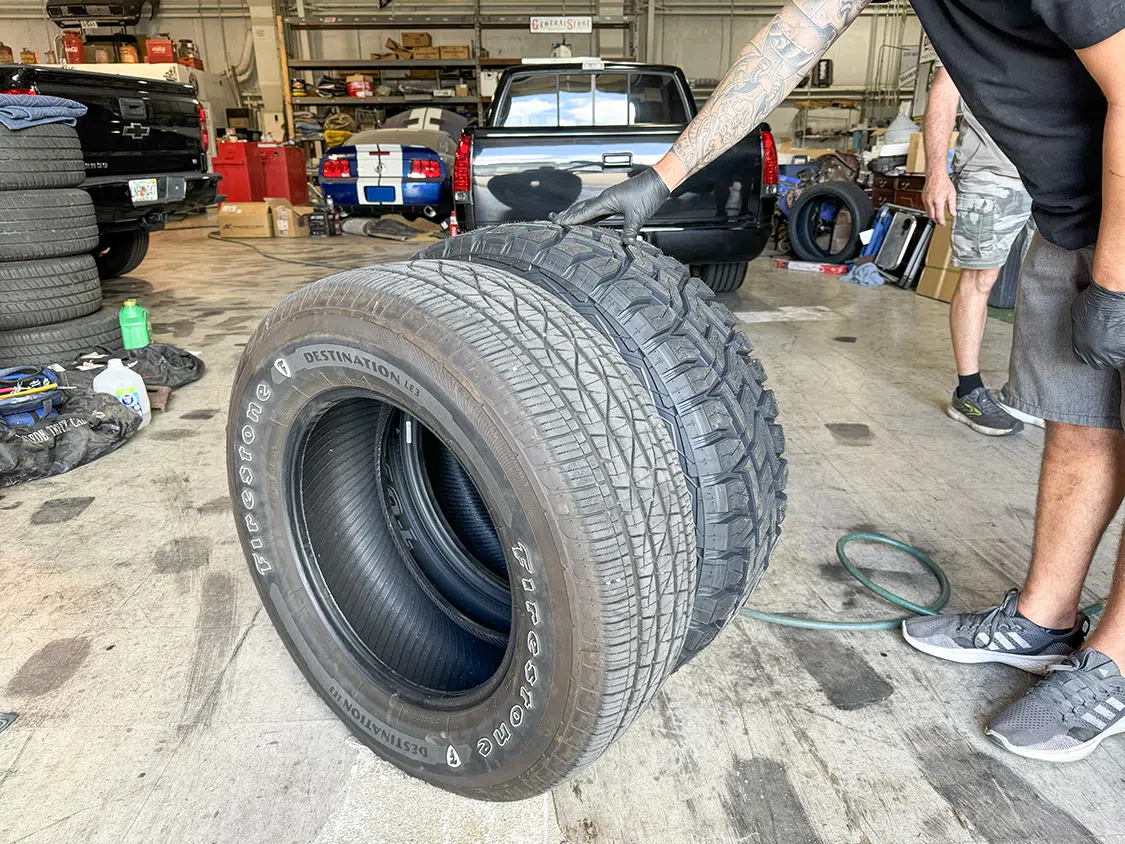
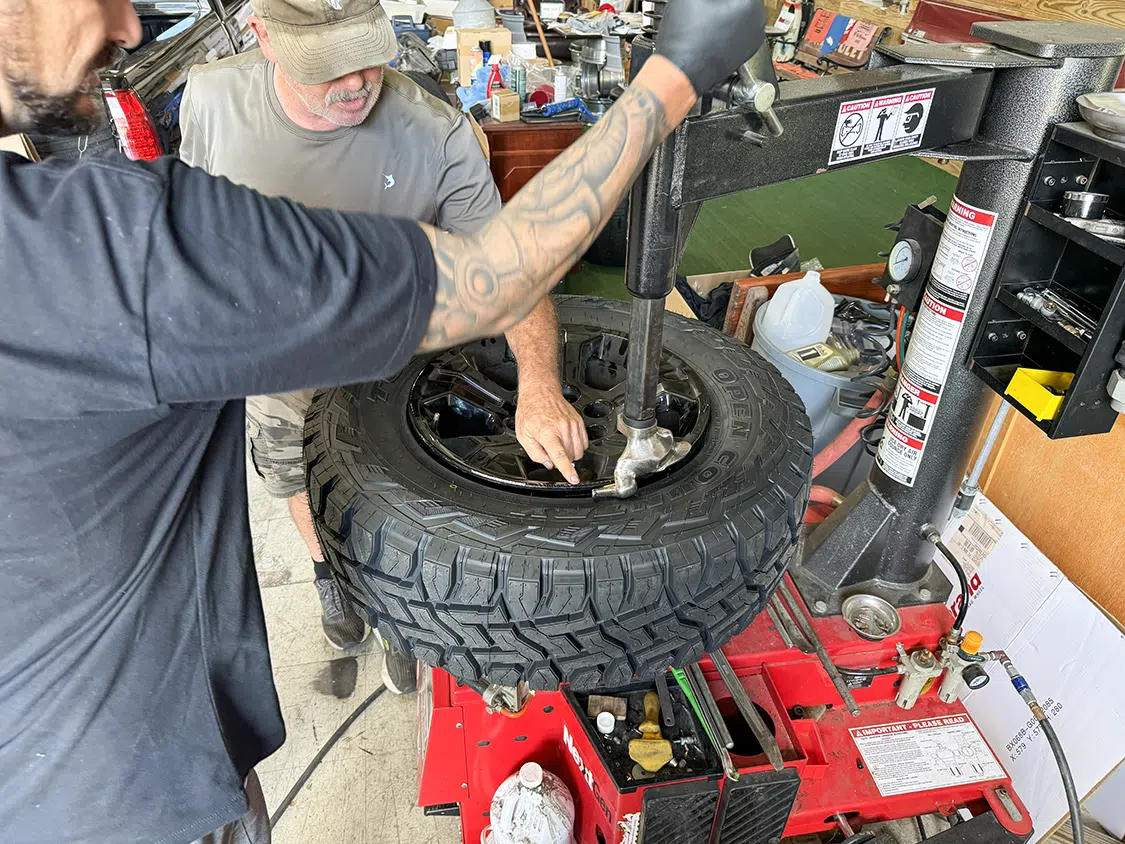
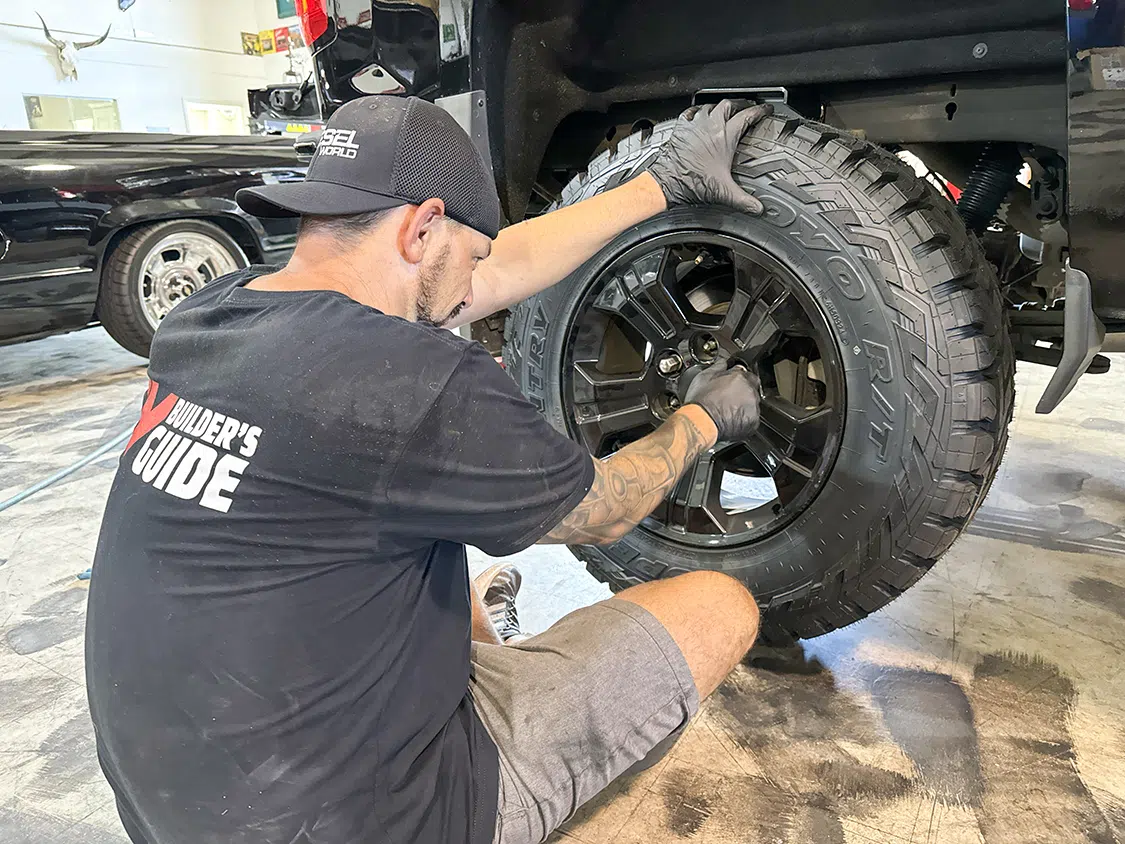
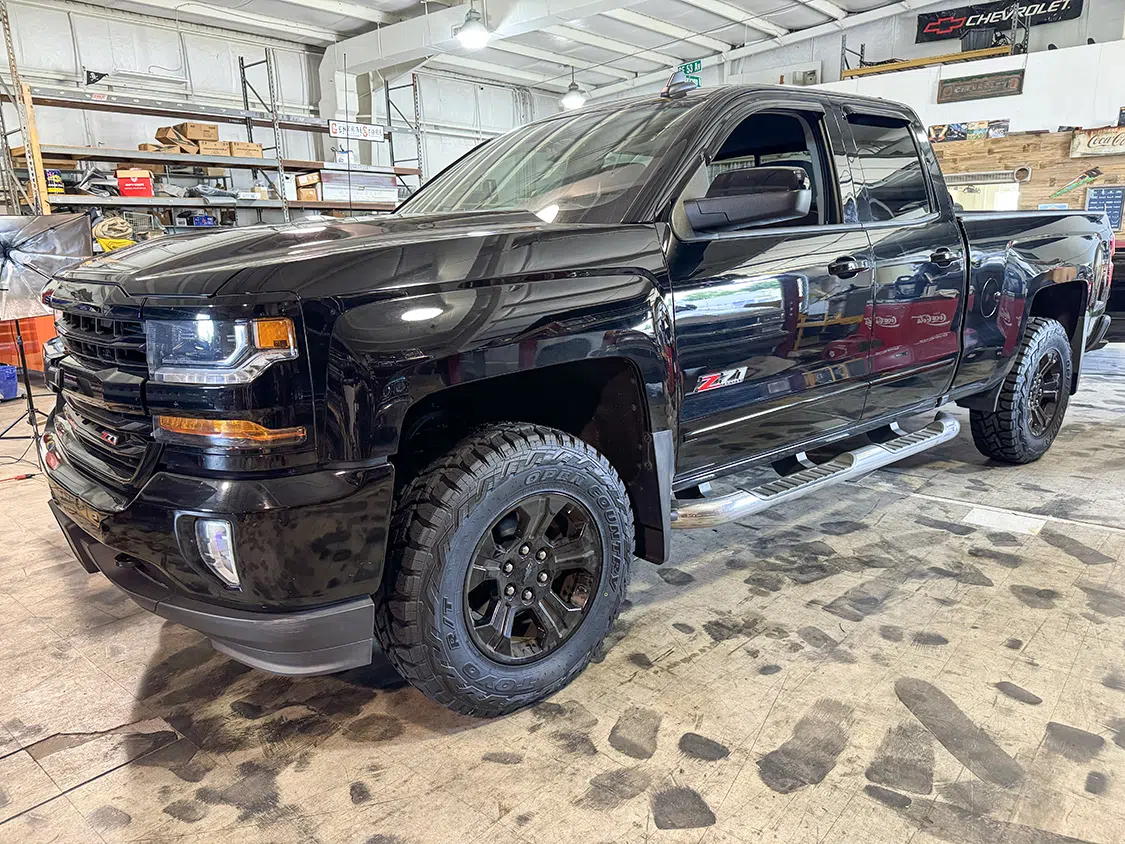
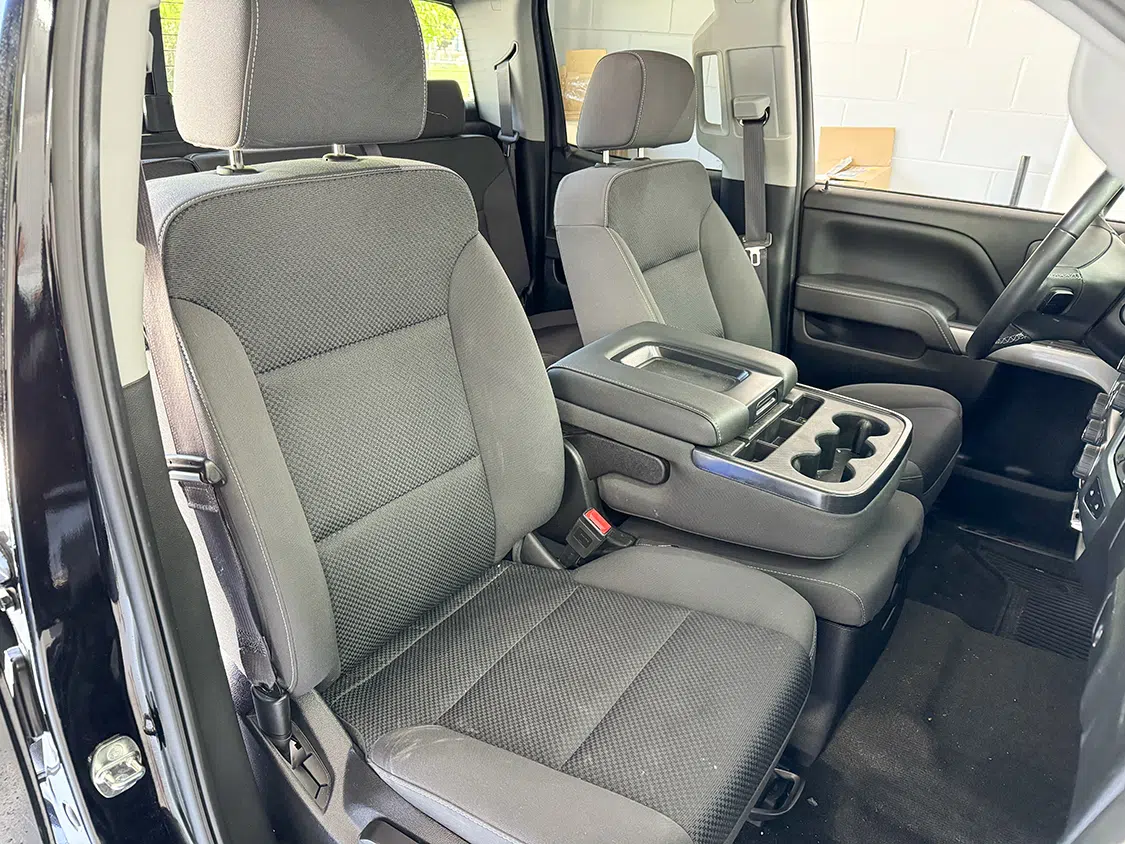
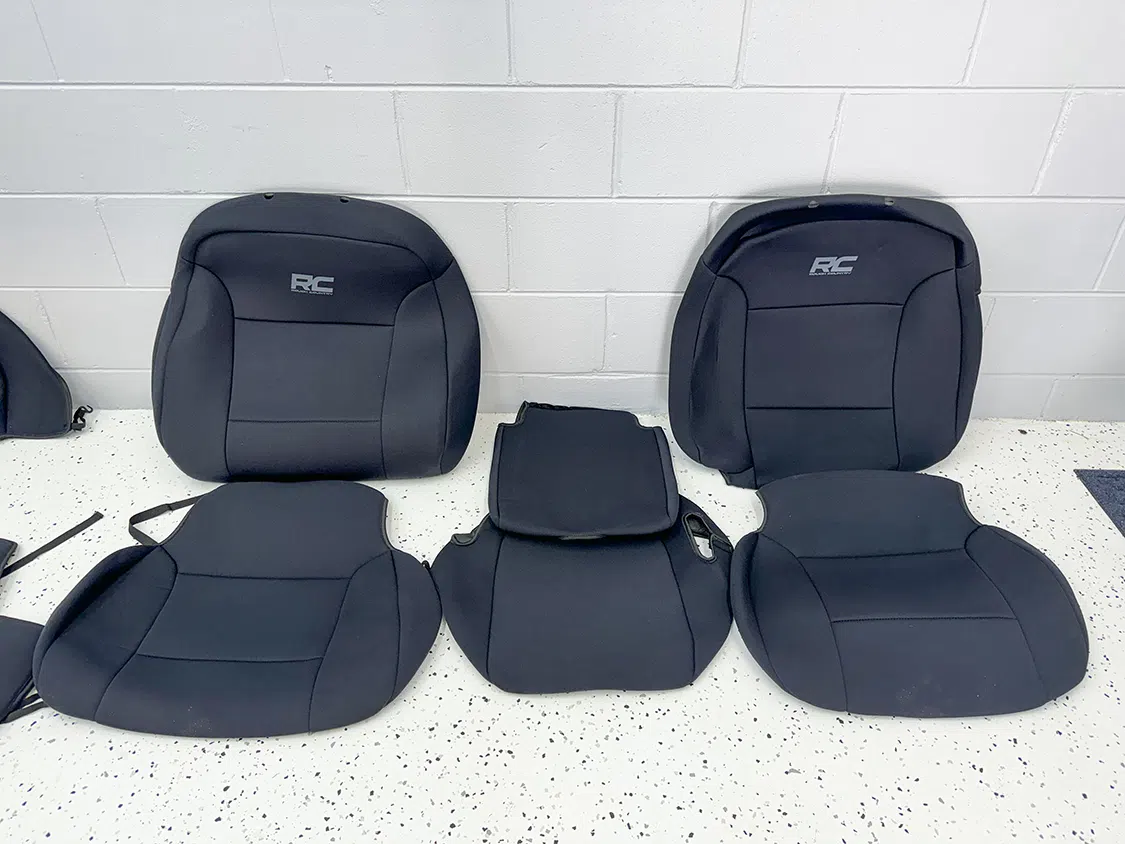
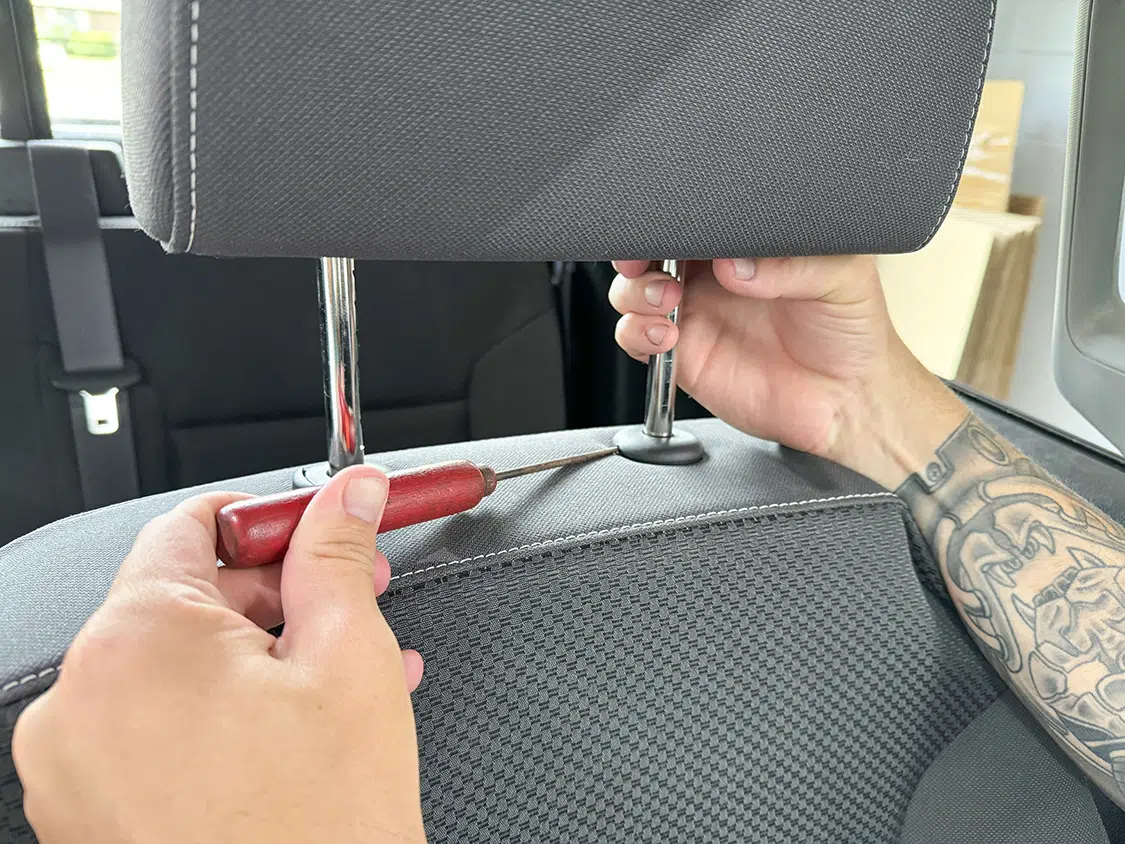
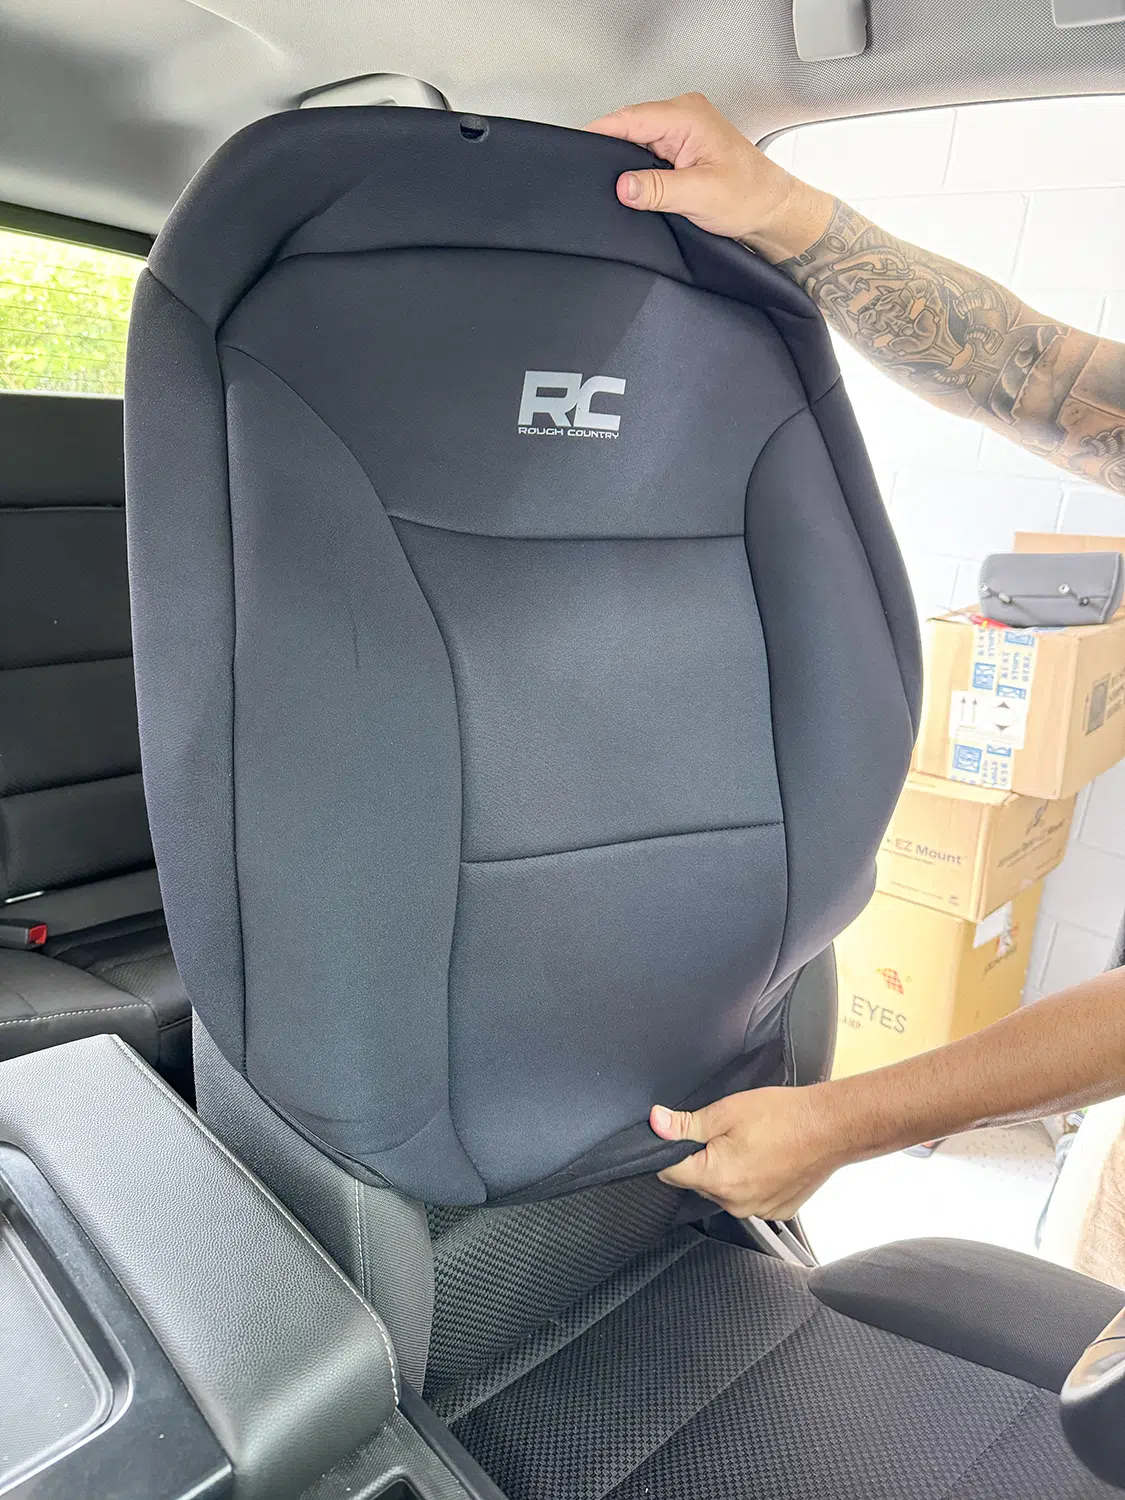
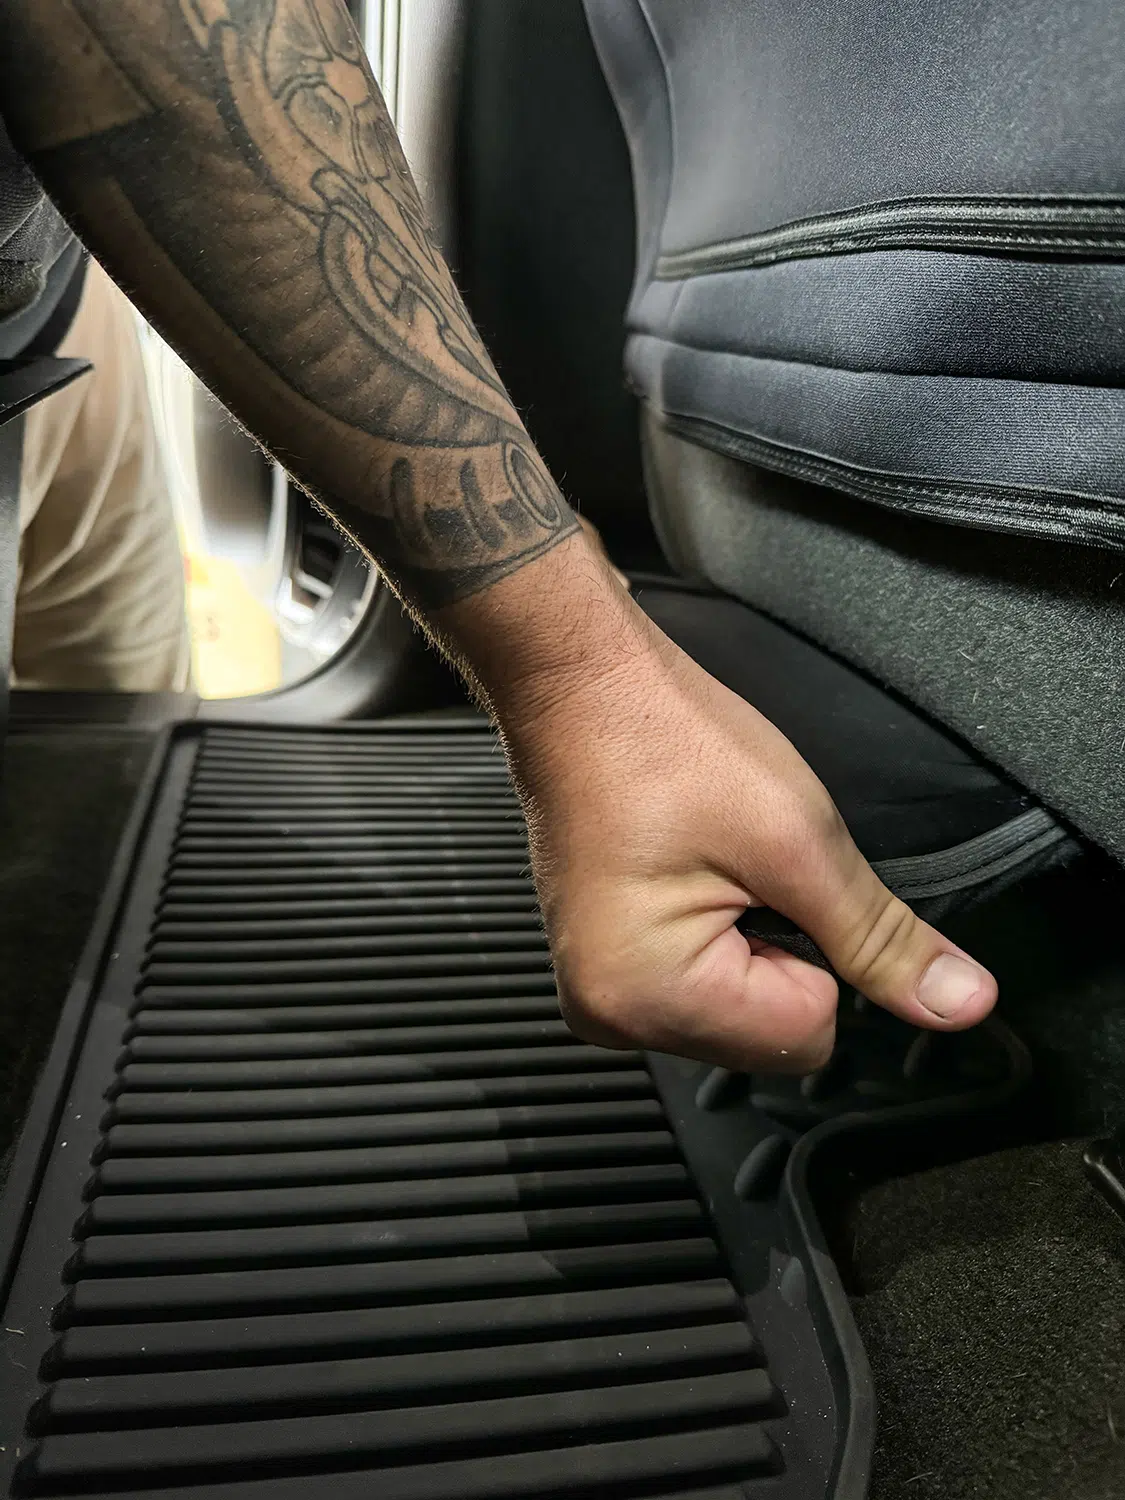
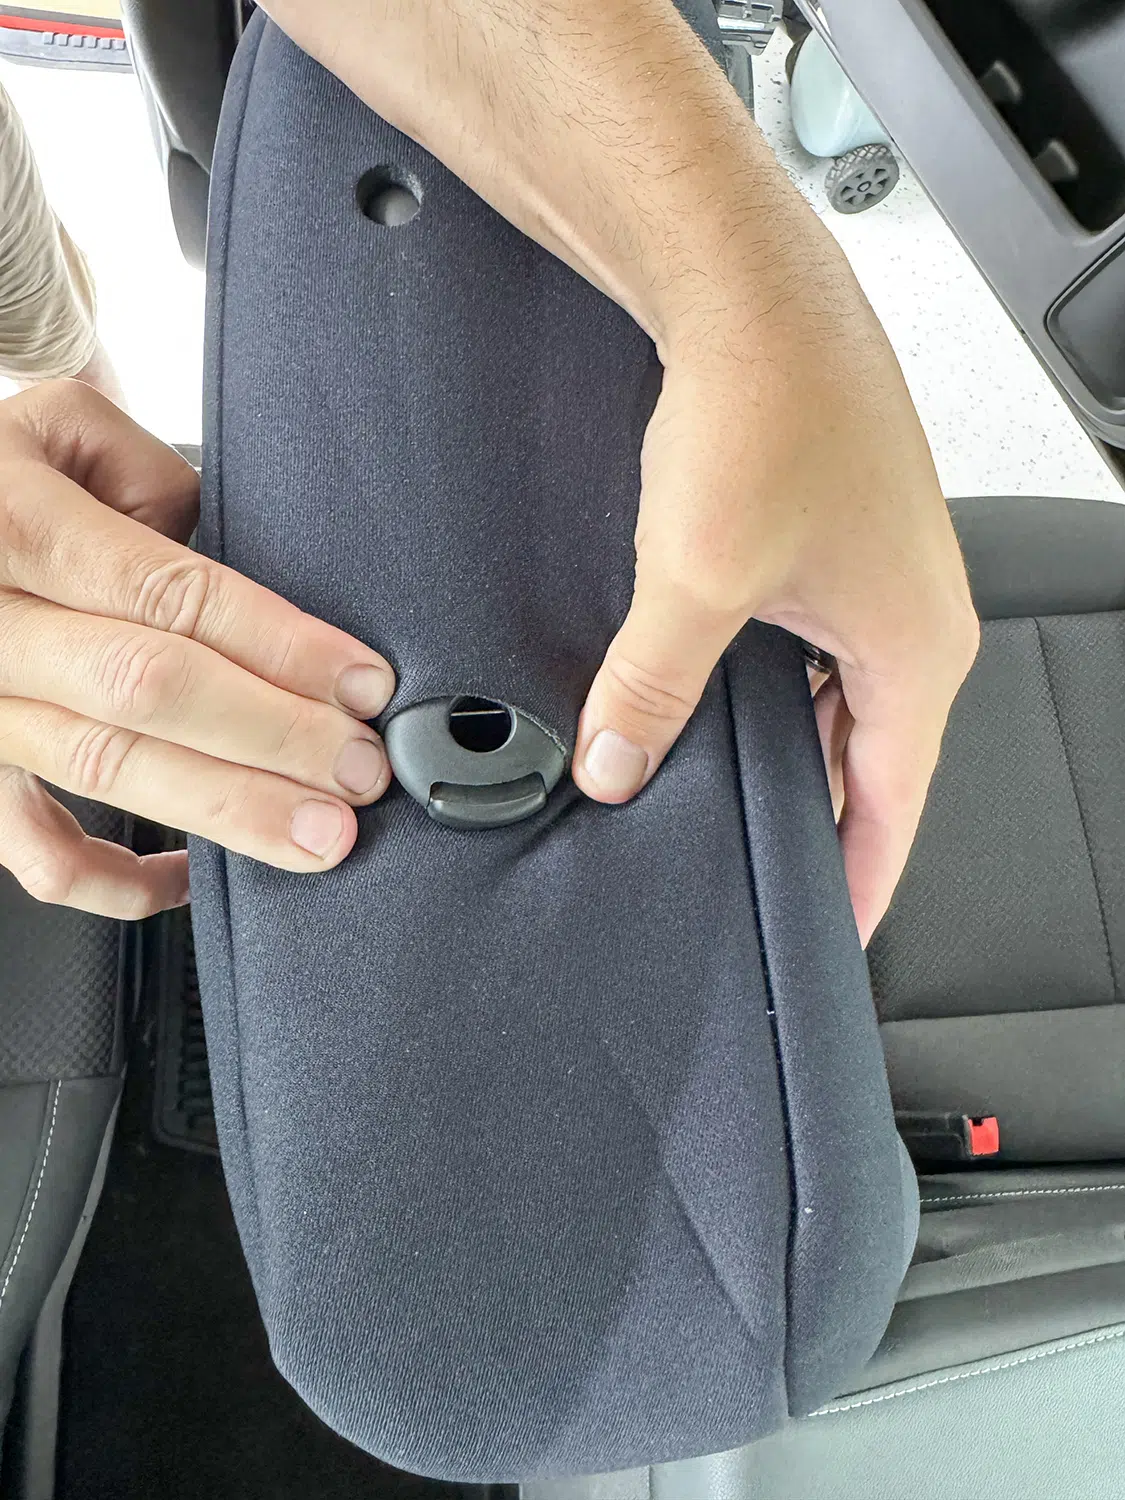
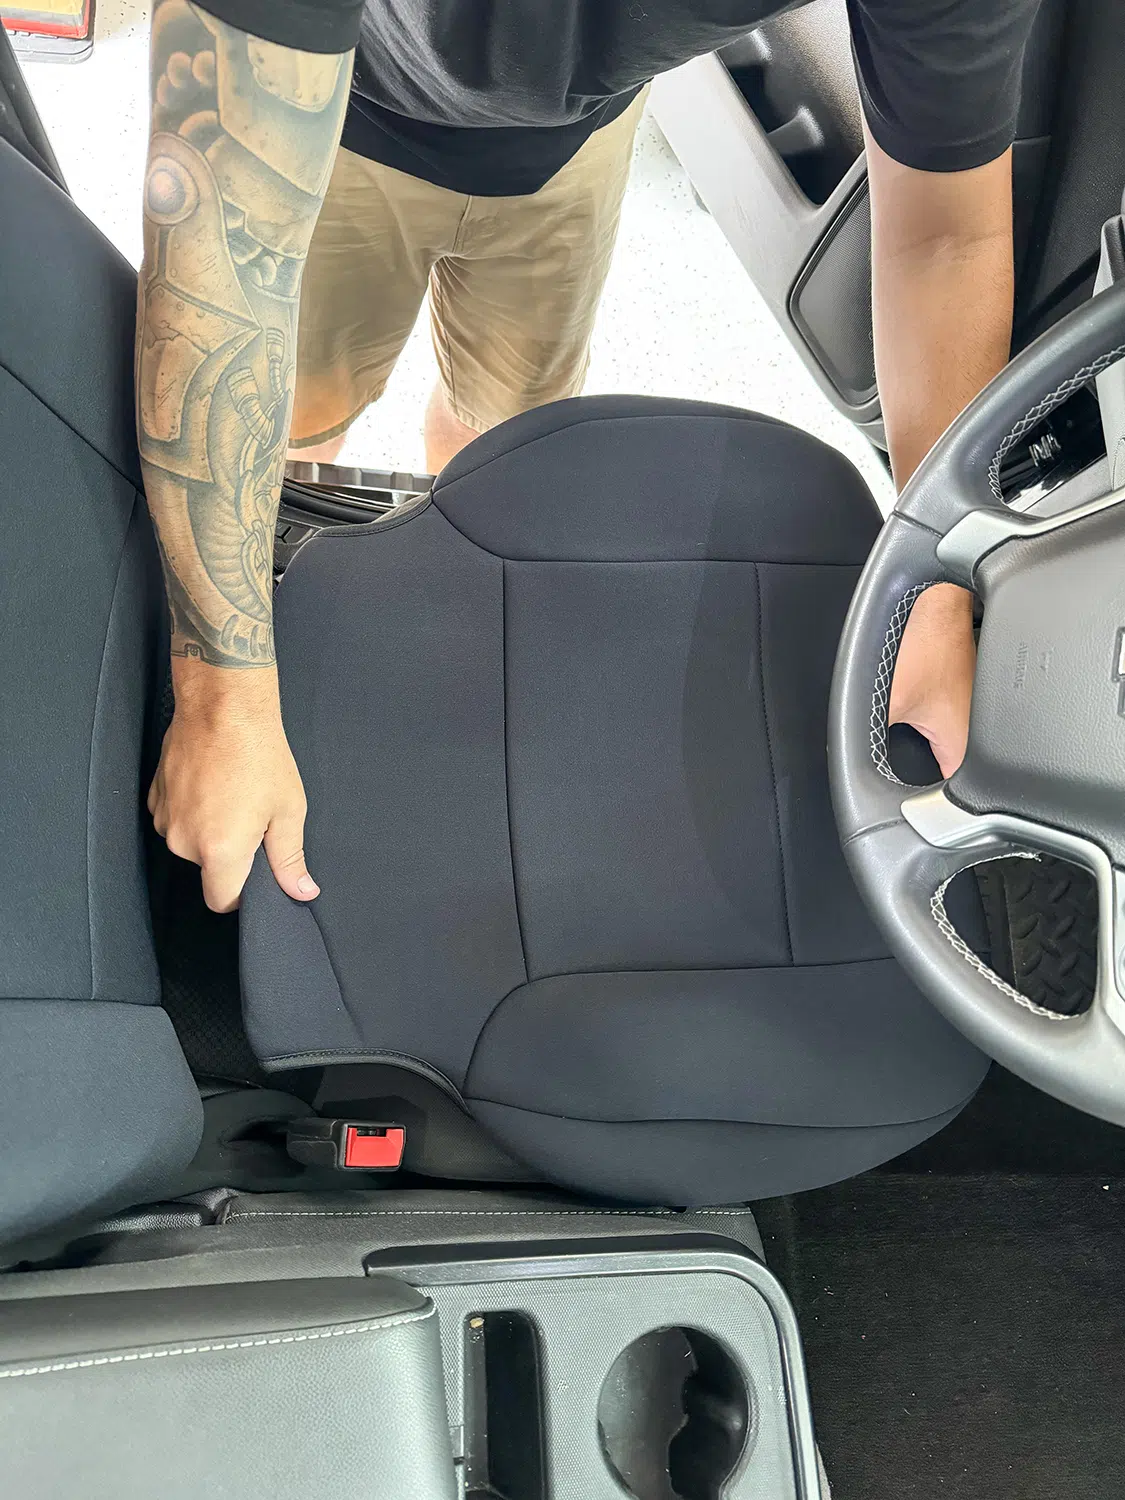
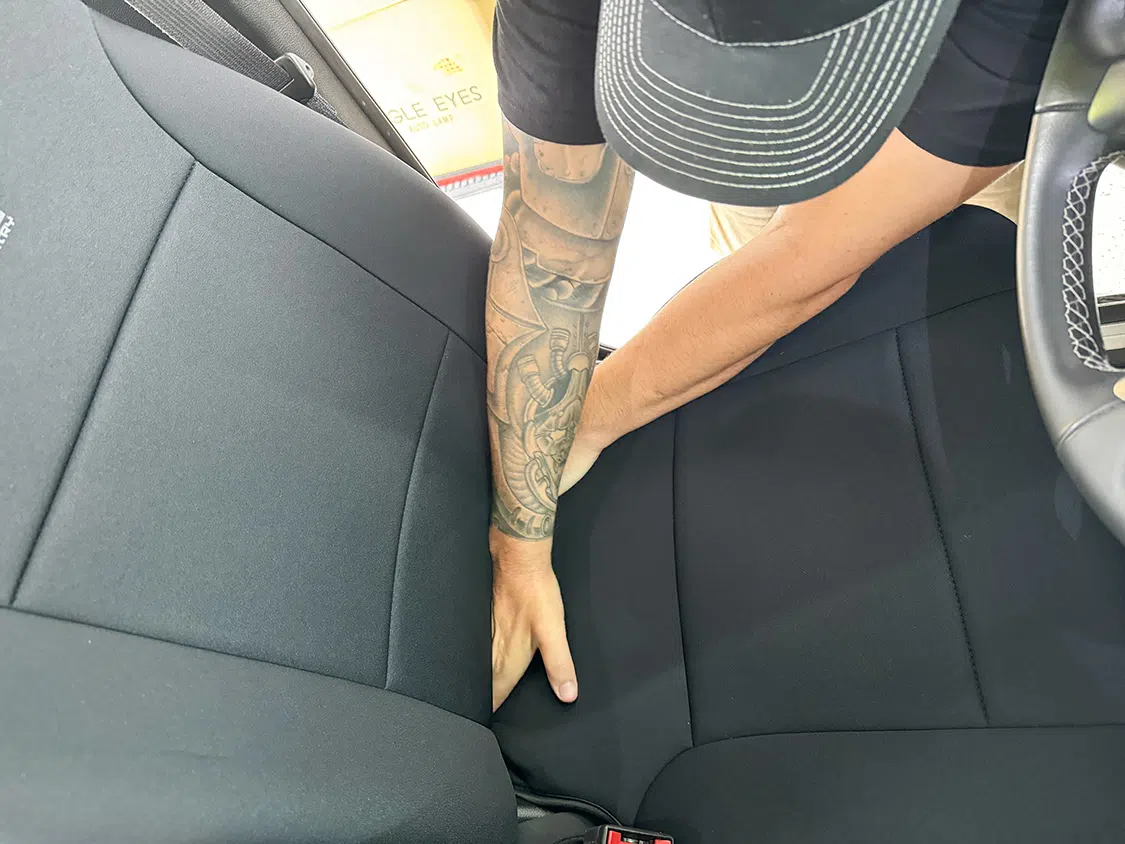
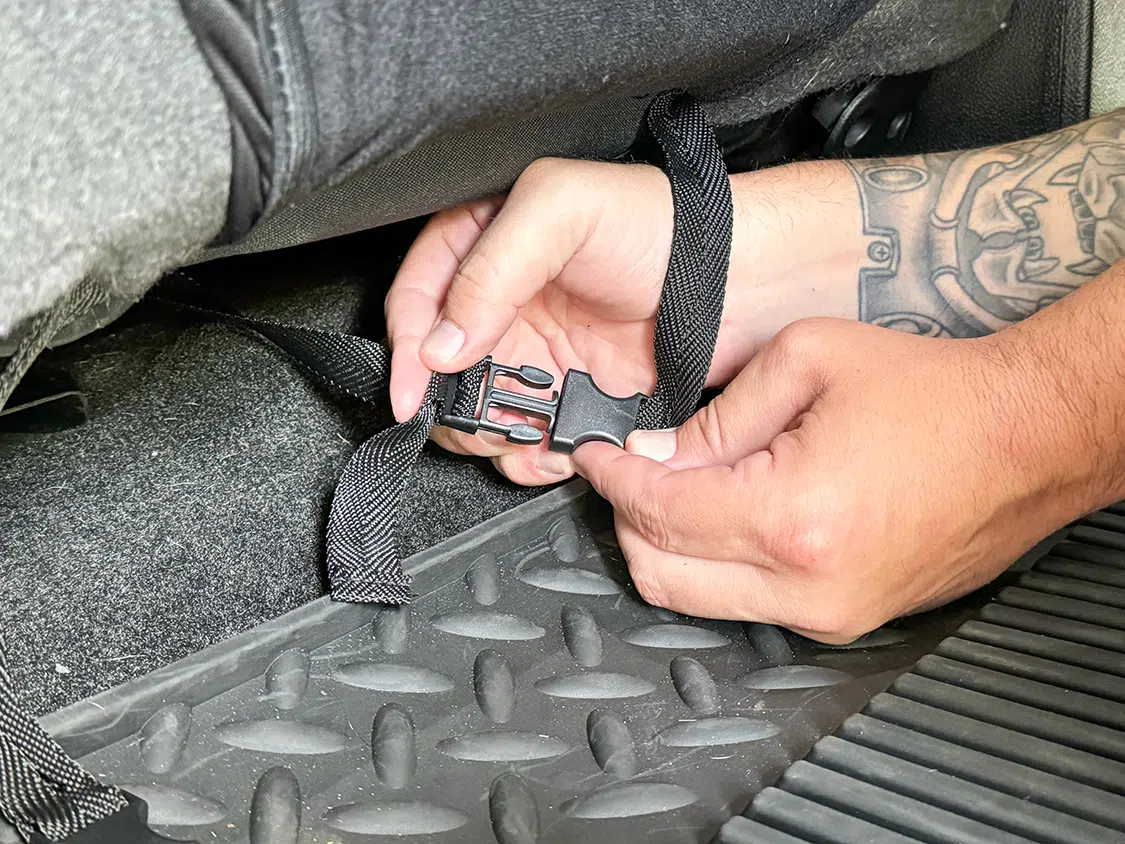
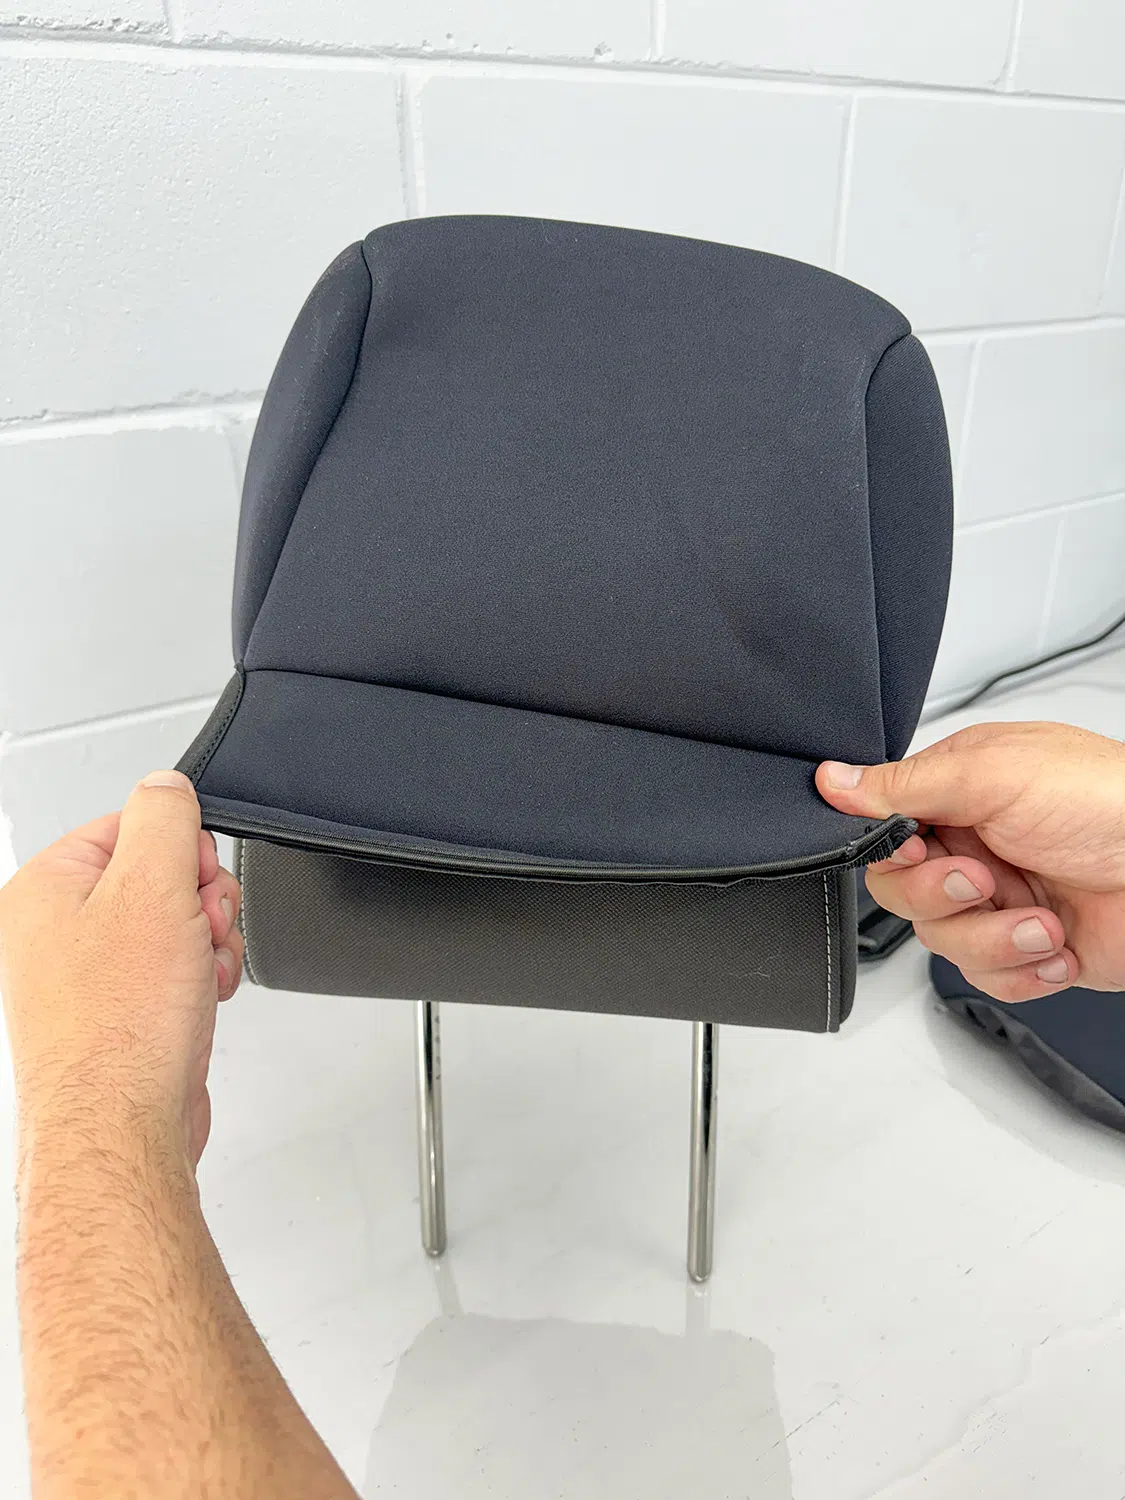
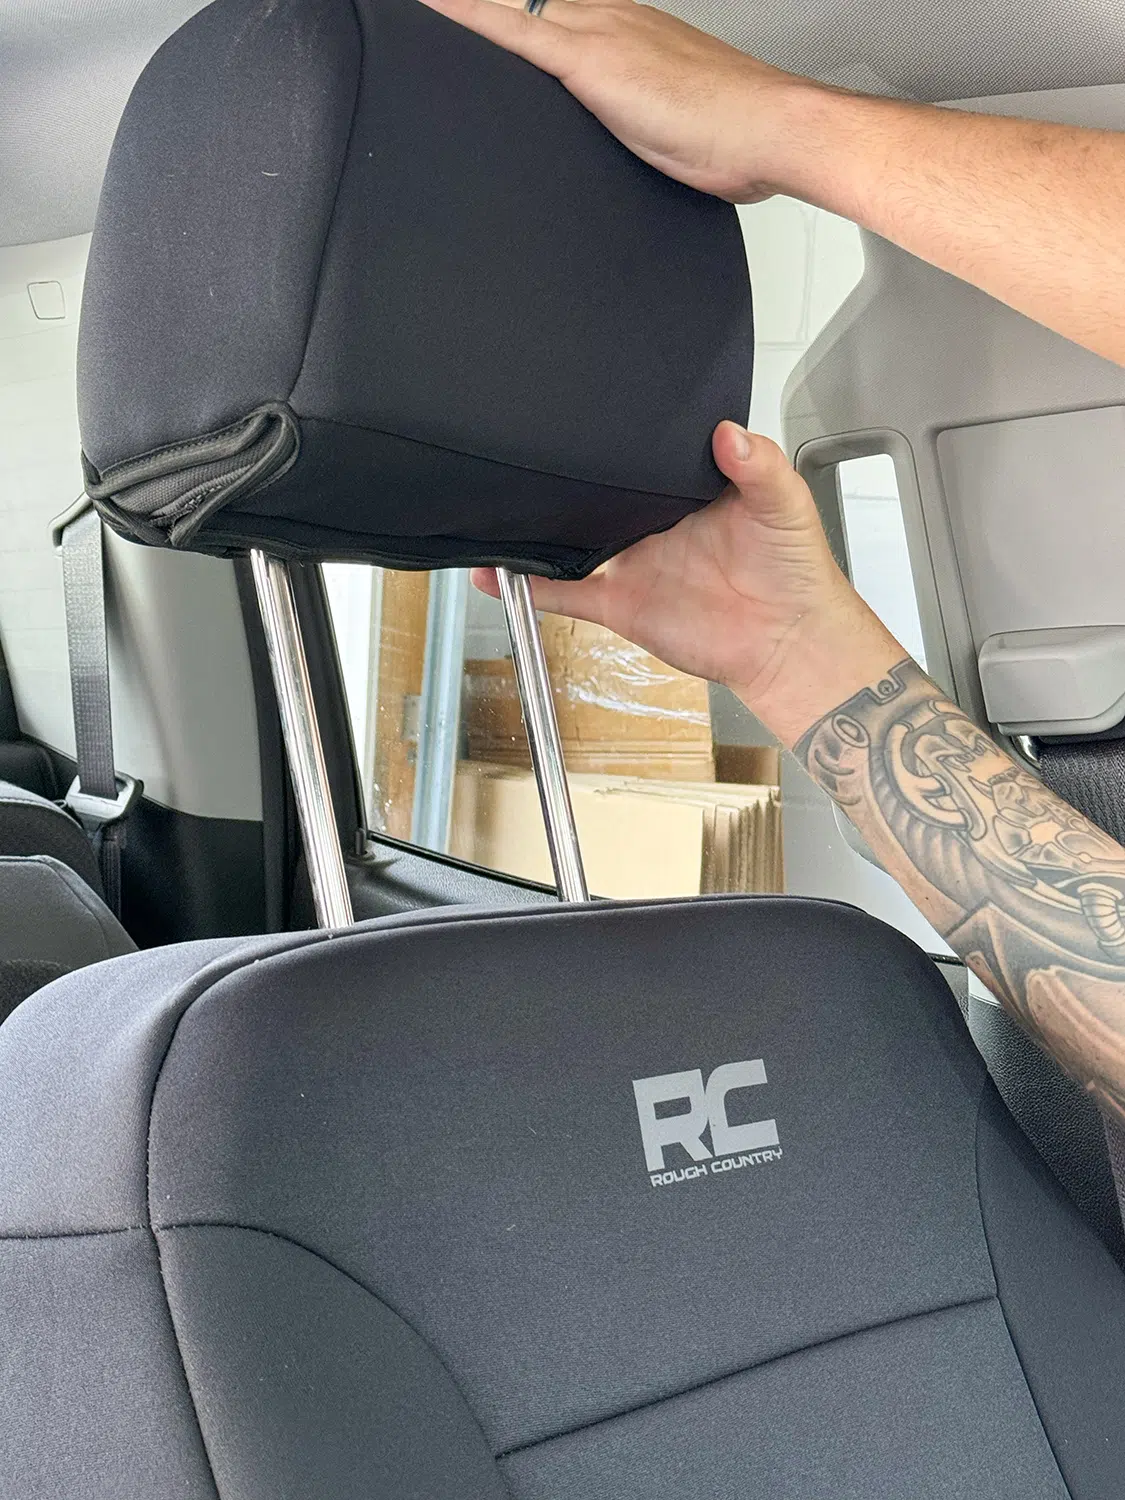
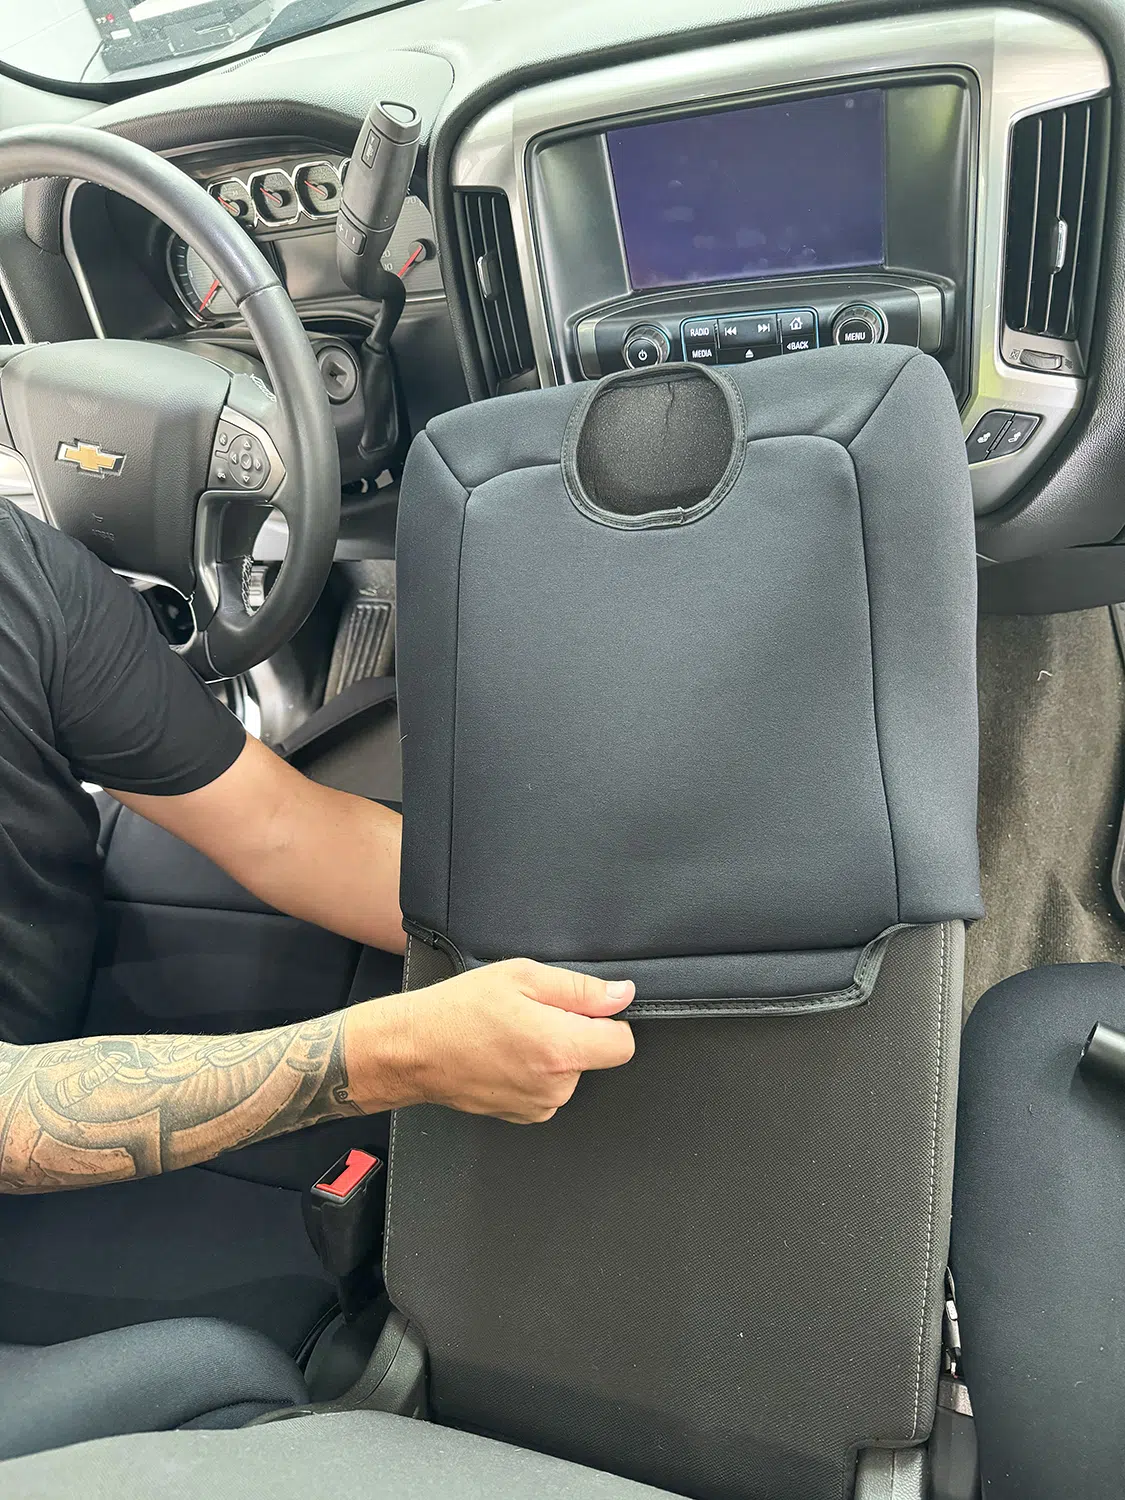
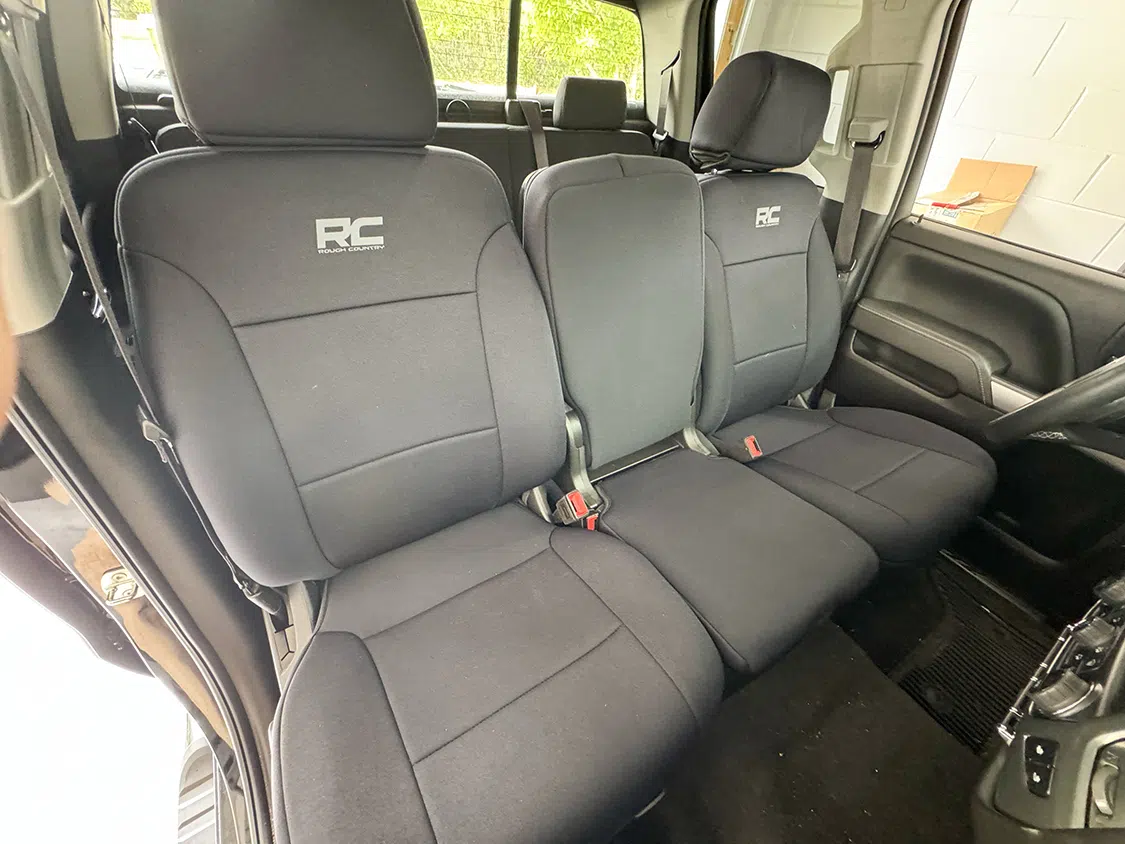
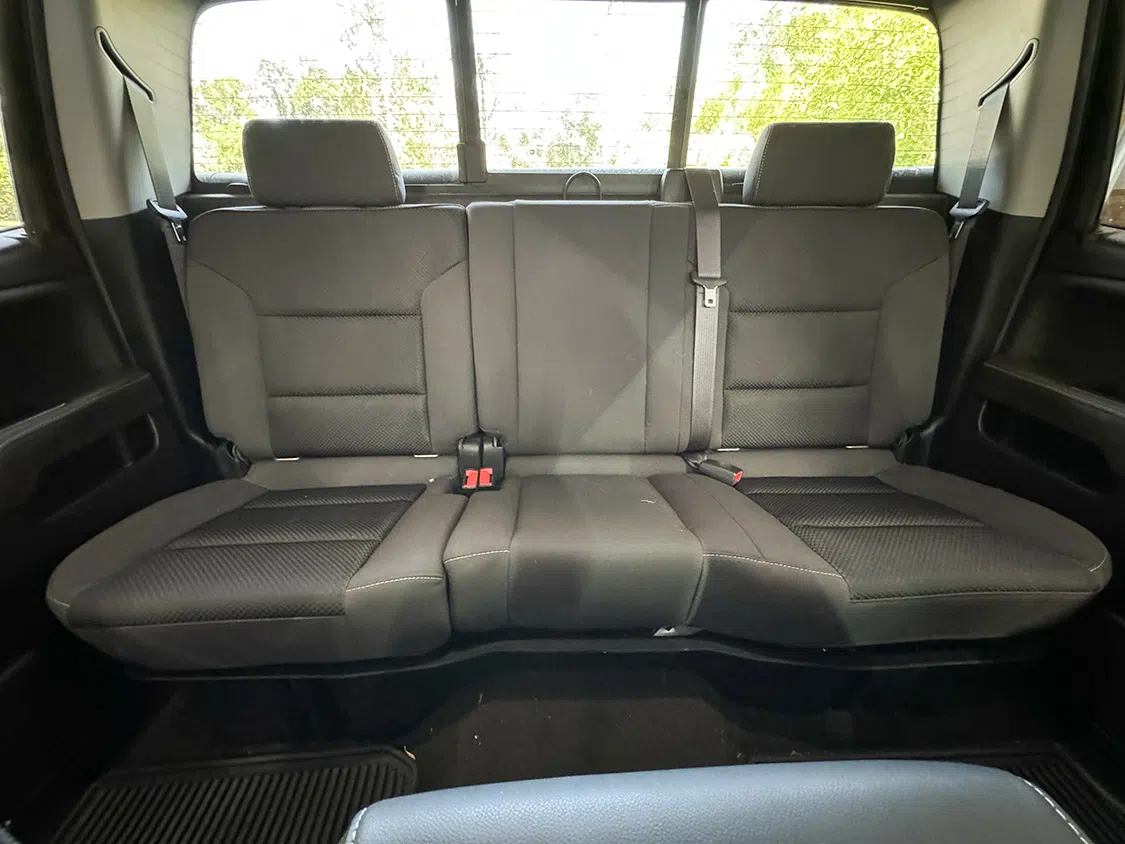
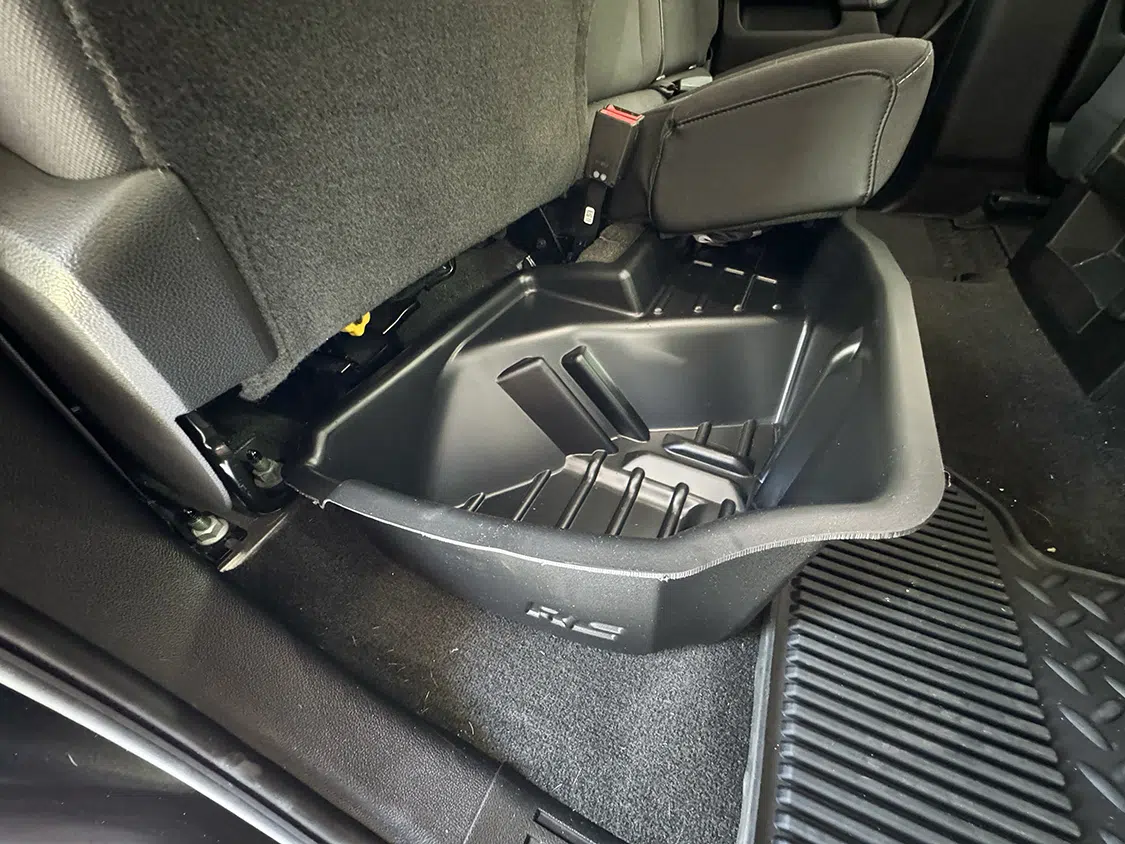
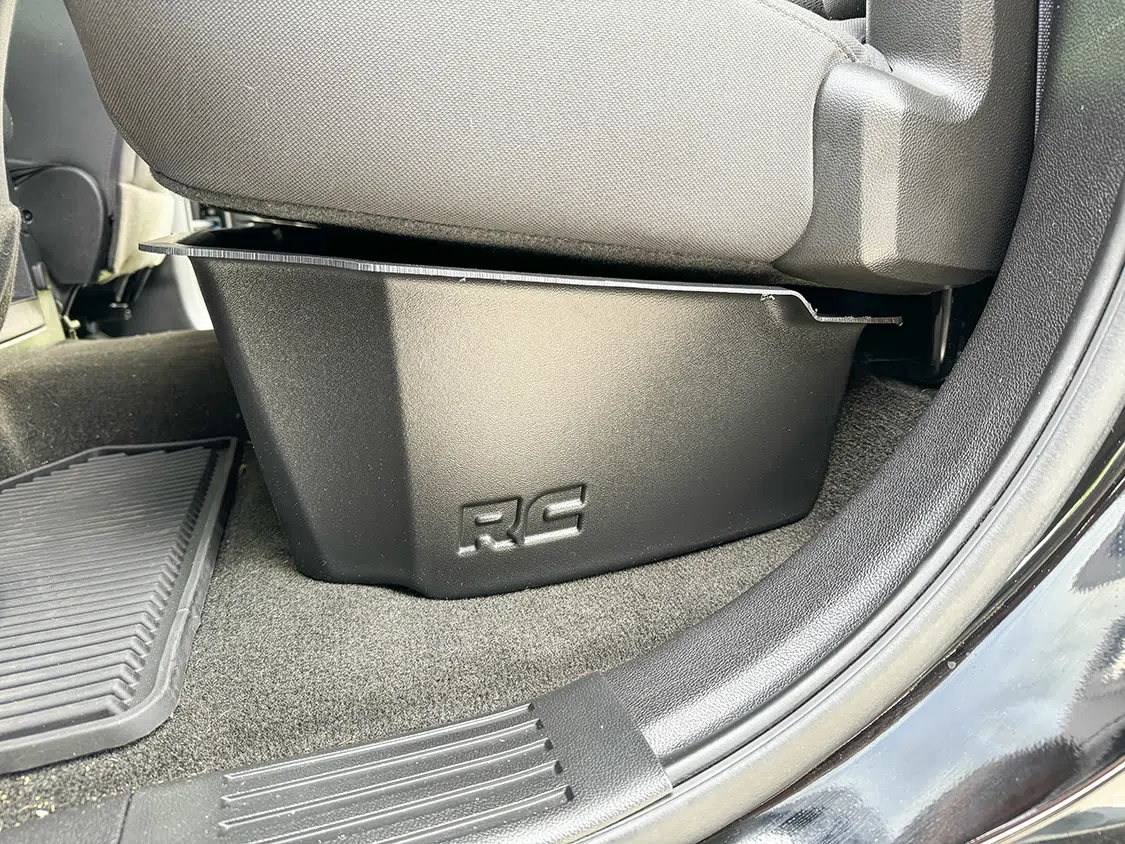
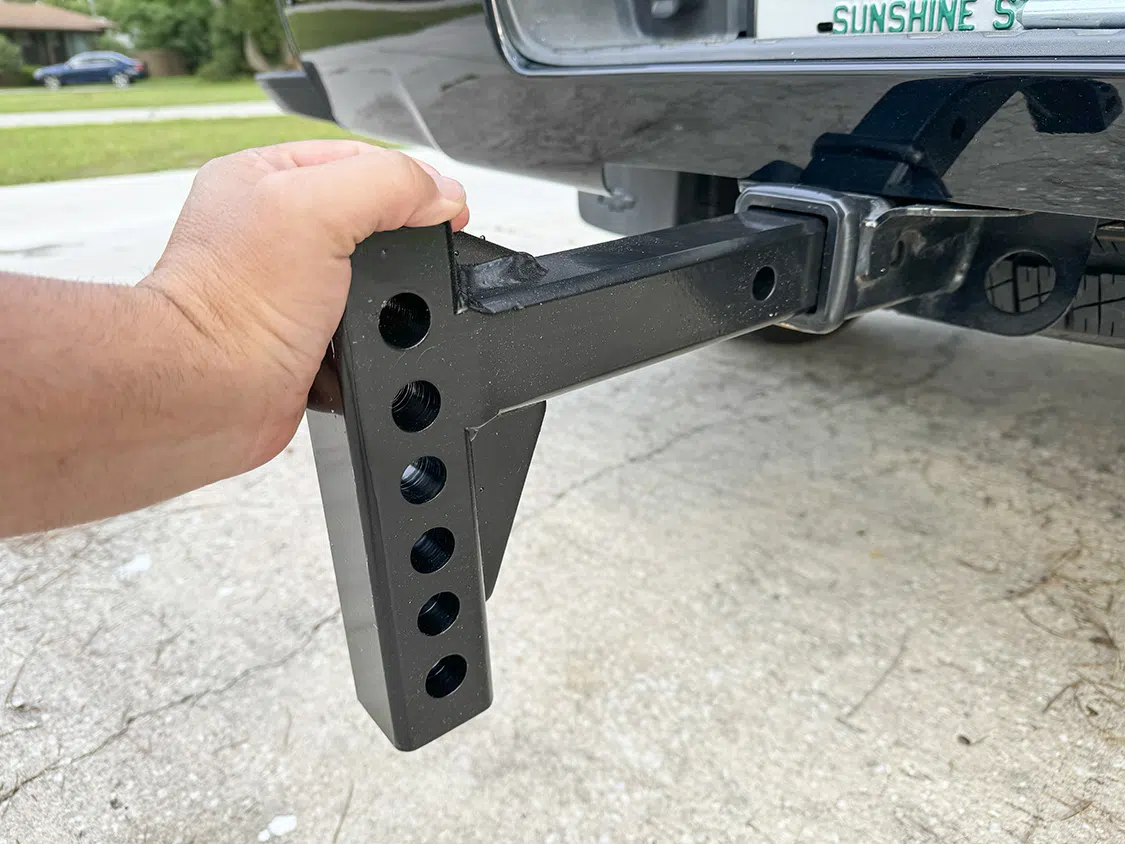
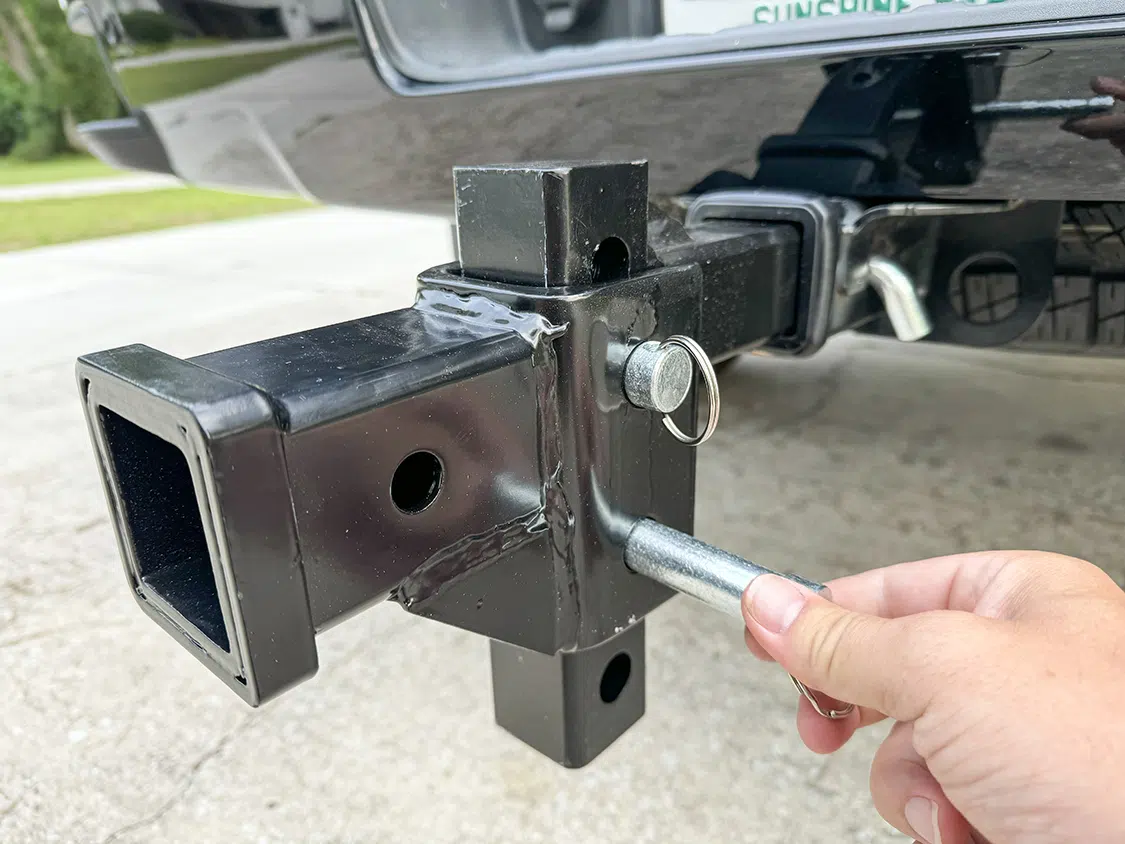
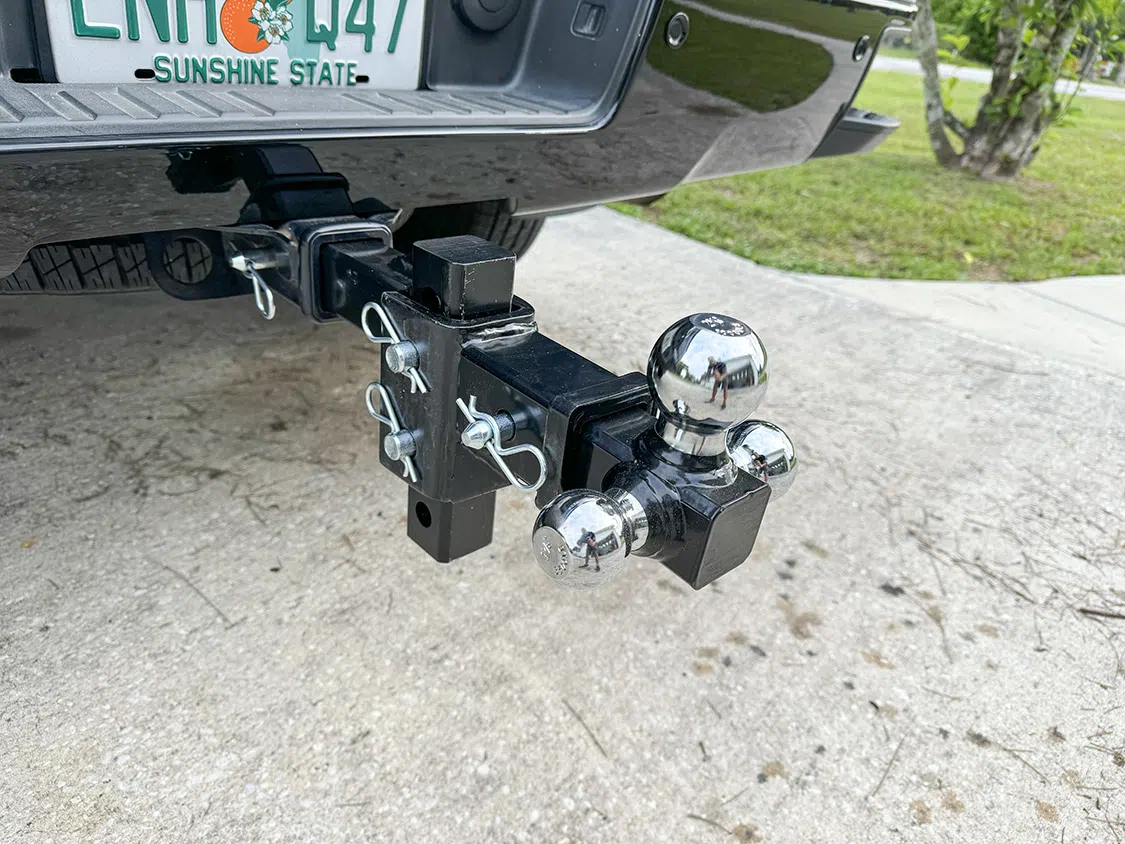
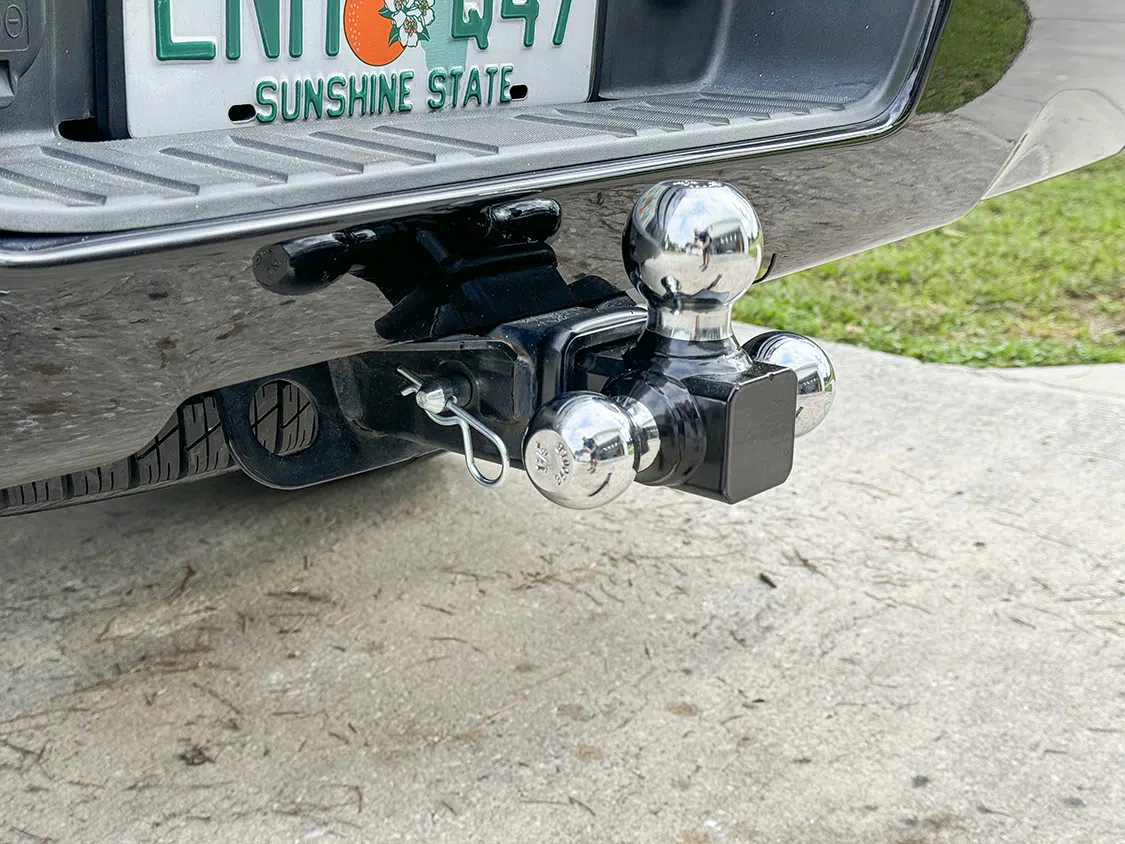
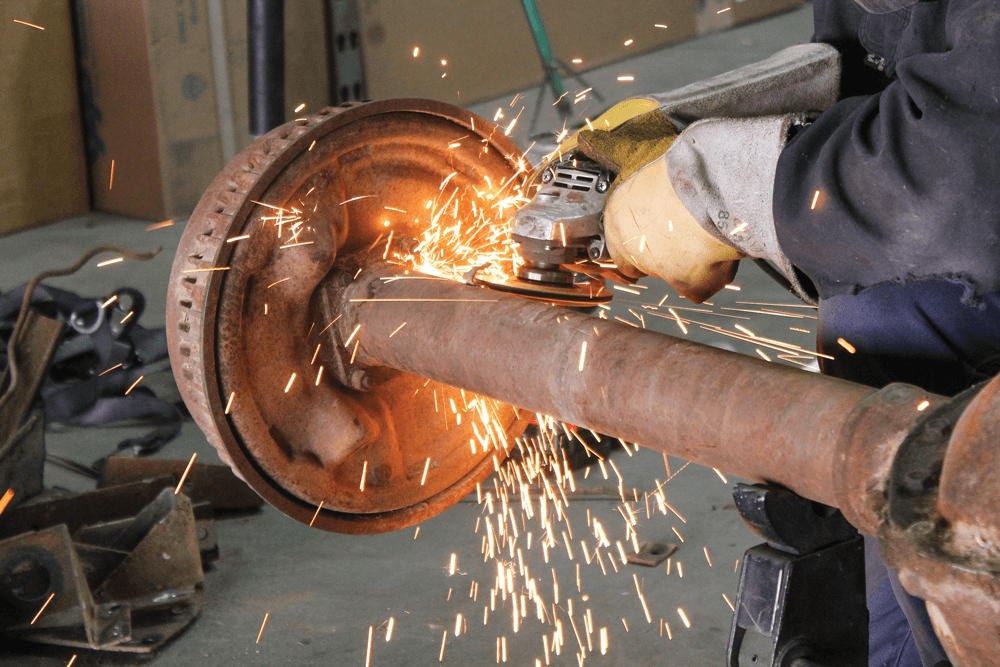
01. Our 2018 Chevy Silverado Z71 4×4 is a truck Chevrolet should be proud of designing, but a few upgrades can make it even better!02. The items on our to-do list include new upgraded tires, a 2-inch front leveling kit, rear frame coating, helper airbags in the rear, a tune-up to the computer, under seat storage, proper tow straps, seat covers, and an adjustable tow hitch.03. We picked up this truck locally in Florida, although based on these rusty factory shocks, it’s obvious the previous owner was from somewhere up north.3(a)04. A quick swap of the shocks with some auto parts store factory replacements took care of the rear in no time.04(a)05. Next is the rear helper bags. Air Lift Company provides everything you need to simply both in some bags and fix your sag.06. With the upper and lower brackets bolted in place, we set the bag into the brackets and tightened the nuts.07. We literally didn’t need to unbolt anything from the factory suspension to get these in place.08. Next, we simply pushed in the airlines and ran them to the back of the truck.09. For ease of use, we jacked up the rear of the truck and installed the air filler port under the tow hitch bracket.09(a)10. With the helper bags installed, we wanted to clean and recoat the frame so the surface rust doesn’t continue to spread.10(a)
If you’ve been through the SEMA crunch, you know the booth vehicle is usually the one with to-do items still on the checklist as you drive in to the big show.
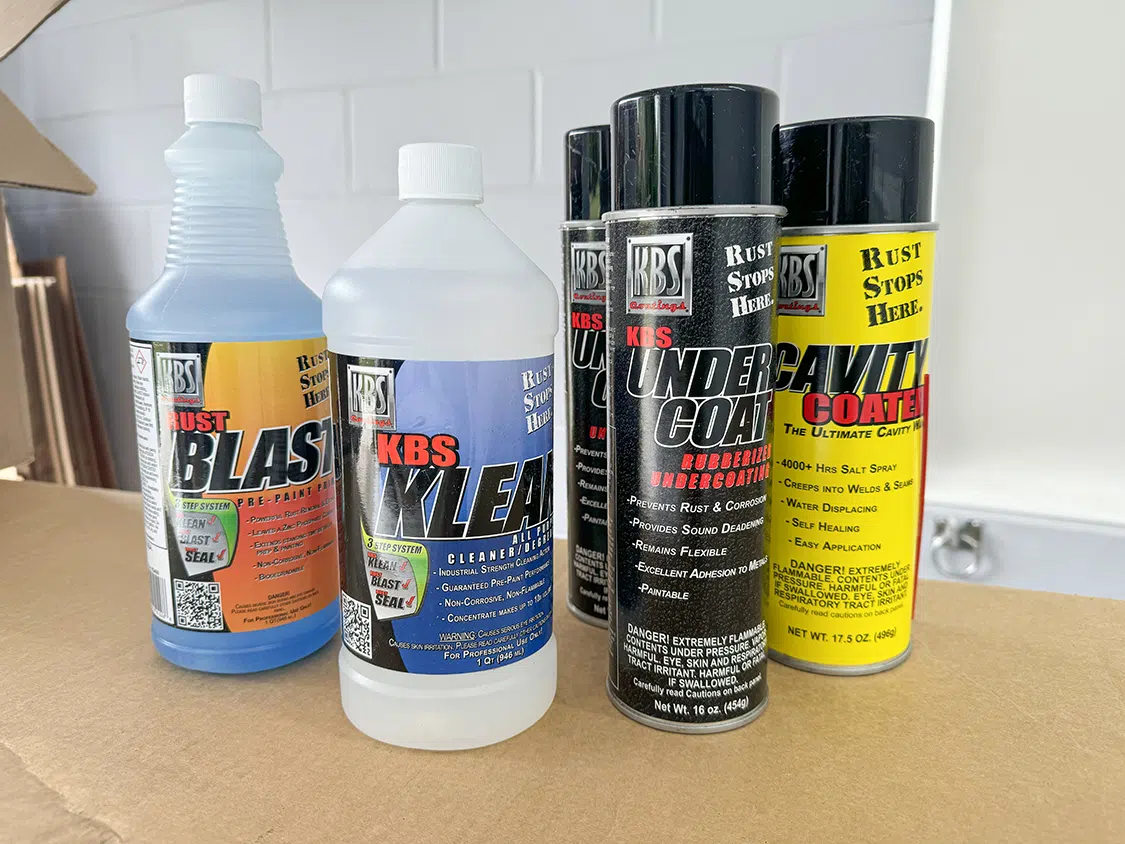
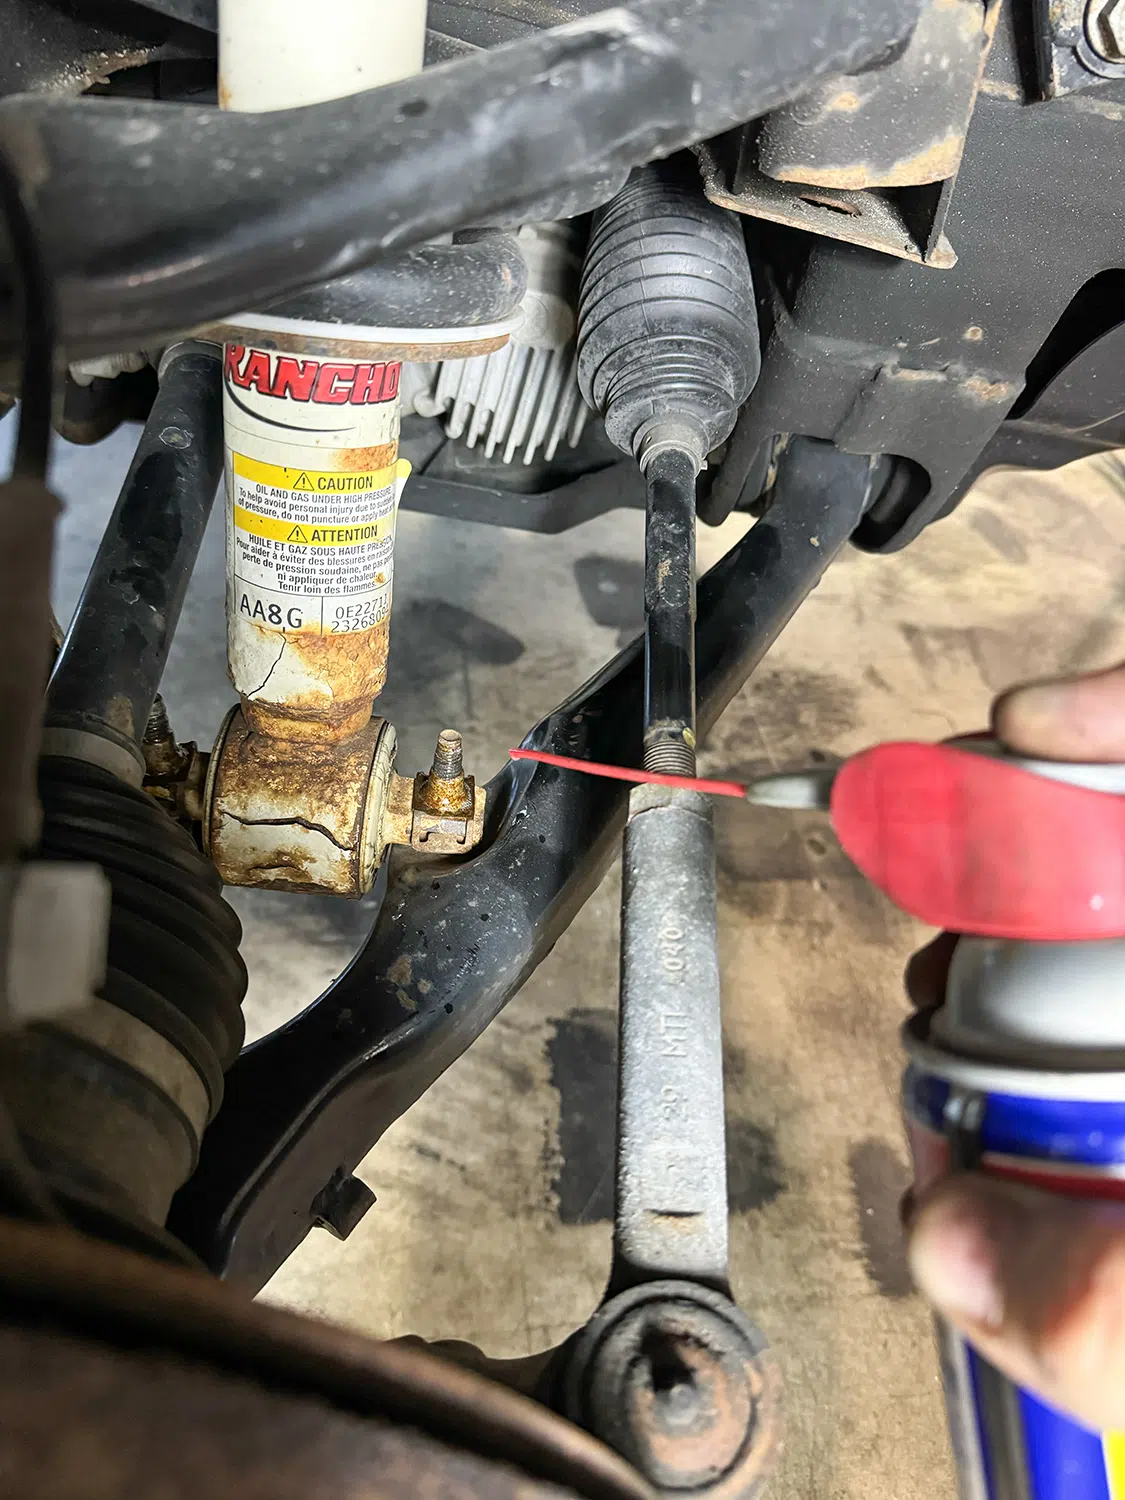
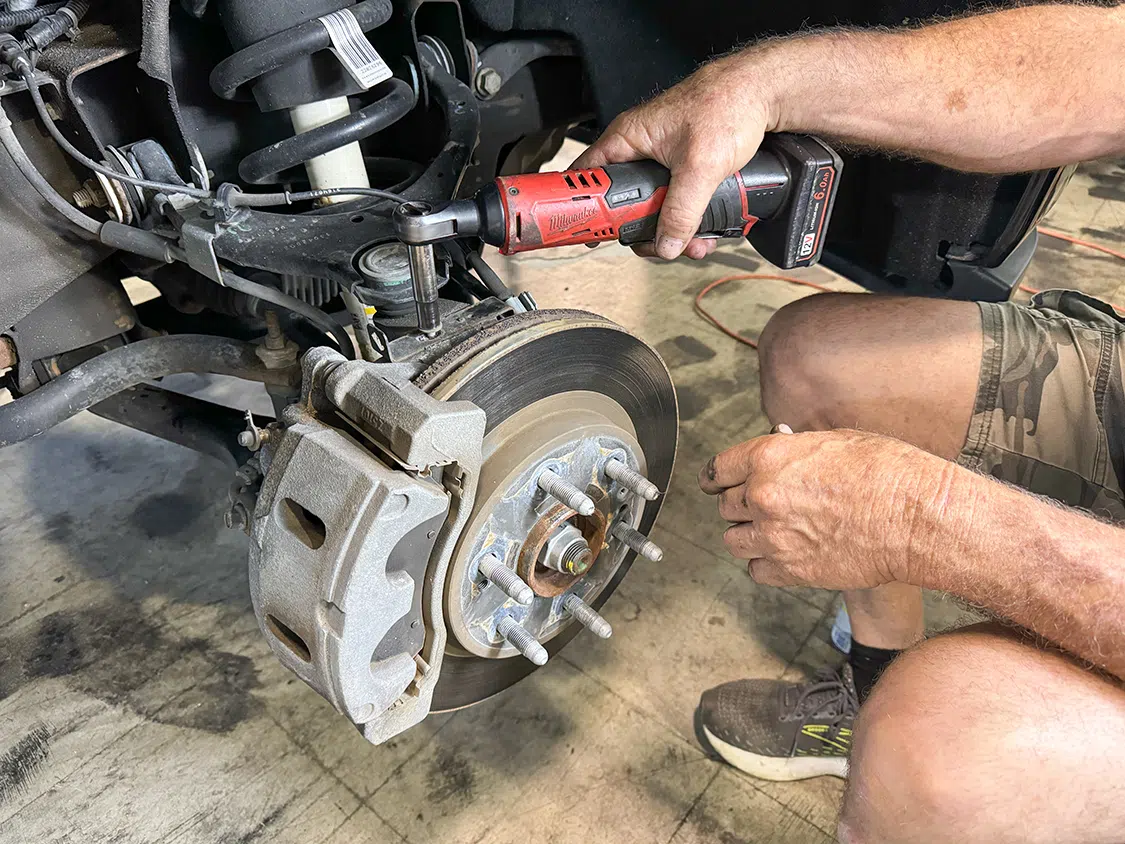
11. For a proper and long-lasting frame finish, we again turned to KBS Coatings. The company’s Rust Sealer system is exactly what our frame rails need.12. First we sprayed the KBS Klean chemical on the frame to break up the rust particles.13. After about 20 minutes of soaking, we simply washed the treatment off with the hose.14. Next up was the KBS Rust Blast which will protect the bare metal before we put on the final coat.15. After protecting the brakes and rubber hoses with tape and shop rags, we could now use the KBS Undercoating to fully cover the frame from the elements.16. Just look how nice the frame is now—like a brand-new truck!17. Next, we moved to the front. WD-40 is a must when you see this much rust. The last thing we wanted was a stripped bolt or nut.18. The first bolt to come out was the brake line bolt. The calipers did not need to be removed for this leveling kit install.19. Next was the nut for the tie-rod end, which was a breeze with an impact gun.20. Both lower bolts in the front shocks could now be slid out and set aside.21. The upper shock nuts needed to be removed by hand—luckily we had a ratcheting open-end wrench.22. And just like that, the factory shocks could be removed and set aside. We won’t need these anymore thanks to Rough Country.23. The new level kit front shock assembly came fully assembled and ready to install. This shock and spring assembly will give us a full 2 inches of lift up front.24. The first step to putting these new shocks in was the top hat nuts, which came with the new Rough Country kit.24(a)24(b)25. Now the lower shock mount bolts could be slid in and the nuts could be loosely added. We waited to fully tighten everything until the very end.26. Next, the tie-rod end was reinstalled, again using some WD-40 to prevent any cross-threading.26(a)27. The brake lines were up next, followed by tightening everything down and double-checking all the mounts.27(a)28. And there you have it: a simple front suspension upgrade that not only gave up some additional tire clearance but also a new set of shocks to replace our old rusty ones.29. Here you can see the height difference with the factory tires before we swap them for some bigger Toyo Tires.30. The original 275-65-18 tires were replaced with a set of 275-70-18 Toyo Open Country R/T tires.30(a)30(b)31. With them bolted into place, we could step back and take in the views. This is how our Silverado should have come out of the factory!31(a)32. Next, we wanted to move the inside of the cab. These seats needed a little something to make them more comfortable and protected for the next few years.33. You may not know it but Rough Country makes these super cool neoprene seat covers for most modern trucks that easily install over the factory seat covers.34. The first step to installing these was to remove the headrests.35. Four simple tasks to install these covers included sliding the cover over the seat, tucking the tabs through the cracks, attaching the velcro behind the seat back, and finally exposing the headrest mounts at the top of the seat.35(a)35(b)35(c)36. The bottom seat cover was just as simple as the top. Slide it on, tuck the tabs, and attach the clips.36(a)36(b)37. Moving to the headrests, we just slid over the cover and attached the velcro.37(a)38. This kit also came with a cover for the center console which looks and fit great.39. The final look is super nice and smells great!!40. The rear seat covers are just as simple as the front, and we also picked up an under-seat storage unit from Rough Country.41. The plastic storage bin was simply set into place, which added additional cubbies to keep things where you want them, and still allows the seat to fully collapse.41(a)42. This Rough Country tow hitch is perfect for any truck at any height. You can add the adjustable height bracket for lifted trucks or simply mount the hitch without it.42(a)42(b)43. Our truck is not high enough to need an adjustable bracket so we chose to simply mount the ball directly to the hitch.43(a)44. To secure our load properly, we needed some serious straps that we could count on. These straps from Summit Racing are maybe the best set we have ever ordered.44(a)44(b)45. We tested them out with Sergeant Square and we highly recommend you order a set of these Summit Racing tow straps if you plan to pull.46. The final item we ordered was this BOLT Lock set of locks, which included a padlock for our trailer storage and a trailer lock to protect the pin. These locks are so cool because they are designed to learn your truck’s key pattern by simply inserting and turning your key. No additional keys are needed!46(a)
We use cookies to enhance your browsing experience, serve personalized ads or content, and analyze our traffic. By clicking "Accept All", you consent to our use of cookies. Visit our Cookie Policy for more info.
 Chris Hamilton
.
February 20, 2025
.
Features
Chris Hamilton
.
February 20, 2025
.
Features


Share Link