Up next 1985 Chevy C10 Sergeant Square update Published on March 15, 2023 Author SOLOMON LUNGER Tags Baer Brakes, F-100, F-100 Builder’s Guide, QA1, Share article Facebook 0 Twitter 0 Mail 0 Keeping the Rhythm Going on Our ’67 F-100 Keeping the Rhythm Going on Our ’67 F-100 
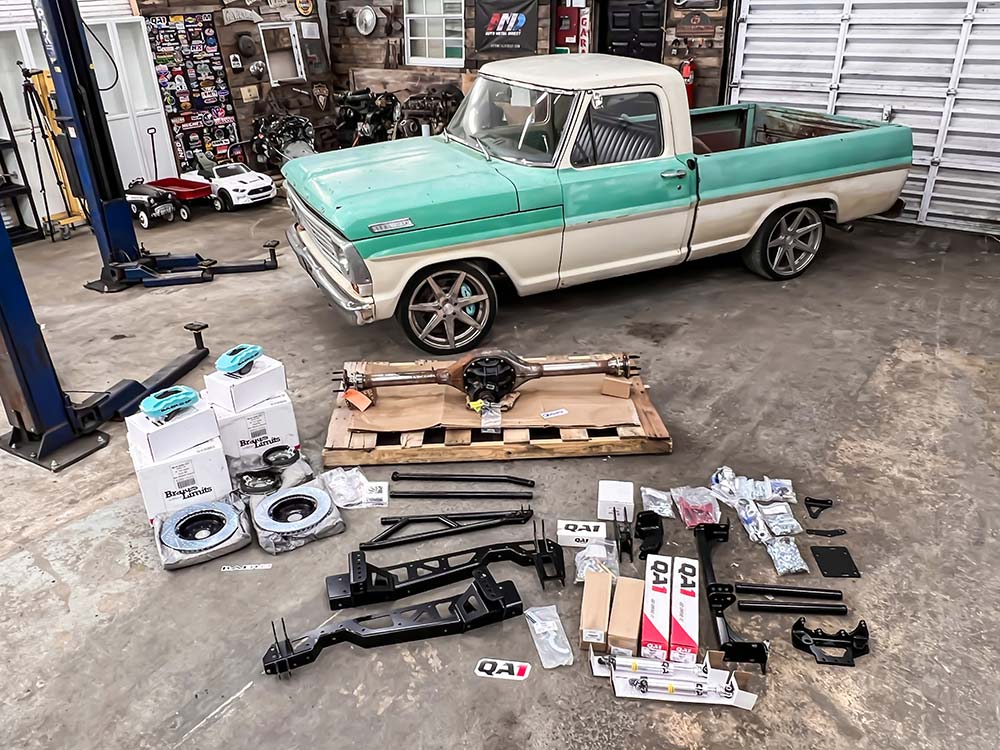
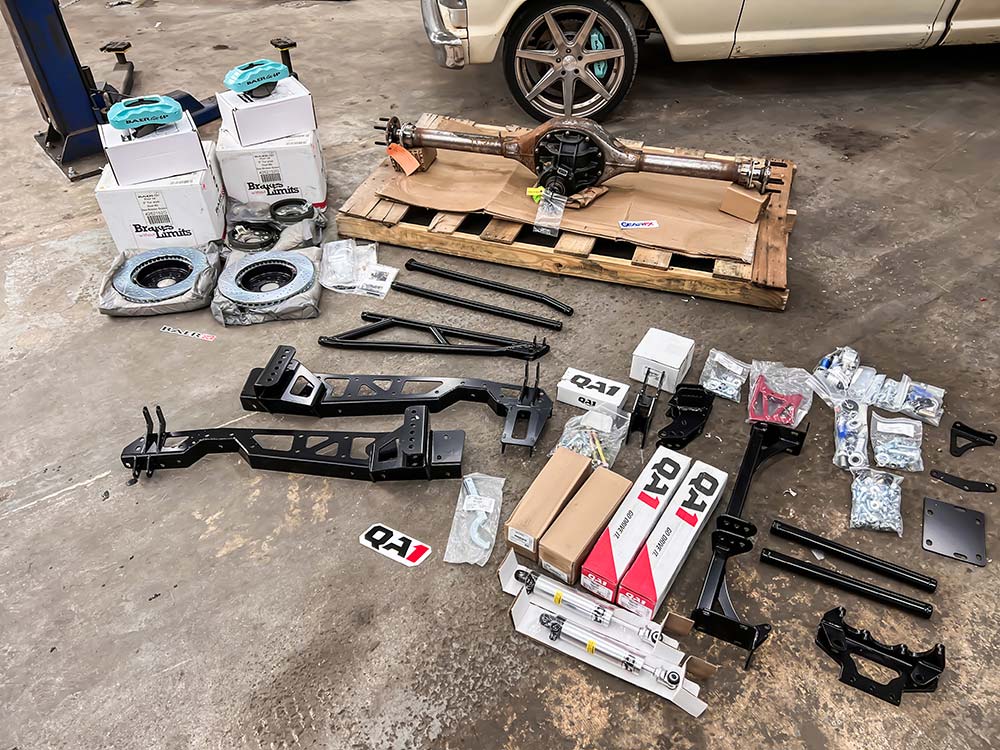
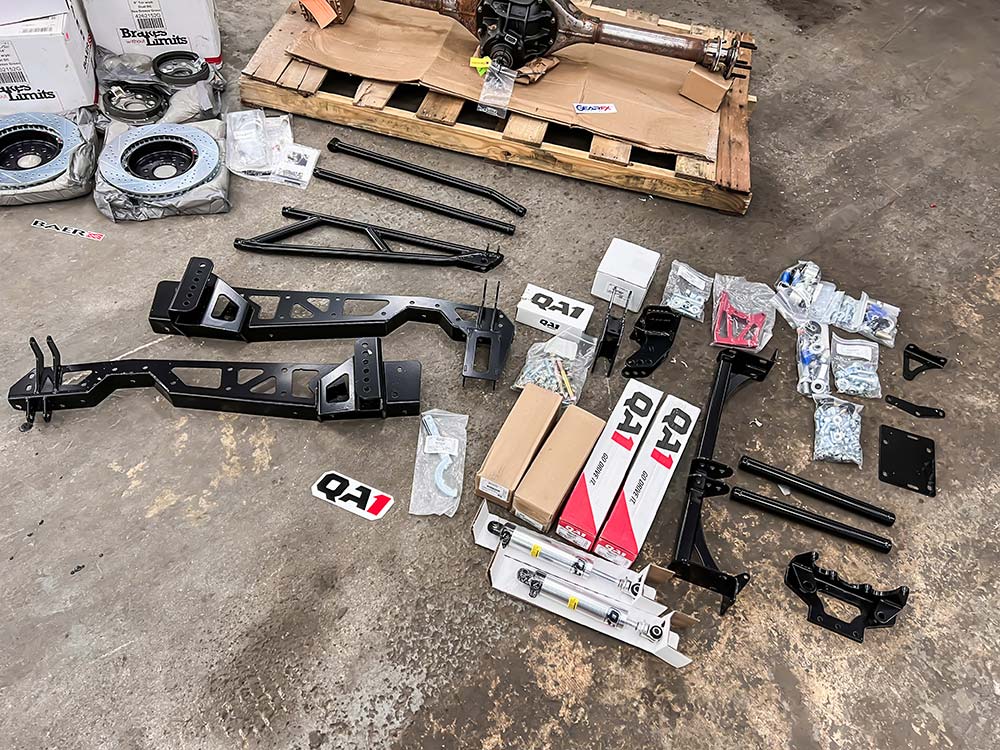
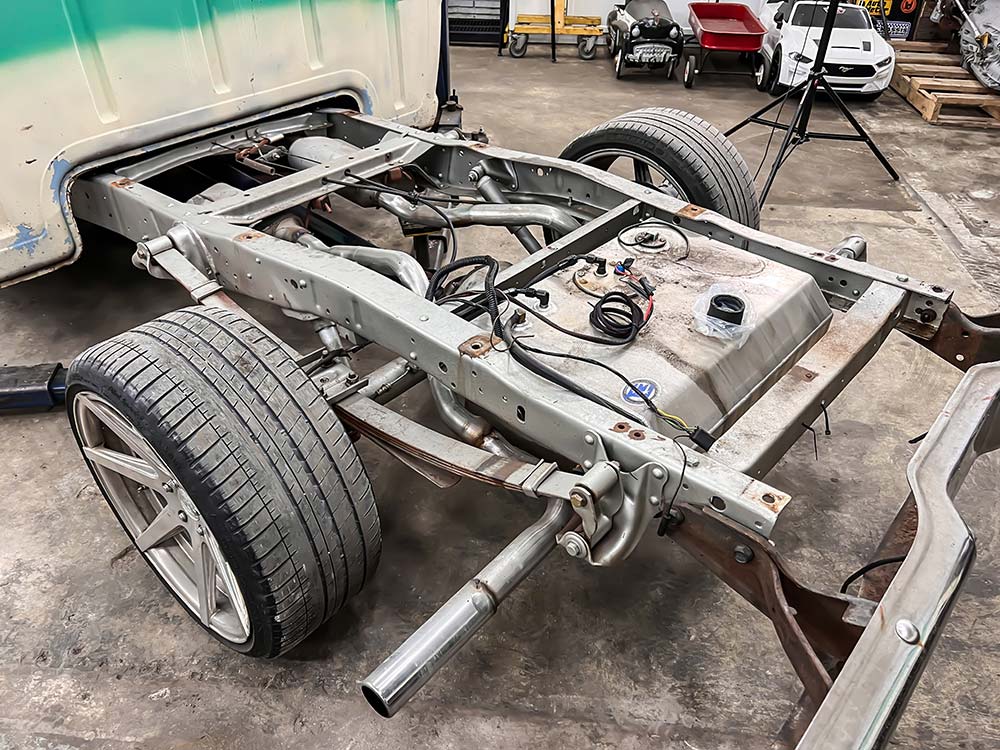
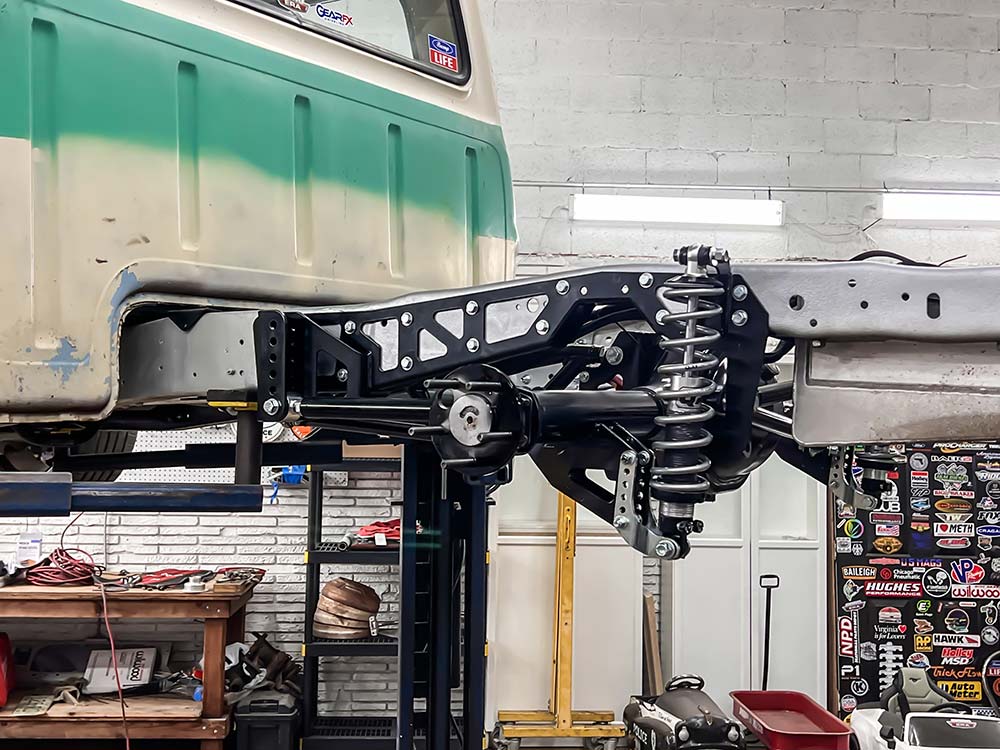
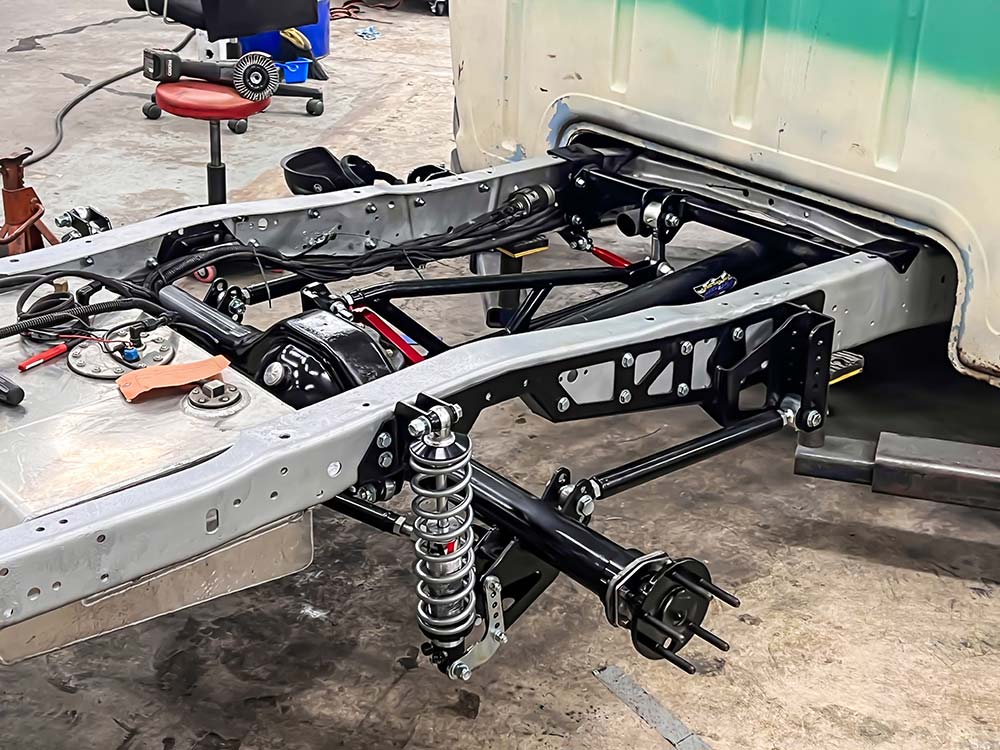
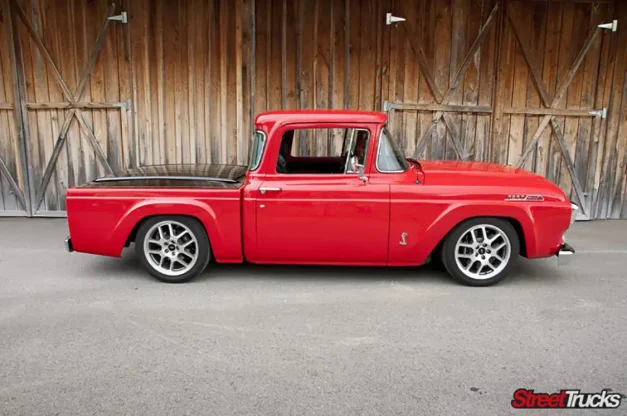
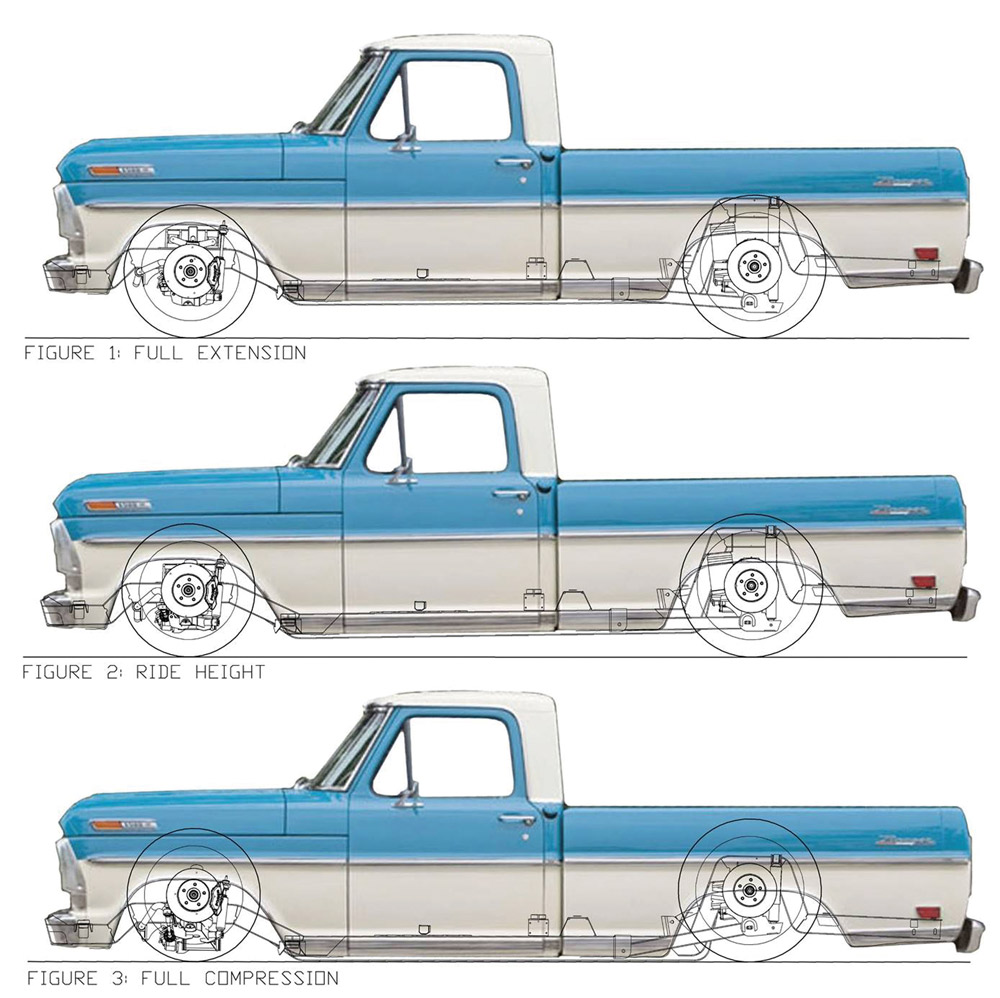
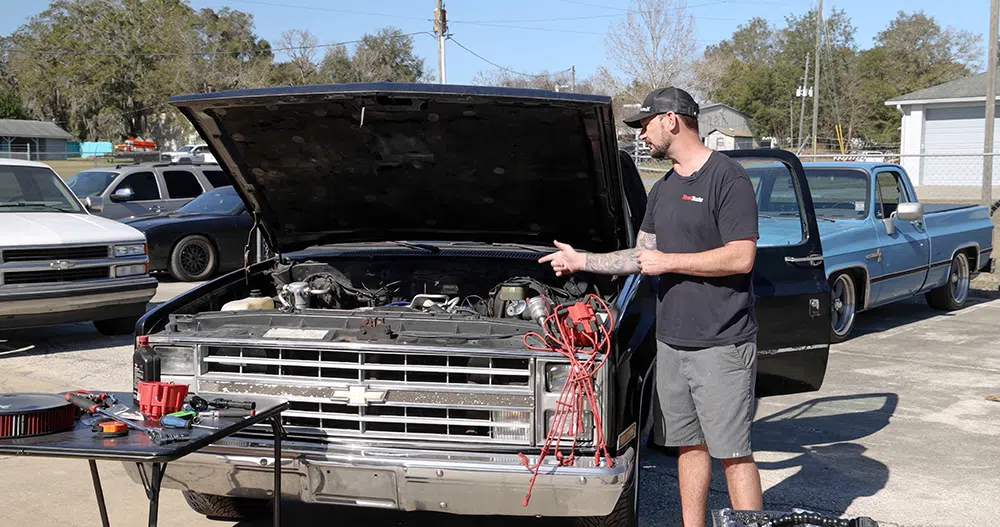
In the last issue of FBG, we did some Crown Vic front upgrades to our 1967 F-100, and we wanted to keep the rhythm going and address the rear suspension too. 
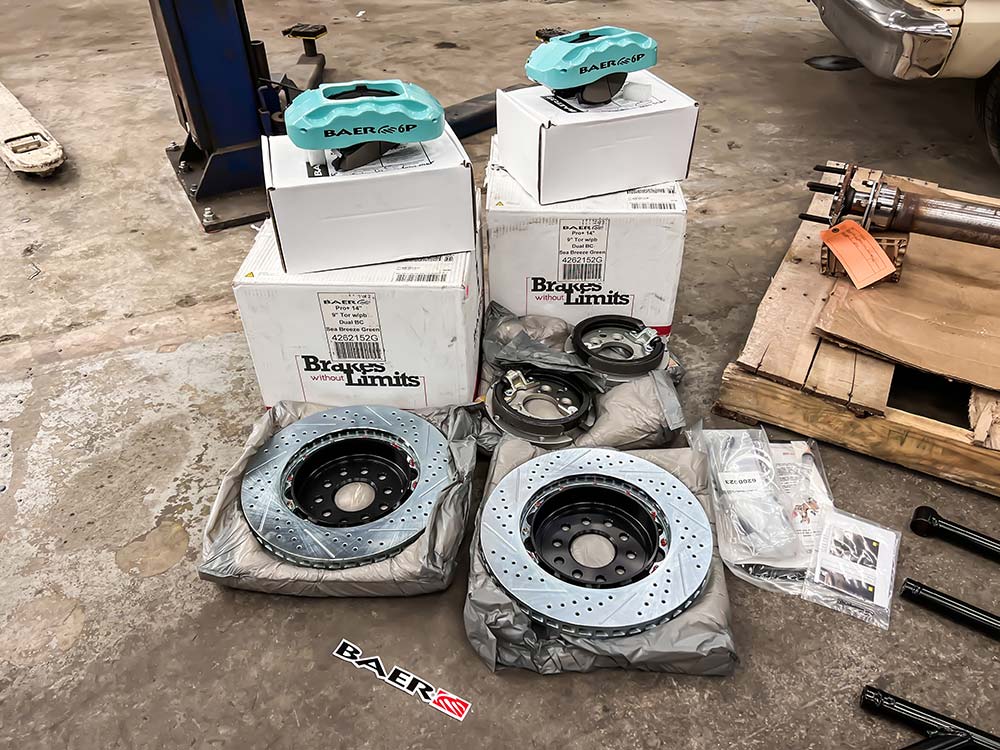
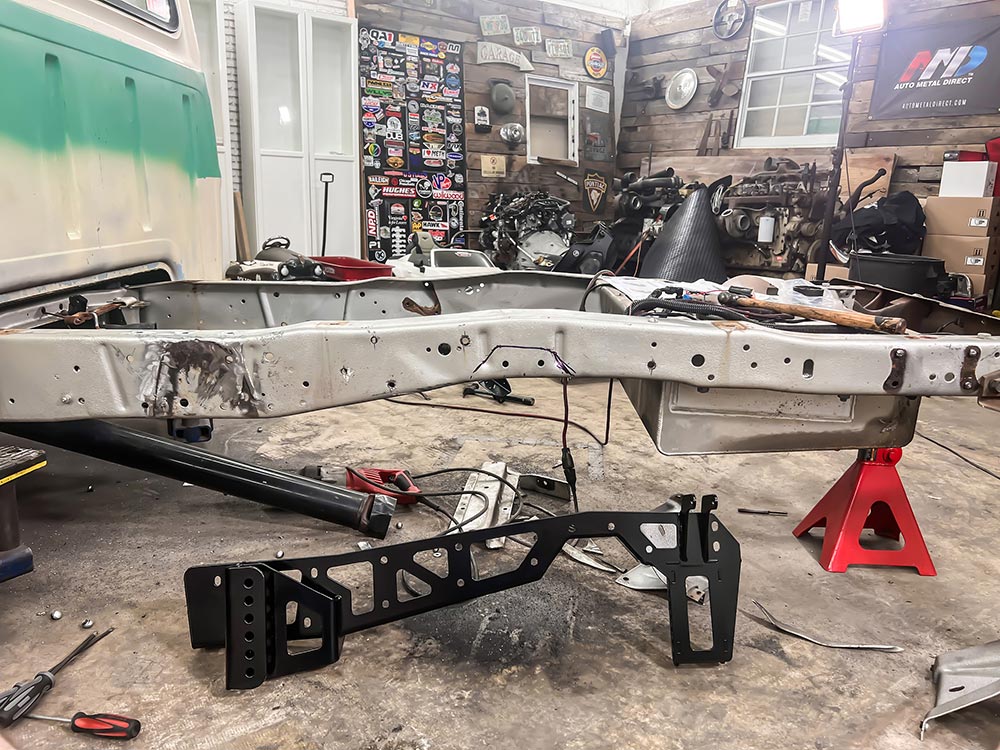
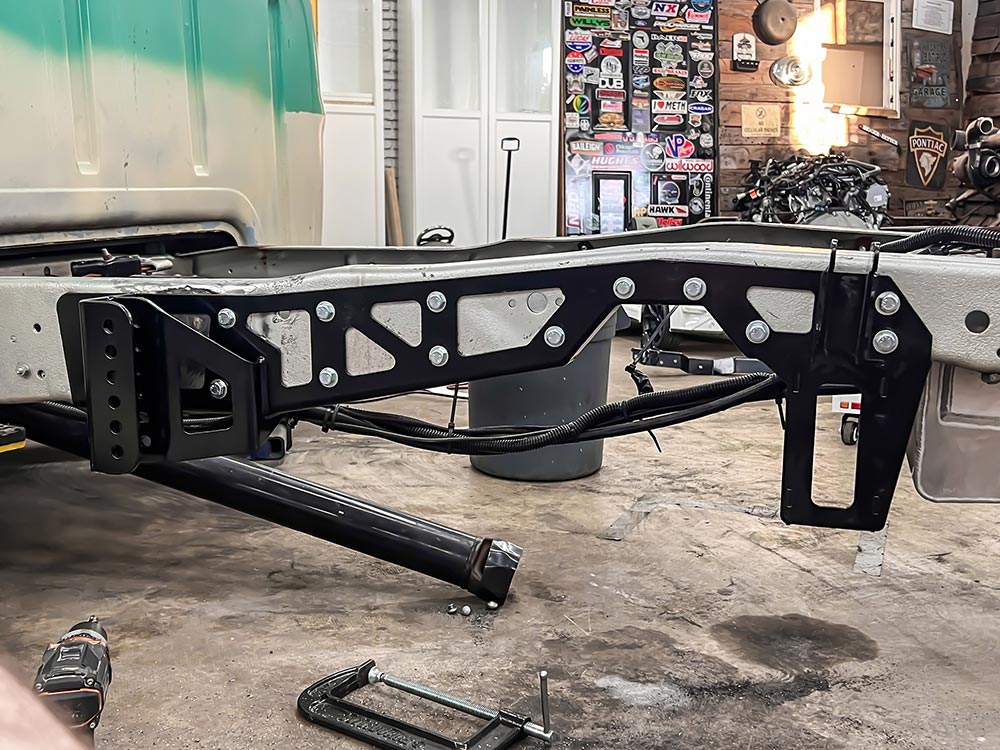
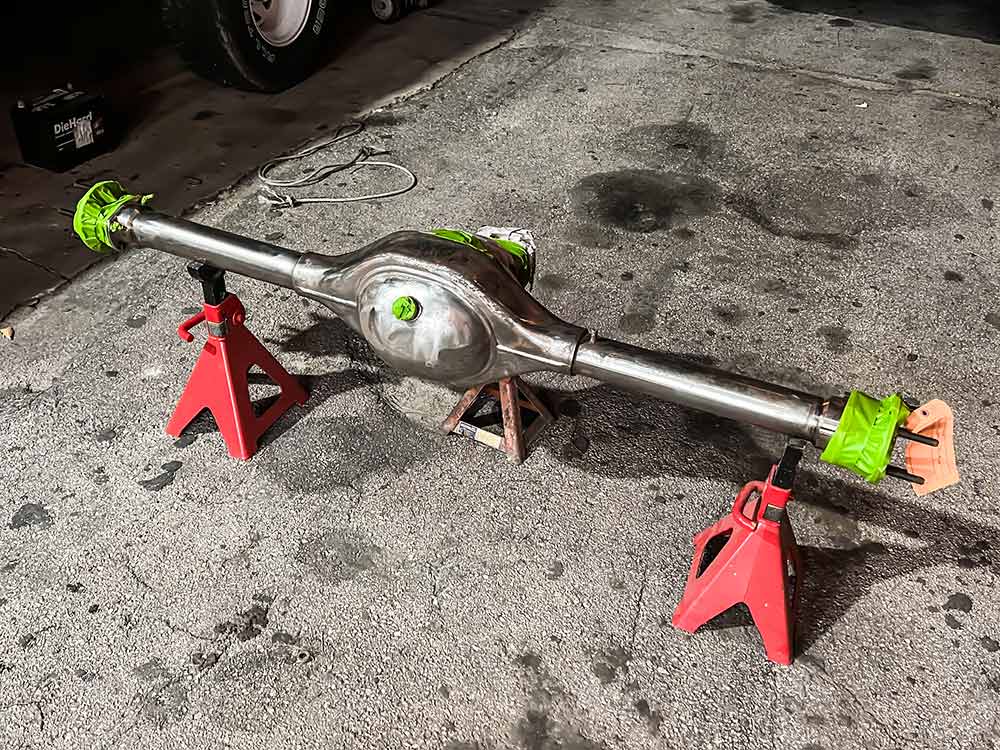
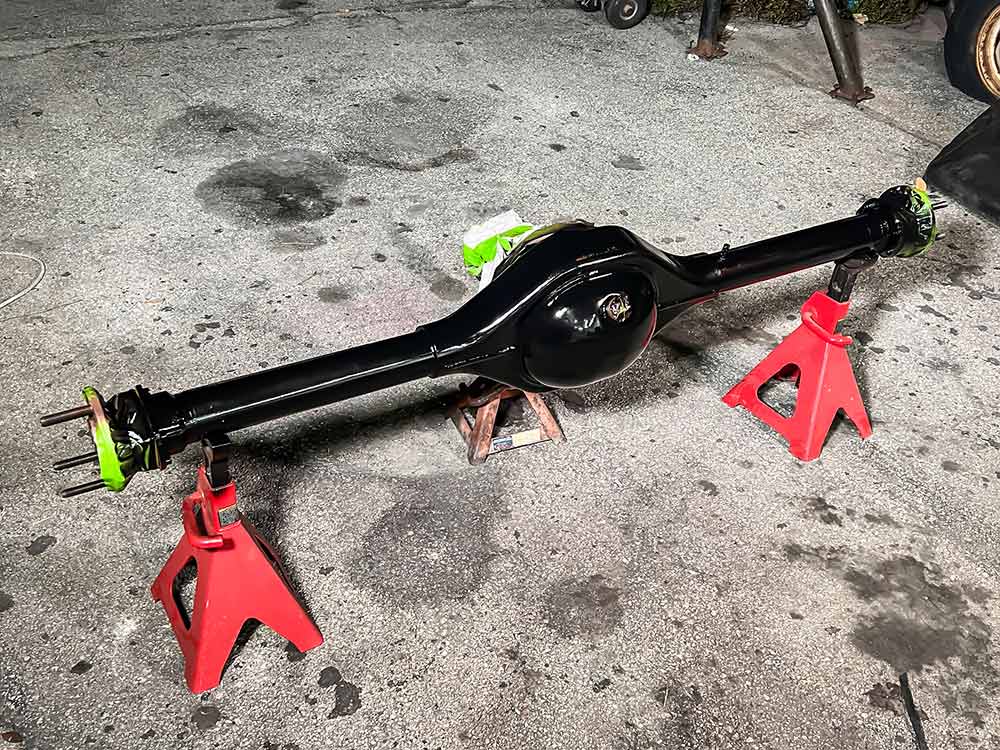
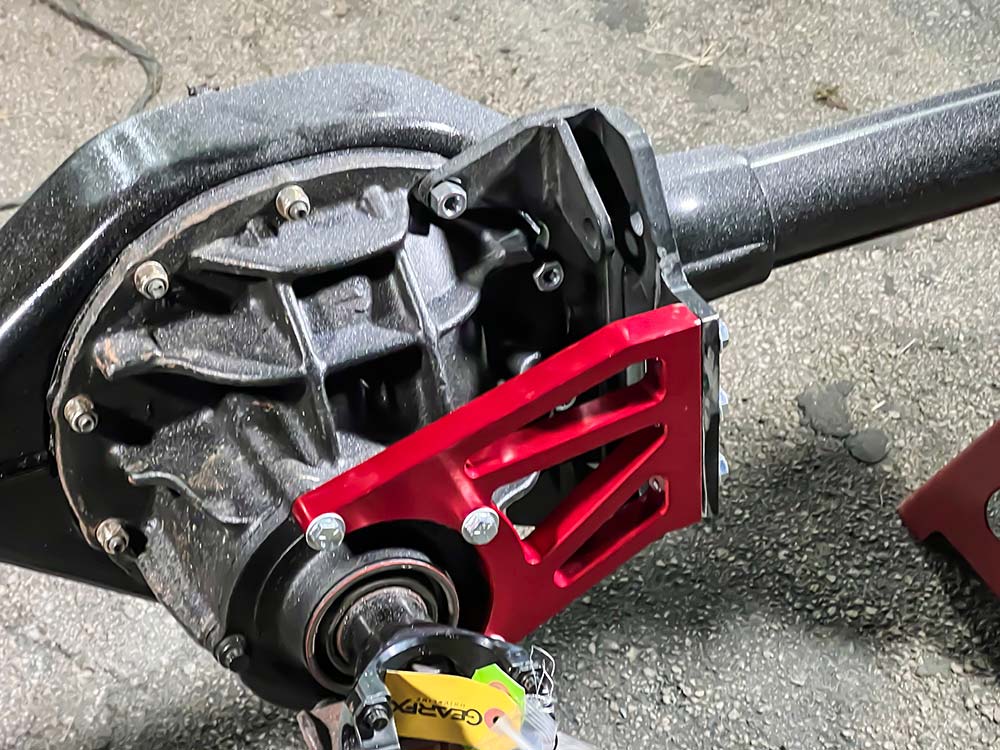
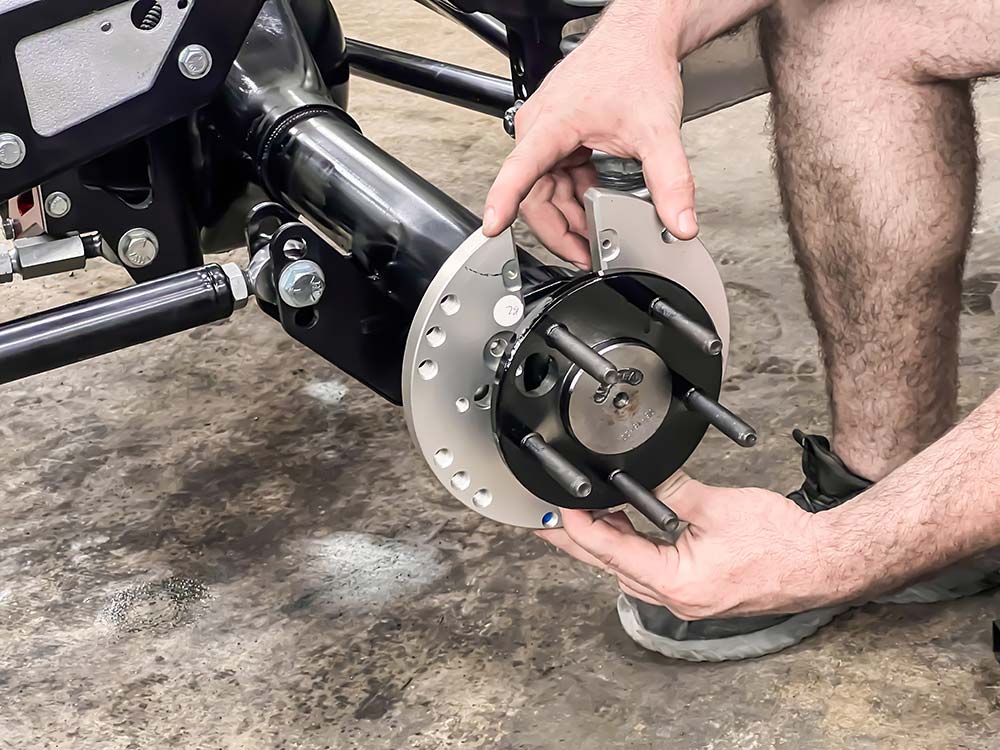
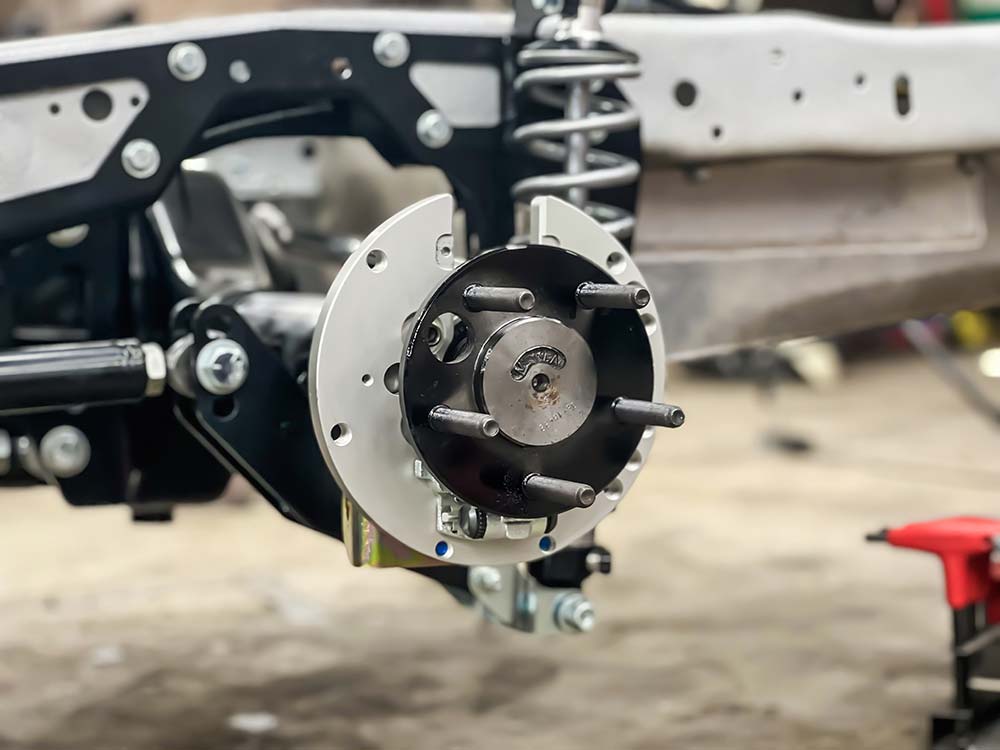
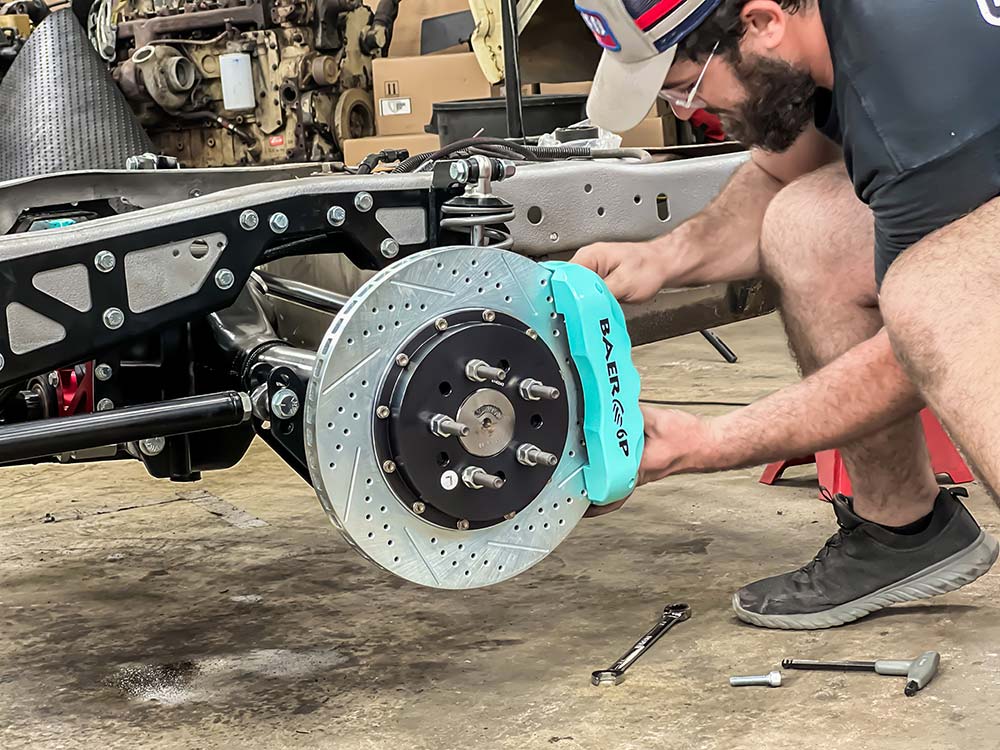
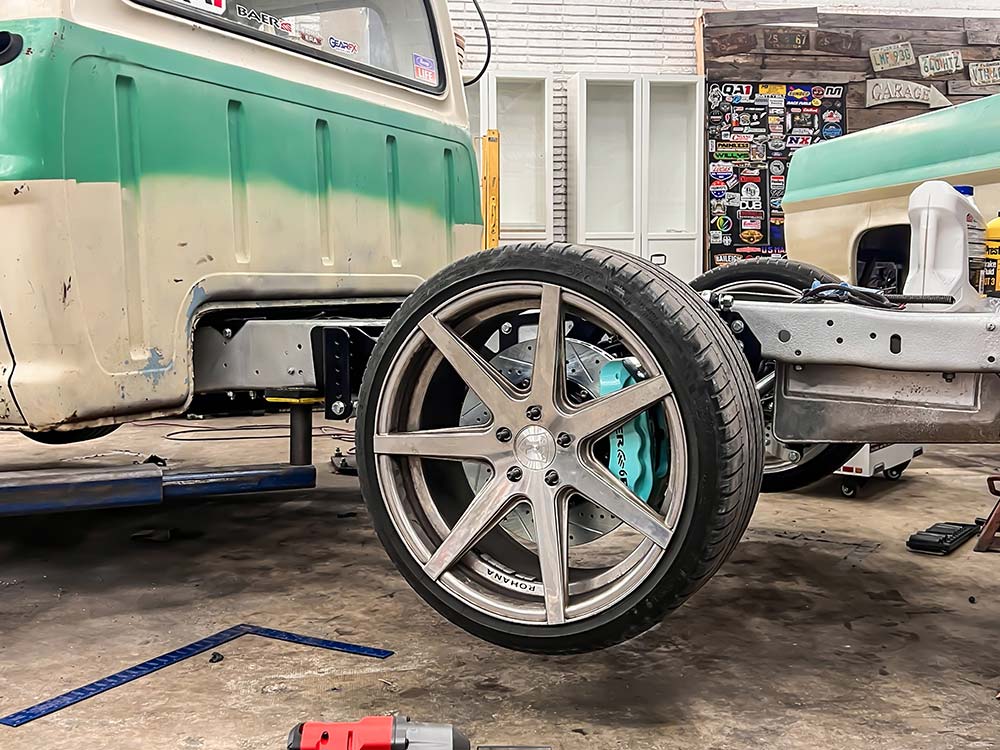
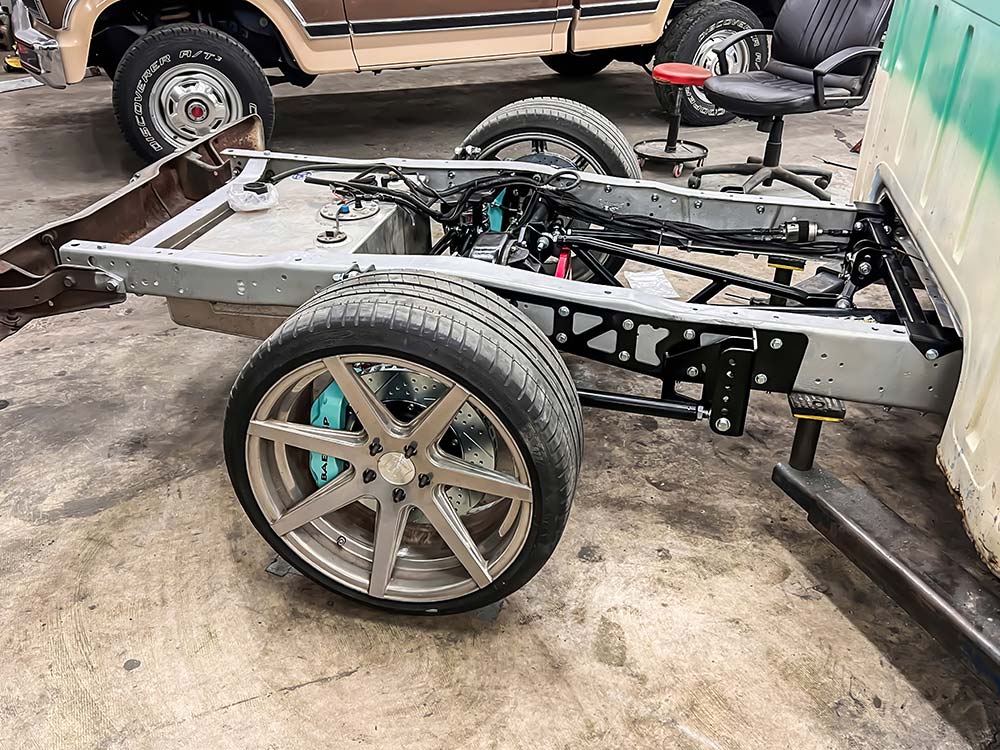
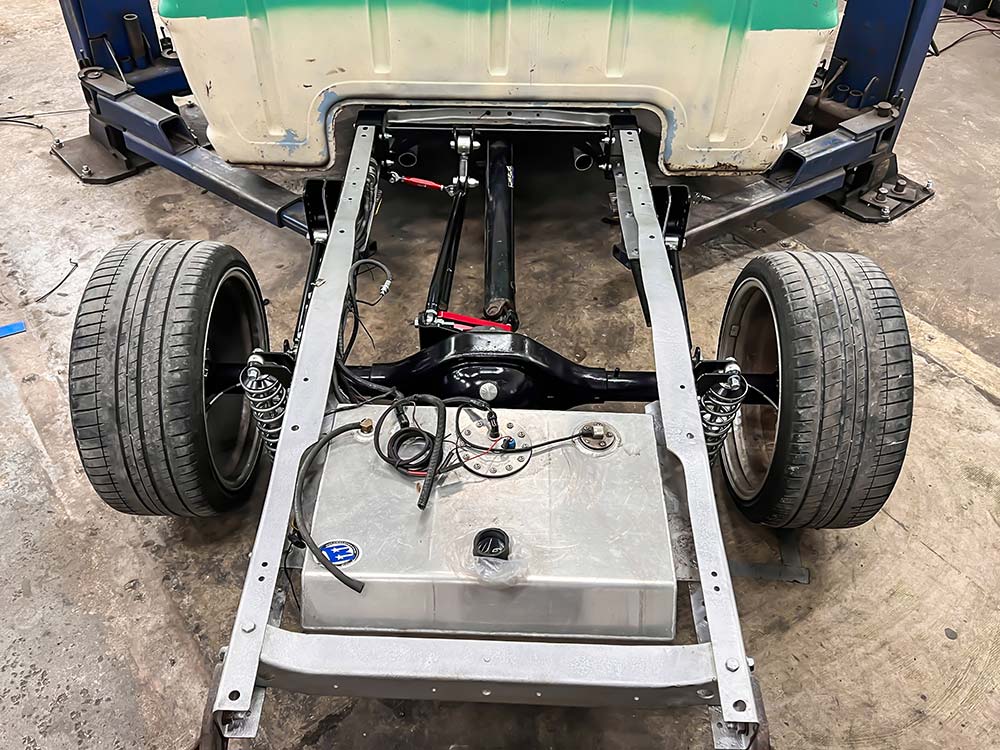
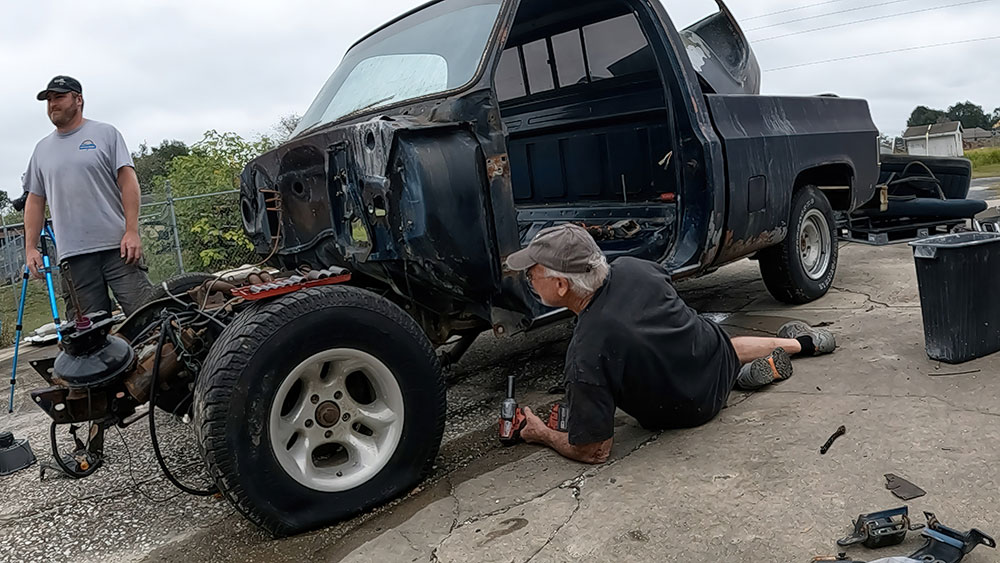
We have some fun plans with this ’67 F-100, and power is one of them. With that in mind, we elected to go for a new 9-inch GearFX driveline housing with 35 spline axles, 3:70 gears, a Detroit locker. To hold that monster of a rearend in place, we have the QA1 rear suspension. Just like up front, we went with a matching set of Baer Brakes Pro+ 6-piston setup.Subscribe to our weekly newsletter 
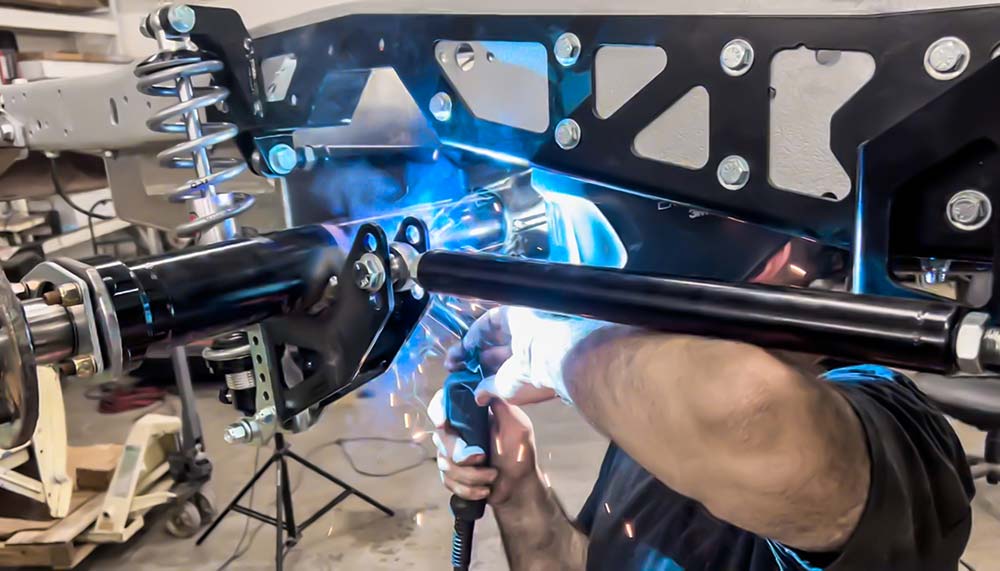
One thing we did a little differently than a usual QA1 install is that we welded the QA1 axle parts to the axle instead of bolting it on, just because of what the intent of the final build is. Here are the products we’re planning to use in this upgrade. Pictured are Baer Brakes Pro+ 6 piston calipers and 14-inch rotors with internal parking brake. Above, a GearFX driveline 9-inch fabricated housing with 35 spline axles, 3:70 gears, and a Detroit locker. We will also install a QA1 rear suspension with double adjustable coilovers. We removed the bed to make the installation that much easier. Here is what we started with. Remove the factory rear suspension and cut off all the rivets. With the supplied template, mark where you need to cut for the C-notch. Once the C-notch is cut, hold your QA1 bracket in place. Use the nine existing holes to line it up. Then drill the necessary holes and bolt it all together. Our rearend came unfinished, so we sanded it, used metal primer, and coated it with black paint. Bolt on the supplied rearend bracket that will hold on the torque arm. We got the rearend in place and welded the axle brackets on. With the rear suspension finished, it’s time to install the brakes. Step one is to remove the backing plate on the axle. Install the bracket/parking brake on the axle. Attach the rotor and install the caliper with the two supplied bolts. Shim if necessary. Take it all in because this just looks so cool!
The Final Word on the C10 Builders Guide Journey The Final Final Word (For reals this time) For the past few years, I’ve had the privilege of writing the “Final Word” for the C10 […] Ronnie January 01, 2024 c10 C10 Builders Guide Department
Word on the street | The Latest News, Rumors and Changes in the Truck World Ranger Splash Returns Classic Name Reimagined in a New Package with One-Time-Only Colors to Follow Ford Ranger fans, the Splash is back! The much-loved special […] Mike Self March 08, 2022 Department Industry News Latest Press Release Product Reviews Profiles Uncategorized
We tested "old farmer tricks" to see if these $0 car repair techniques actually work. Thanks to Keeps for sponsoring today’s video. Click here http://keeps.com/donutmedia to get 50% off your first order of Keeps hair loss treatment. We tested “old […] Adam Johnson July 26, 2022 Department Industry News Latest Press Release Product Reviews Profiles Uncategorized Videos
Online Exclusive Feature "Siete 0" A 1970 GMC 1500 Truck Specs: Subscribe to our weekly newsletter Owner: Alfonso J. Romo Truck: 1970 GMC 1500 Name: Siete O Location: California Engine: Original GM, SBC, […] Adam Johnson January 14, 2022 Department Features HEADLINE Latest Uncategorized