 BRANDON BURRELL
.
November 12, 2020
.
Department
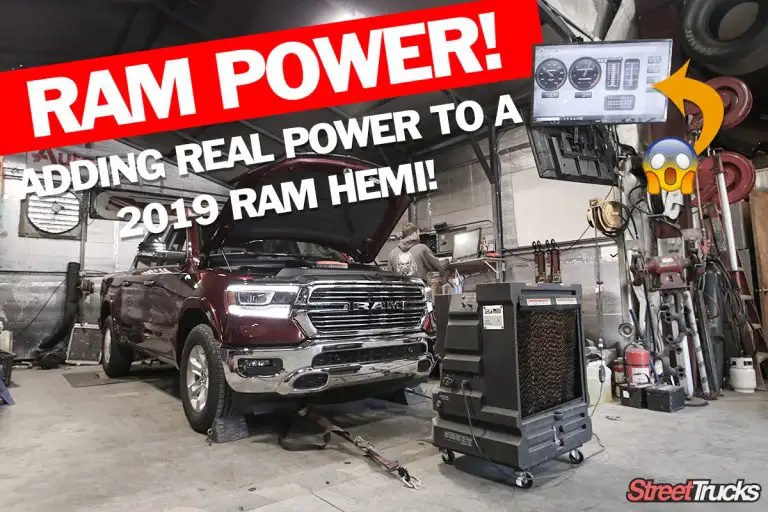
For most of our readers, getting better performance from their trucks is a must. Whether it is more power for quicker acceleration or more torque for towing that camper or boat, upgrades are a must. Fortunately, with the newer trucks, gaining better numbers is easy if you and a couple buddies can turn a few wrenches. For our project truck, we started with a stock 2019 Ram 1500 Laramie 2WD. Being it has the 5.7L HEMI powerplant, it was pretty peppy off the lot, but we knew we couple get more out of it with an afternoon of hanging out in the garage with friends.
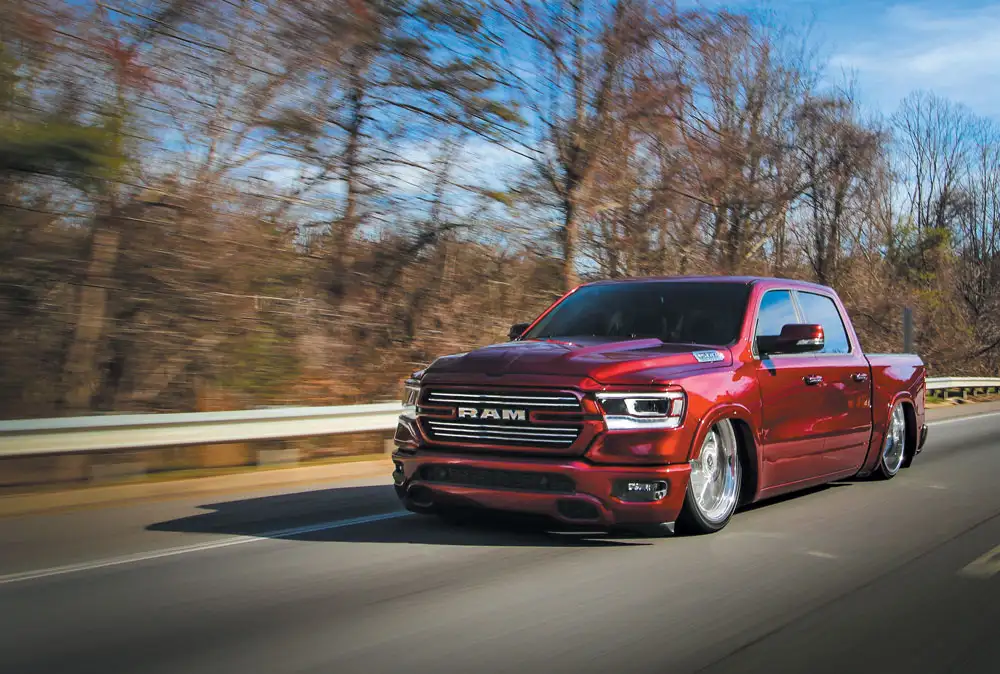
To open up the air input to the motor, we picked up a Vararam Industries Air Grabber (P/N VR-HEMI-5G, $369 retail) that replaces the stock, restrictive air box. This intake actually performs better as the truck picks up speed and the air is forced into it. To expel the burnt gasses, we swapped out the factory exhaust with a Borla S-Type Cat-back exhaust with 5” polished tips (P/N 140752, $985 retail). This exhaust is a direct bolt on with no cutting or welding and it even fills out the rear bumper exhaust cut outs better than the stock tips.
To open up the stock computer’s ability and add some control to utilize features like towing mode, performance mode and economy mode, we picked up the Edge Products Pulsar Tuner (P/N 32453, $500 retail) This tuner is a quick 10 minute install that uses your steering wheel cruise control buttons to change settings at any time. We also picked up and Edge Products Insite CST2 screen (P/N 871300, $435 retail) to add more views into the truck’s temperatures and readouts. These ease of install on all the parts for this upgrade makes for a fun afternoon in the garage with friends, which provide more comic relief than actual help, with some simple hand tools and a Quickjack to allow for easier access to the exhaust. Follow along as we go through some of the steps needed for this upgrade.
SOURCES:
Borla Exhaust
805-986-8600
borla.com
Vararam Industries
832-975-0671
Varram.com
Edge Products
888-360-3343
Edgeproducts.com
Tameless Performance
828-505-8195
Tamelessperformance.com
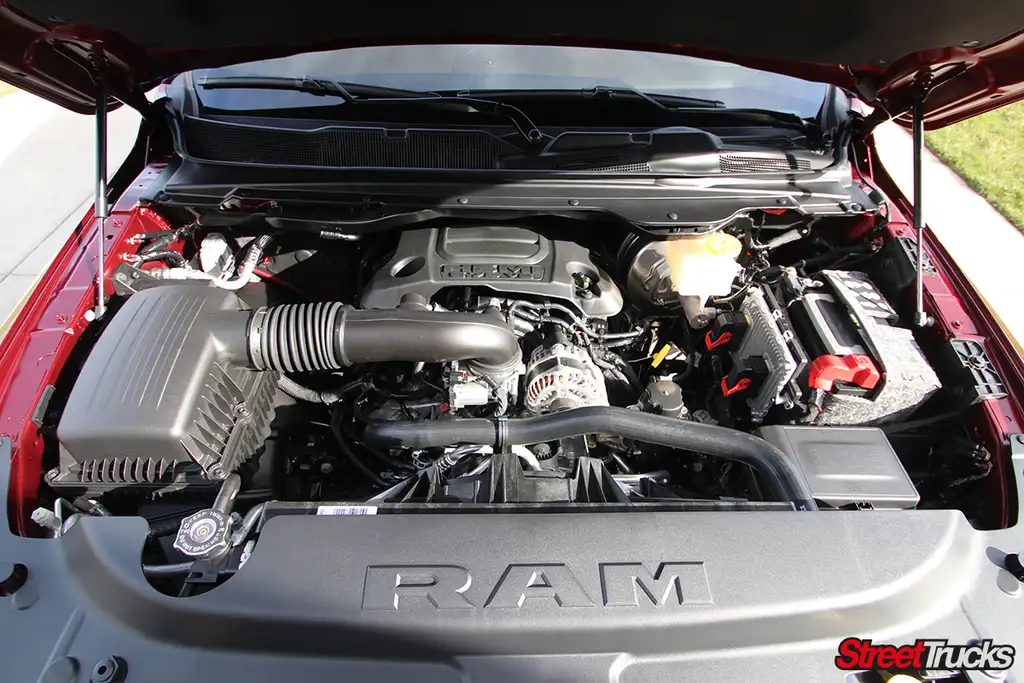 Starting with a stock, brand new engine bay makes things a little easier and less messy for sure. That stock, restrictive air box must go to allow for better airflow.
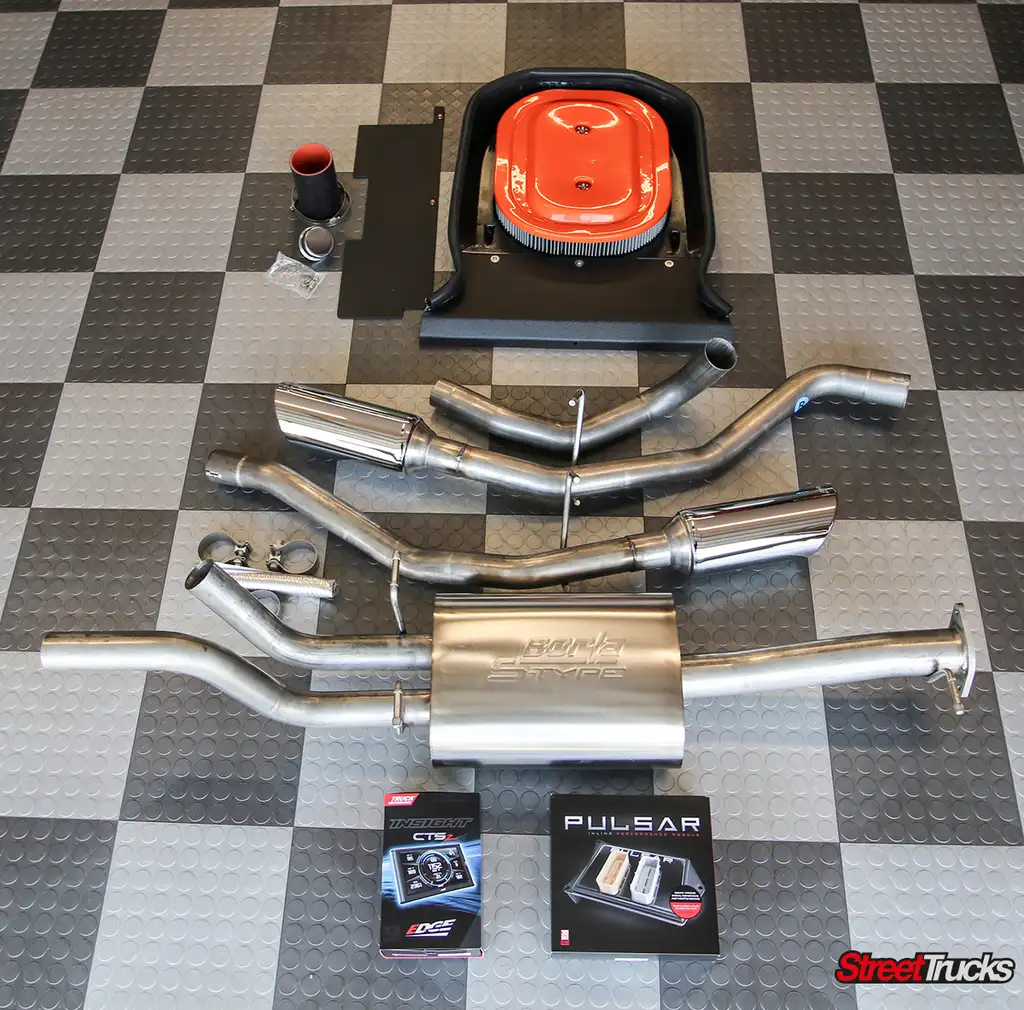 With all the parts laid out, you can see that there’s not a lot involved in an upgrade like this.
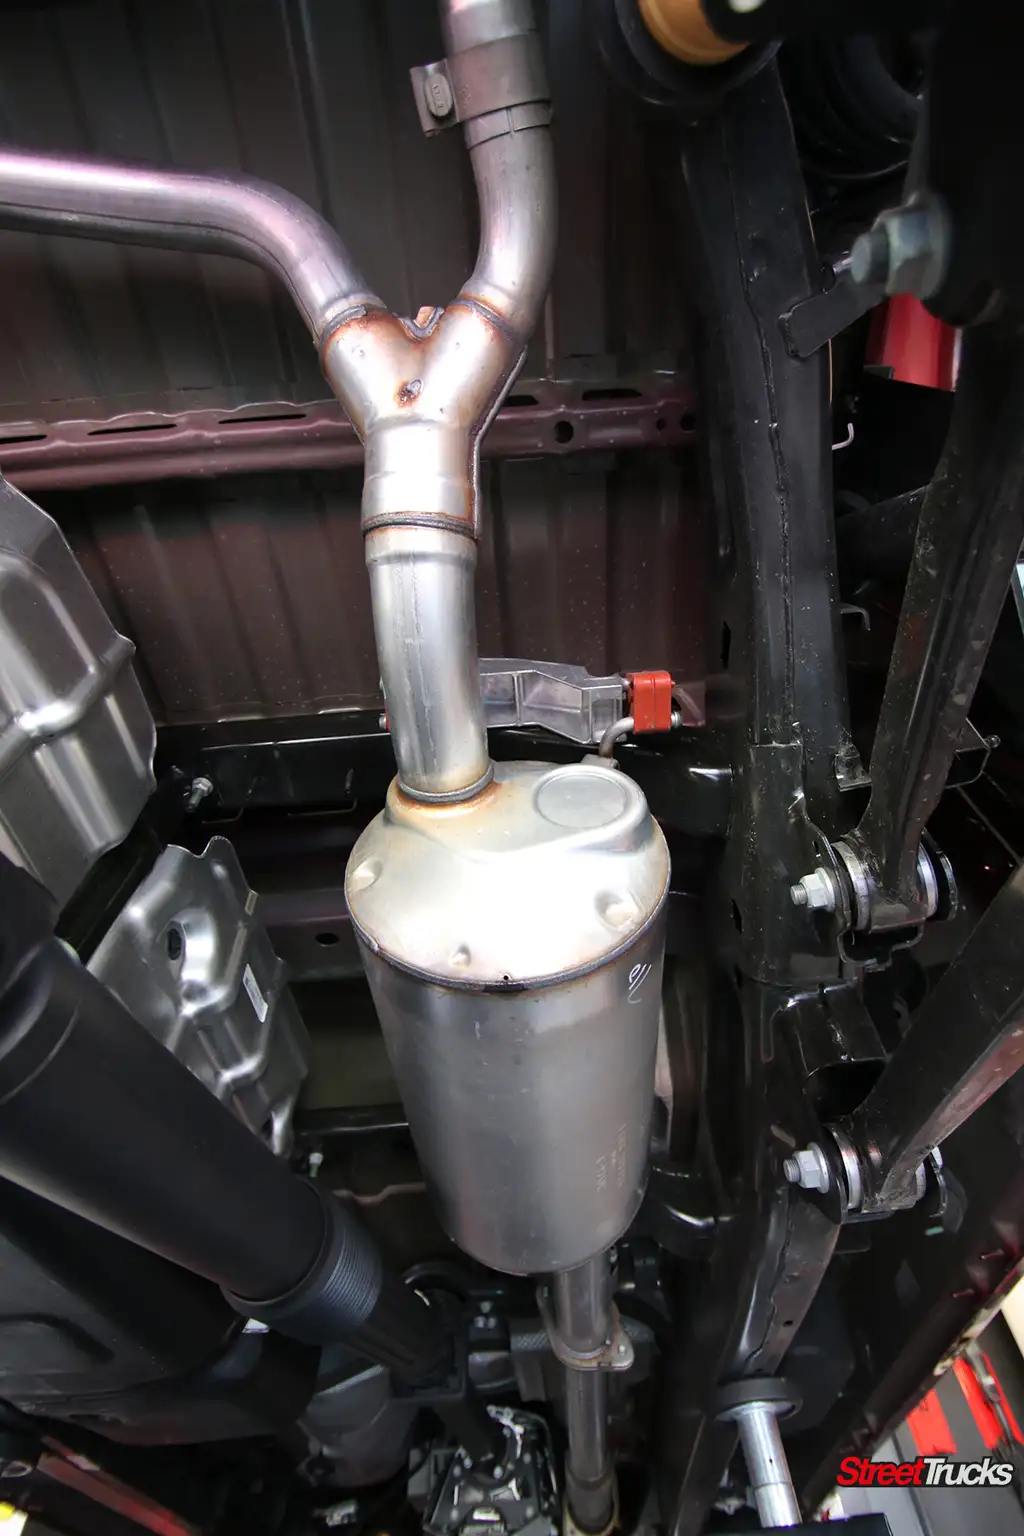 Starting with the exhaust, the stock muffler and piping is held in place with bolted brackets and standard exhaust hangers.
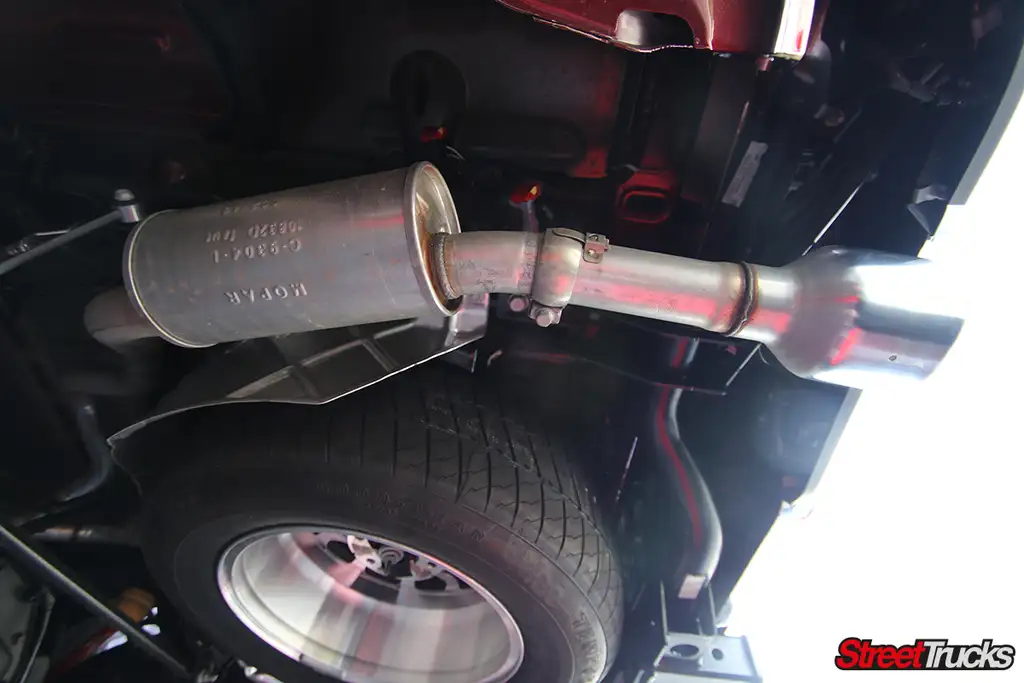
The factory exhaust has built in resonators just before each exhaust exit that quite down and restrict the spent gases.
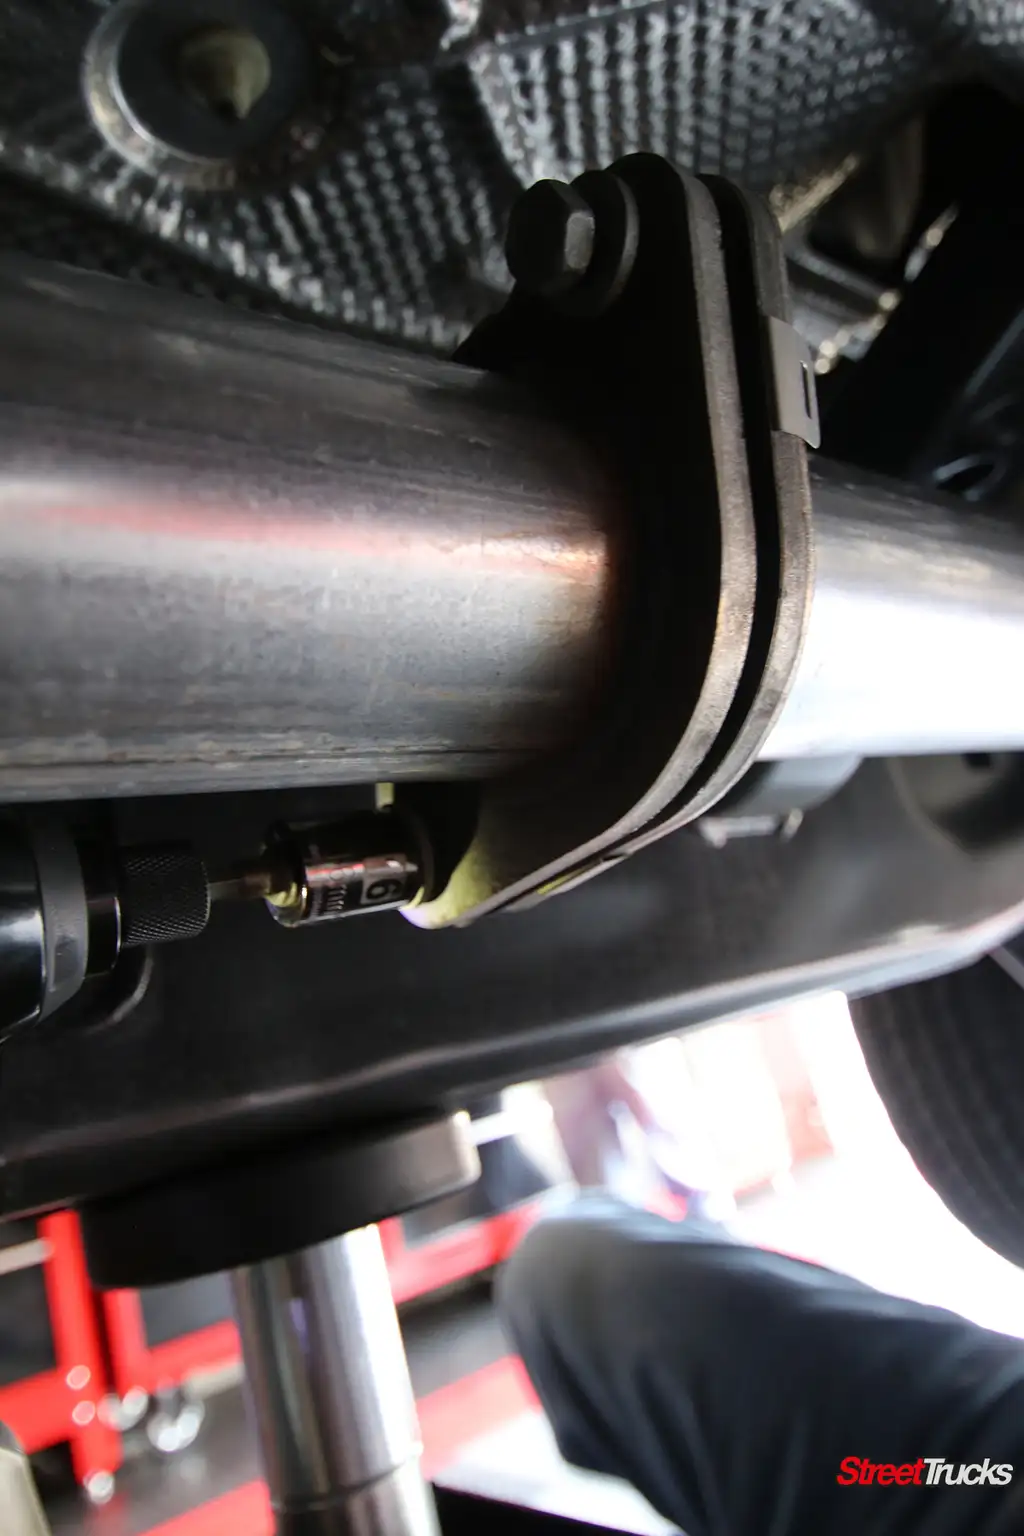
To remove the factory exhaust, start by unbolting the flanges.
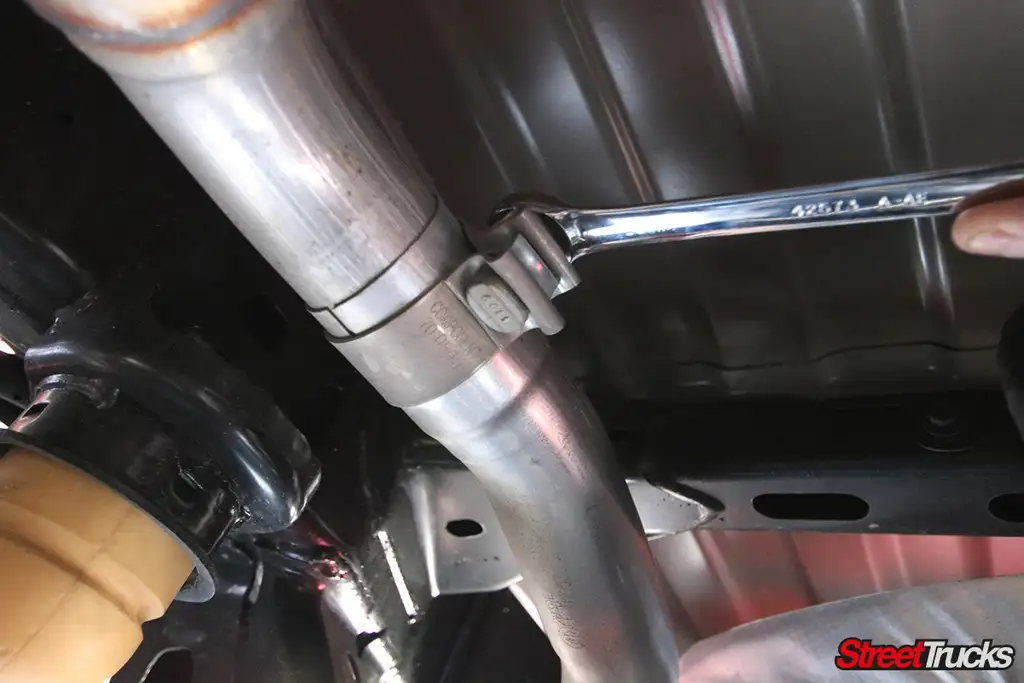 Unbolt the clamp holding the rear piping.
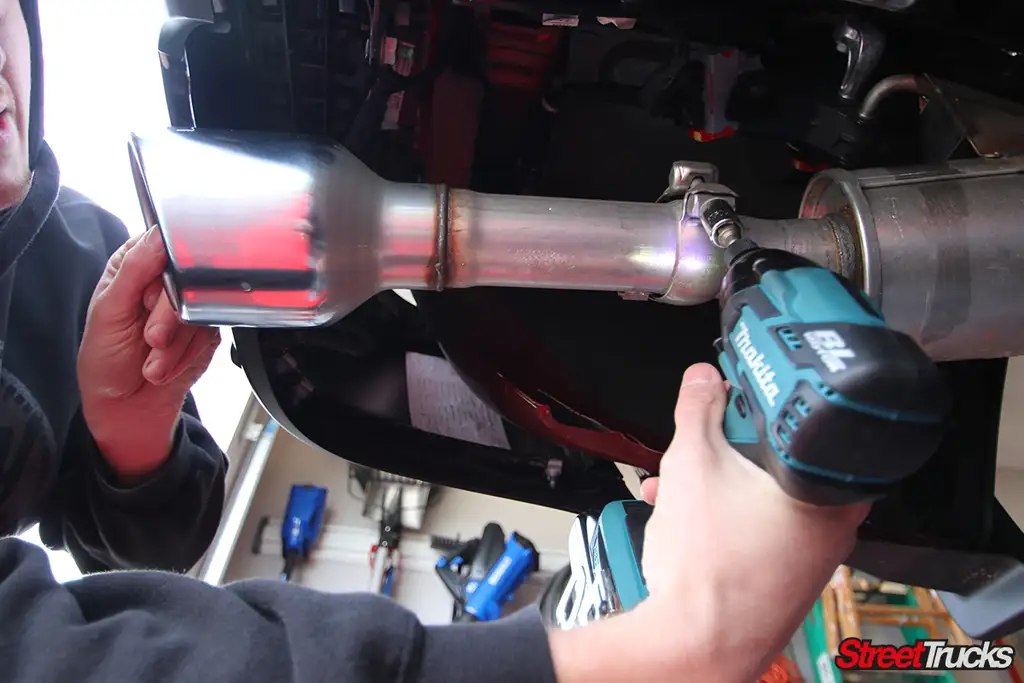
Unbolt the factory exhaust tips to allow for easier removal of the piping.
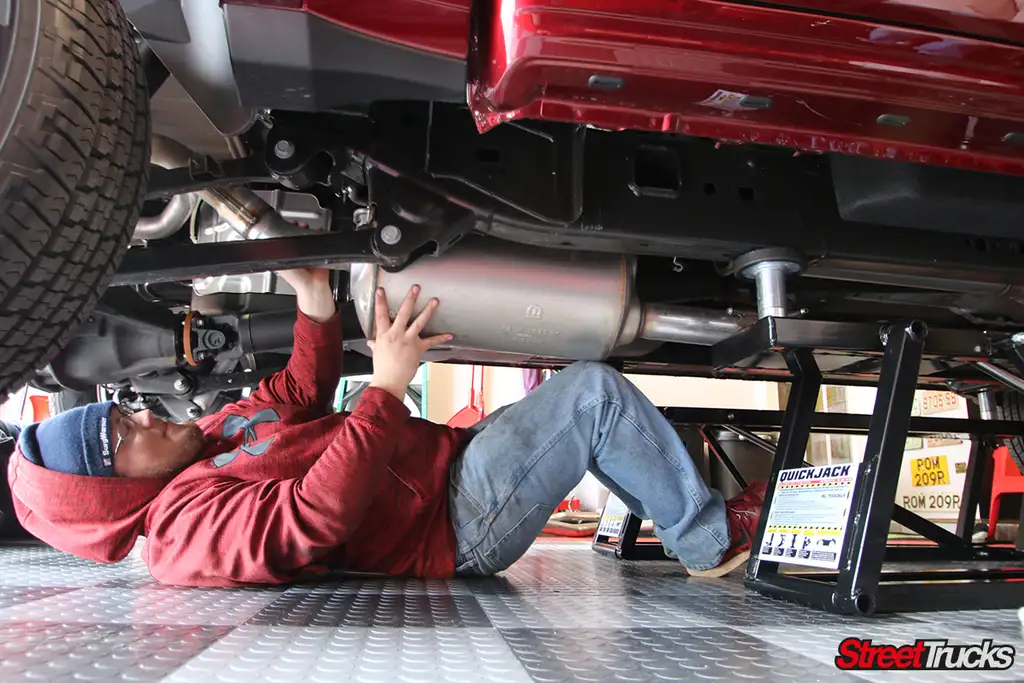 Once you have all the flanges unbolted, this is where you put one of your smaller (preferably younger) friends under the truck to pull the stock muffler out of the hangers to remove it from the truck.
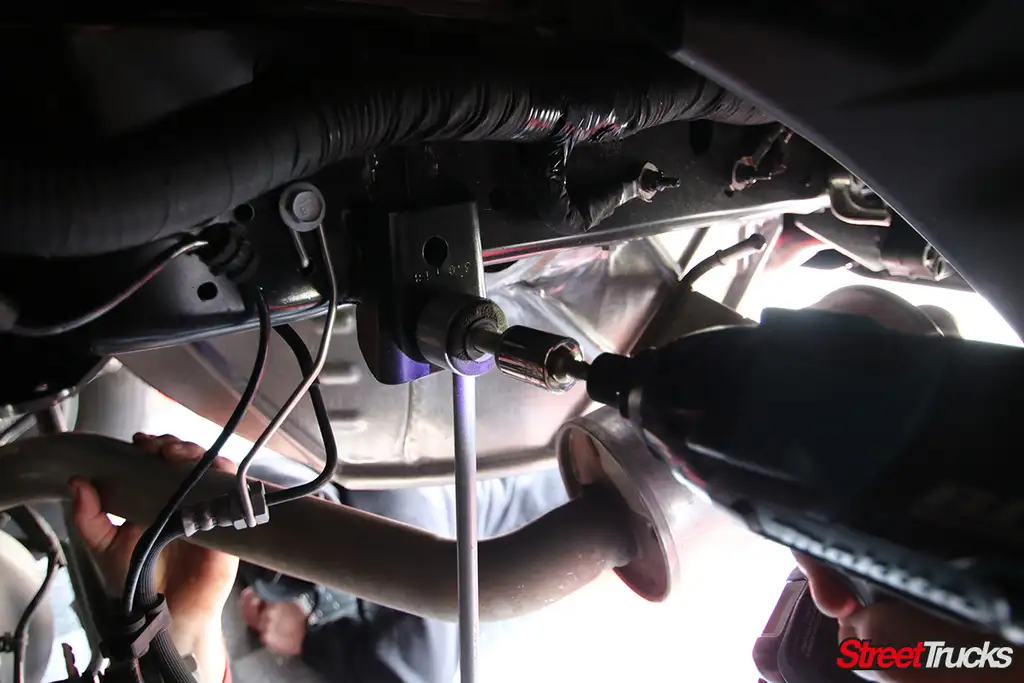 To remove the driver side piping and resonator, the rear sway bar end link must be temporarily unbolted to give more room.
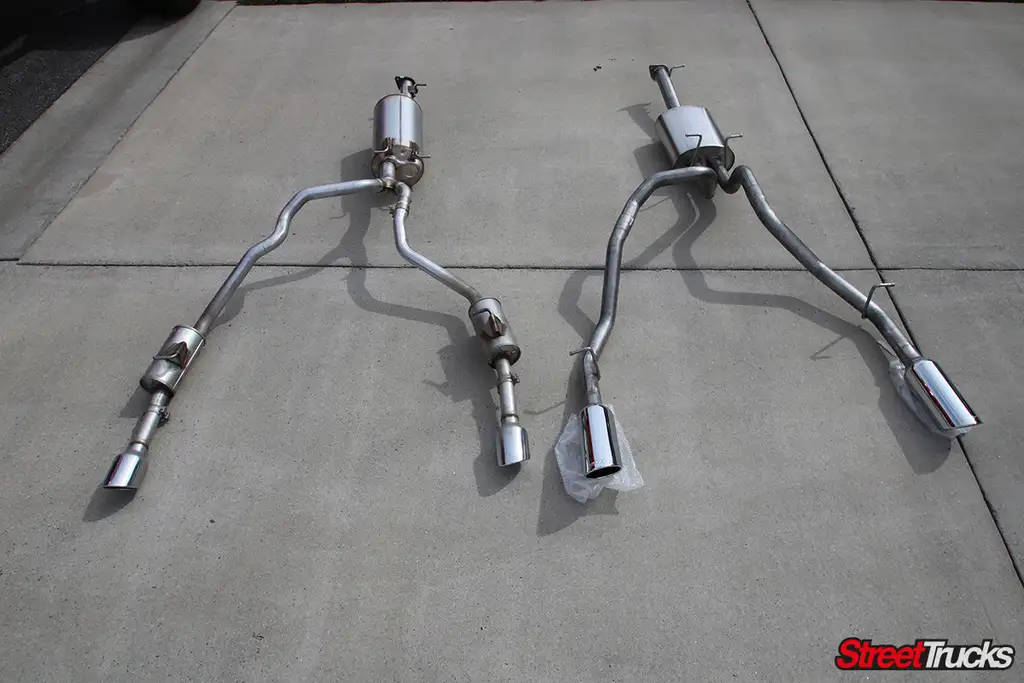 With the stock exhaust system off the truck (on the left), you can see how much better the new Borla system (on the right) looks, yet still perfectly follows the factory routing.
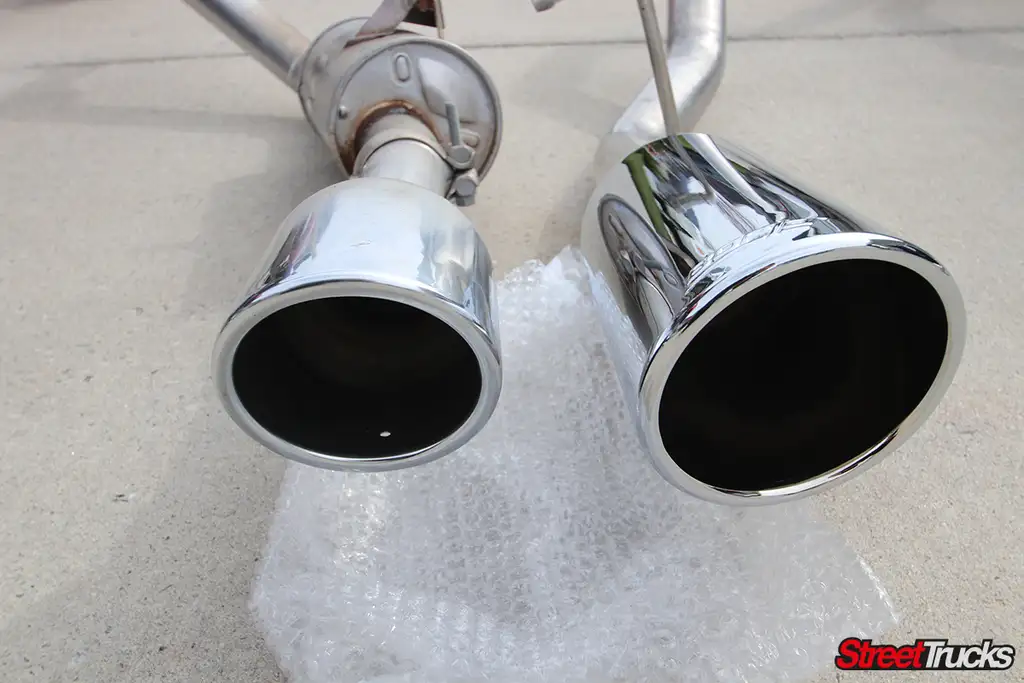 The new Borla 5” polished tip (on the right) is dramatically better looking than the smaller, stock tip.
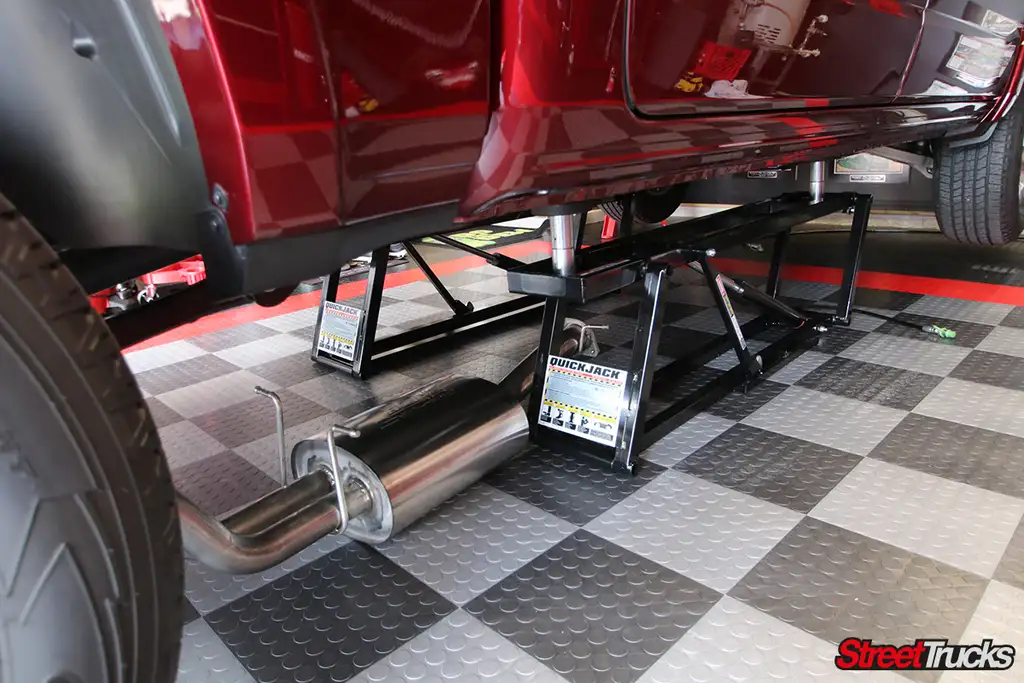 We laid out the new Borla exhaust under the truck, so everything was where it is needed to ensure everything is faced the right way. Having the Quickjack for this install made gaining more room under the truck easier.
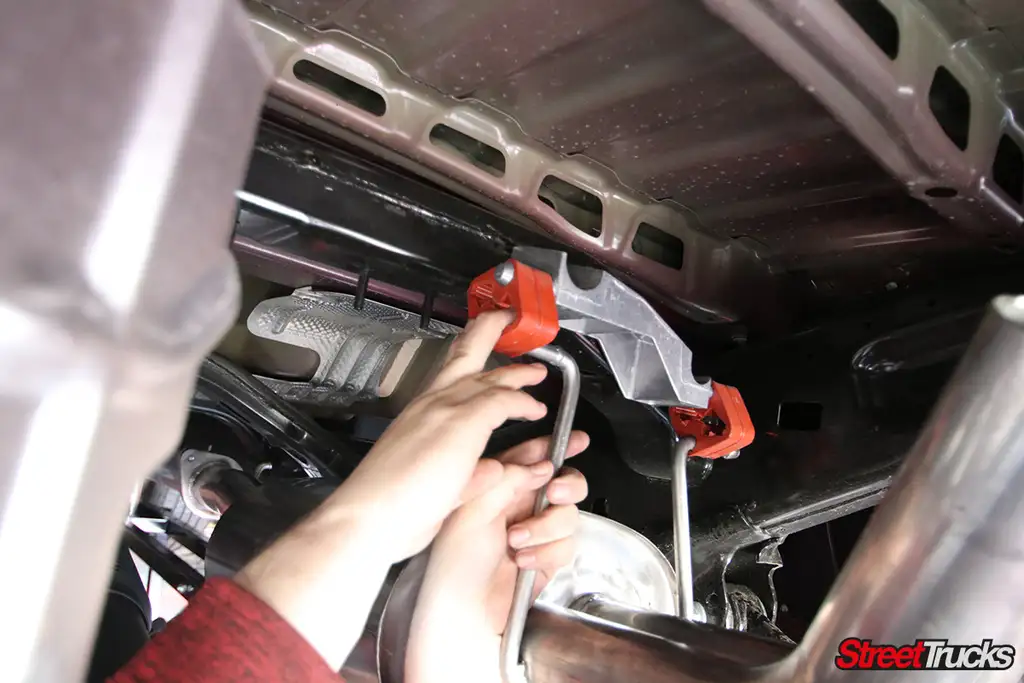 Start the install by hanging the new muffler in the factory exhaust hangers.
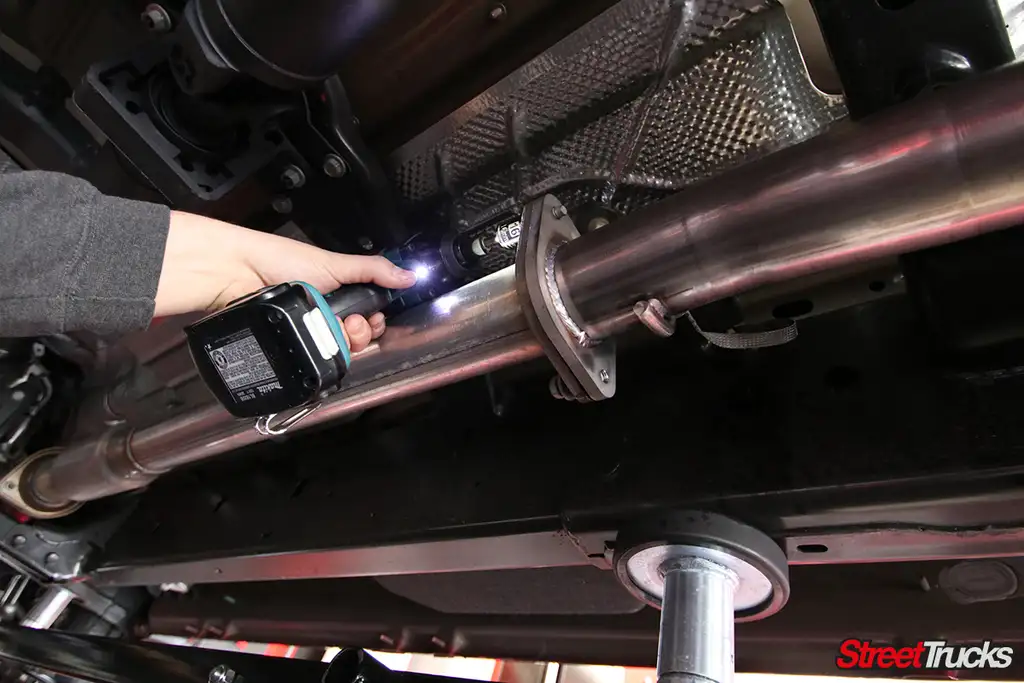 The new muffler simply bolts back to the same factory flanges the stock muffler was unbolted from and even uses the stock bolts.
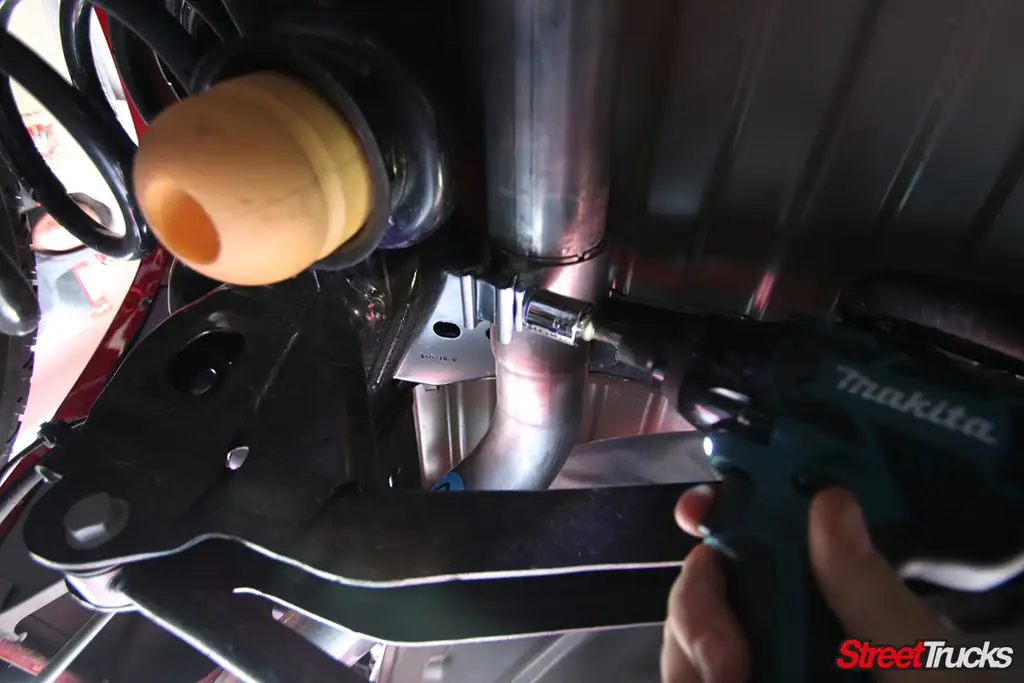 Clamp the rear piping in place using the supplied clamps.
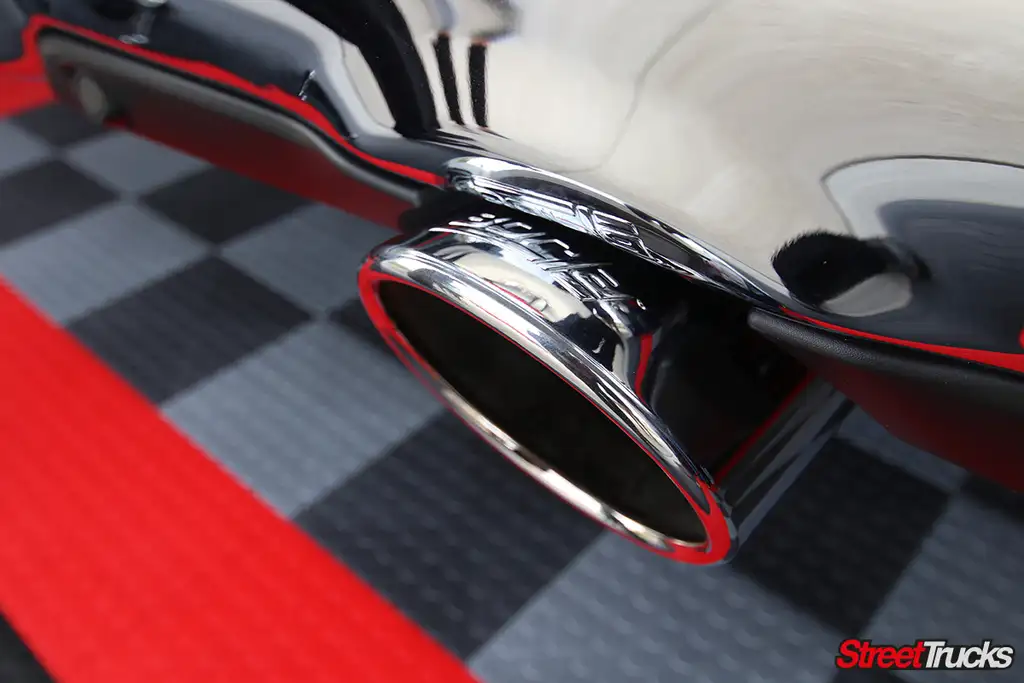 Once on the truck, the new 5” Borla tips fill out the factory bumper cut outs even better than the stock ones did.
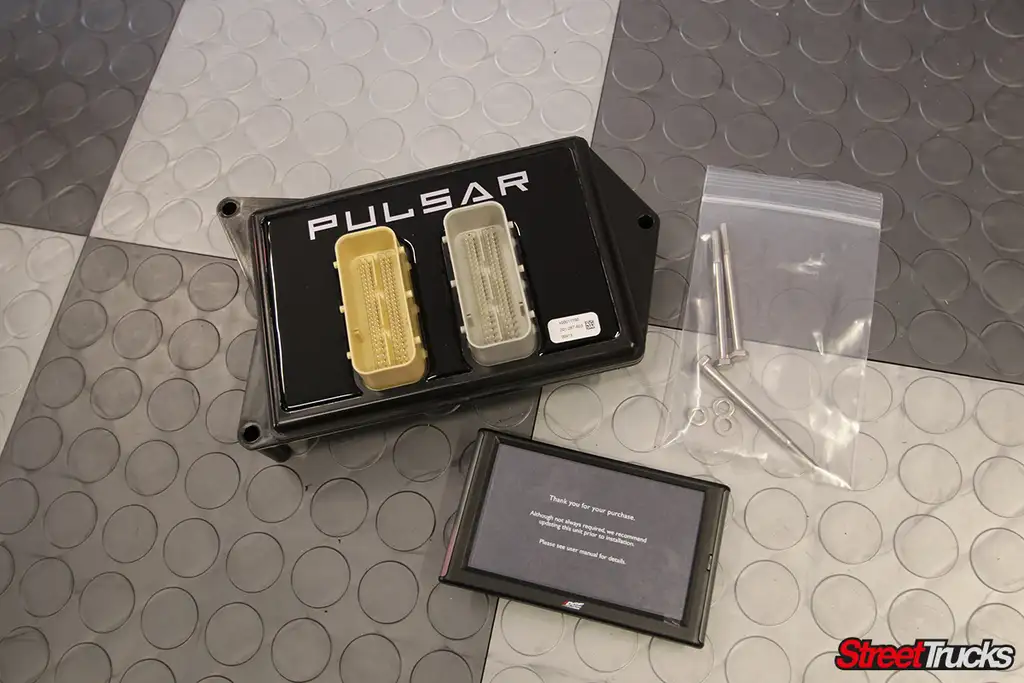 The next thing we installed was the Edge Pulsar that came with their CST2 Screen. As you can see, there isn’t many parts to this install (The wire harness from the ODB2 port to the screen is the only thing not in this photo)
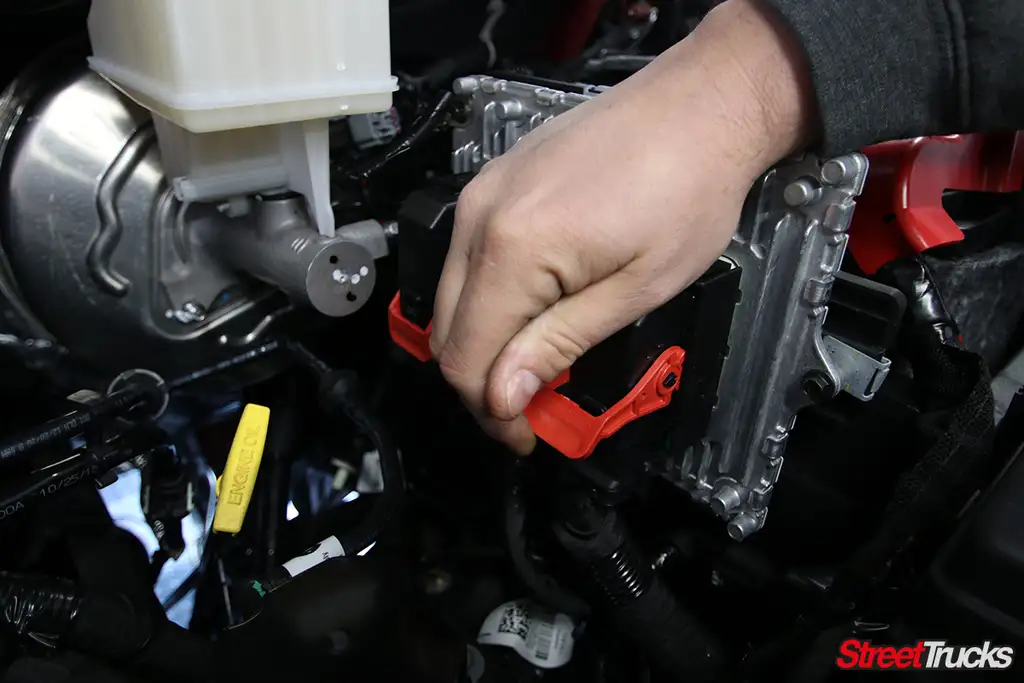
Unclamp the factory wire harness red clamps from the factory computer and remove the plugs and push them to the side for now.
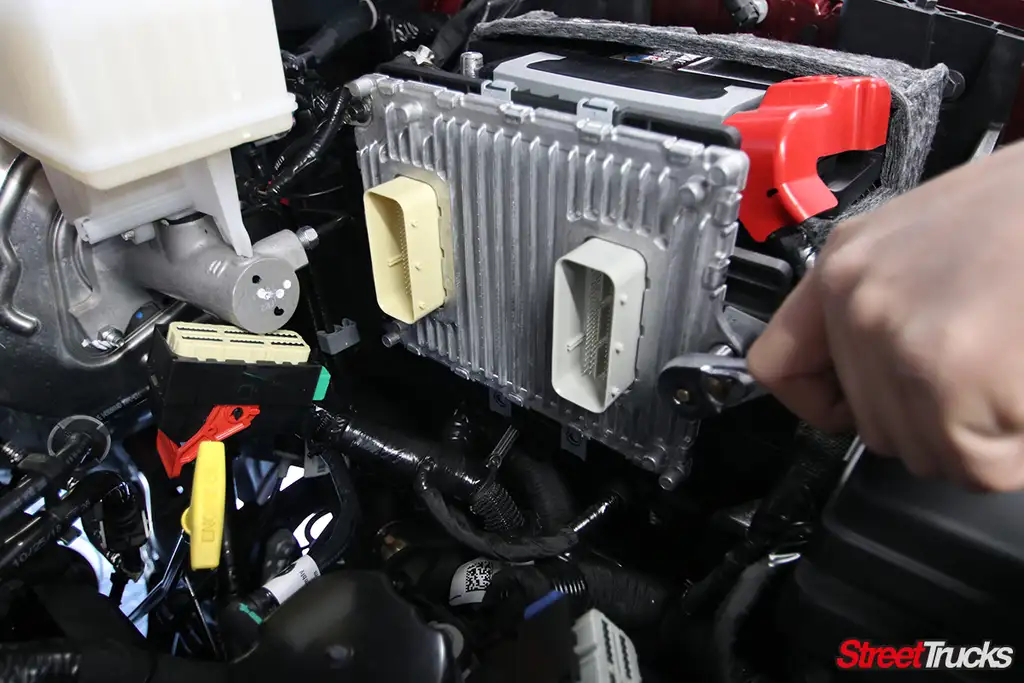 Remove the 3 bolts that hold the computer to the truck and it simply comes out.
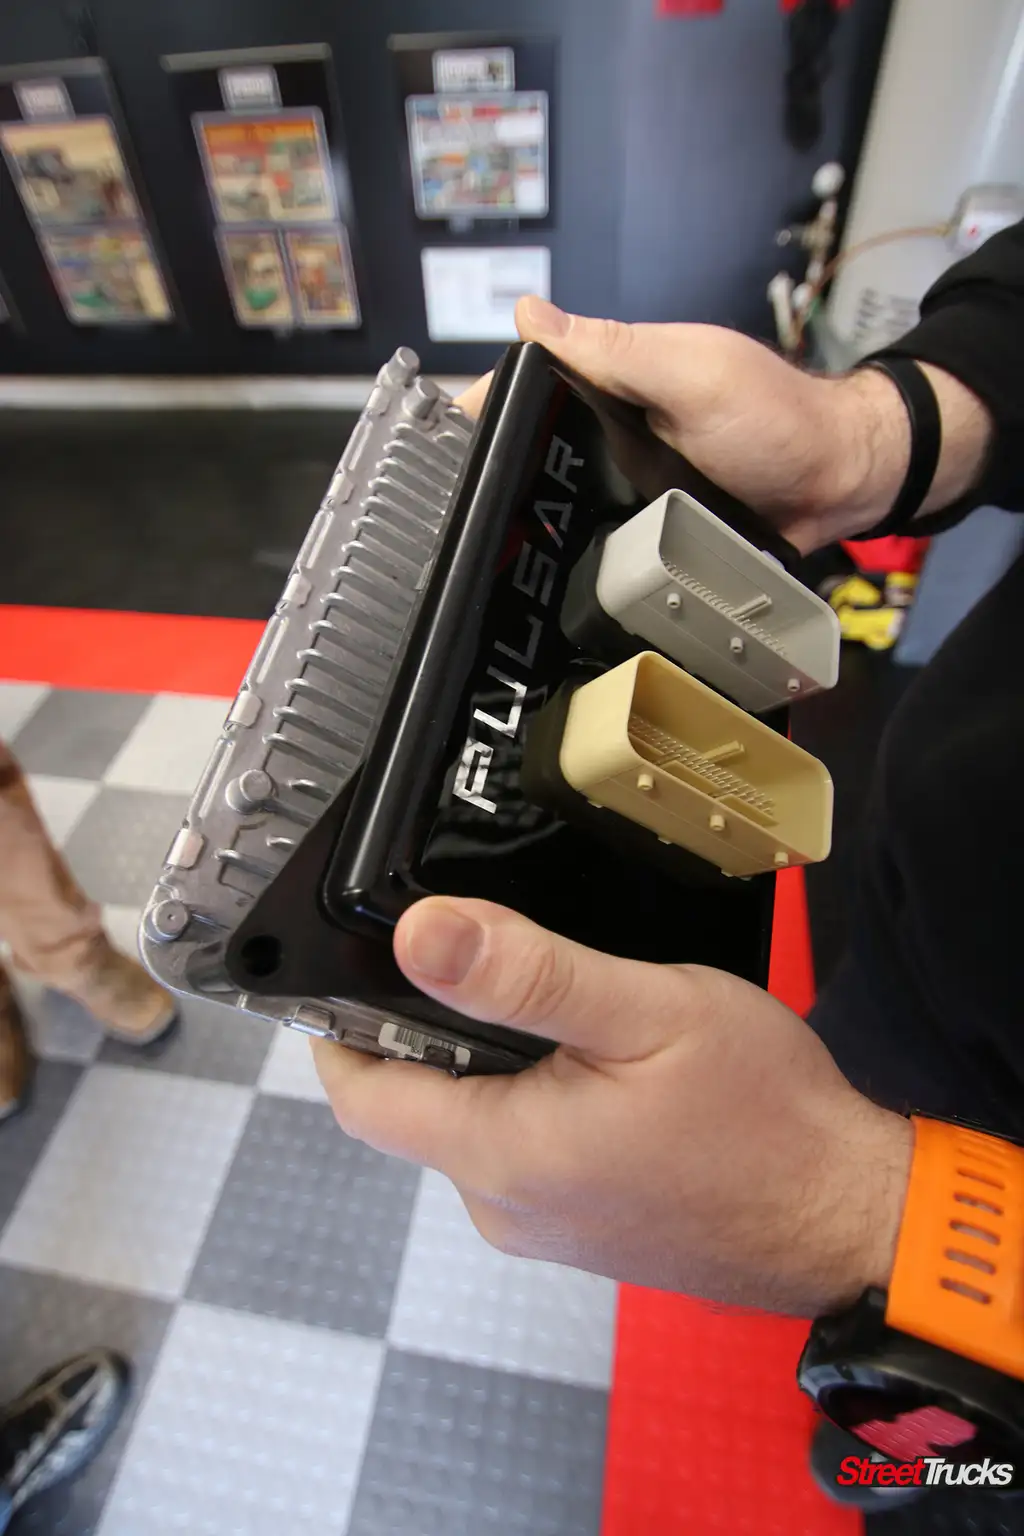 Plug the Pulsar into the factory computer plugs by firmly pressing them together.
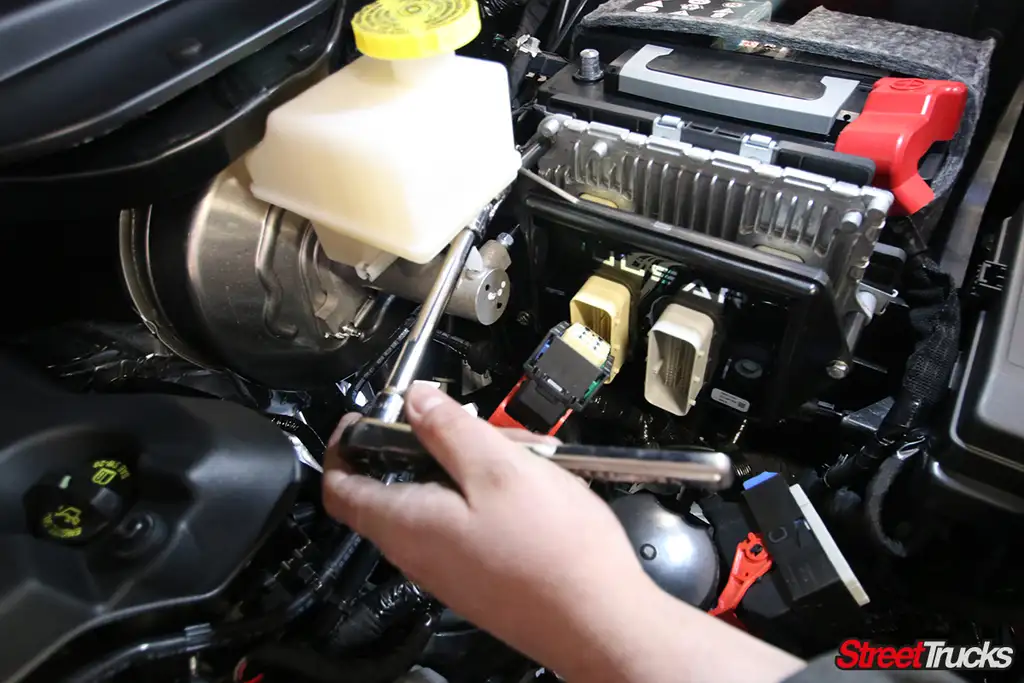 Set the computer back into the factory spot and bolt it in with the 3 supplied bolts and washers.
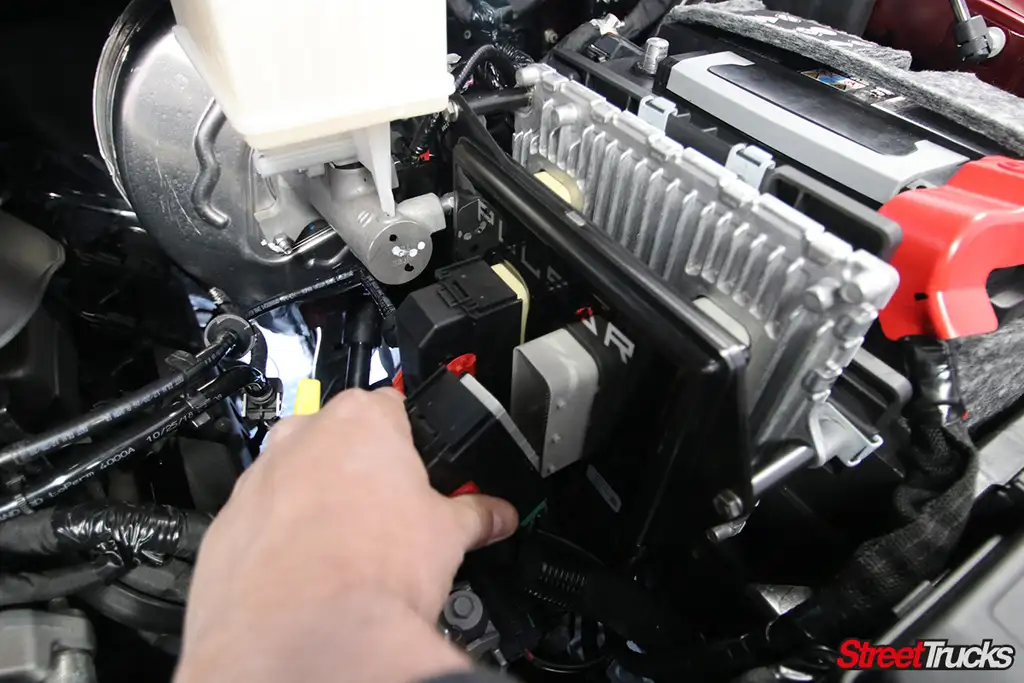 Plug both harness plugs into the pulsar and ensure they are seated correctly. The Pulsar is now installed and ready to set up per the owner’s manual using the cruise control buttons on the steering wheel.
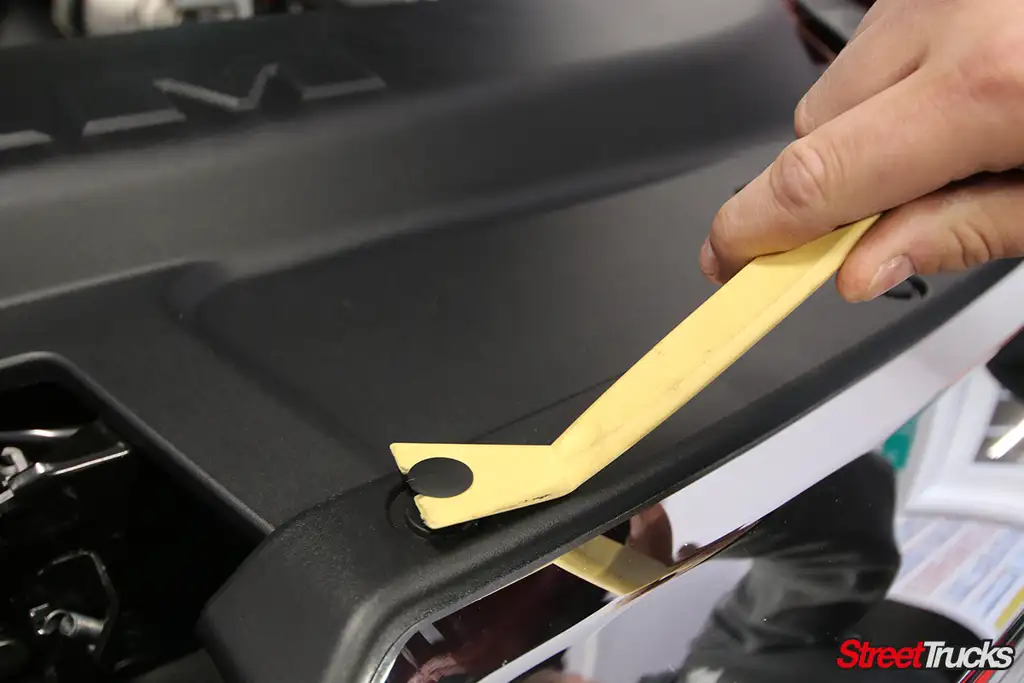 To start the intake install next, start by removing the plastic clips holding the radiator shroud in place.
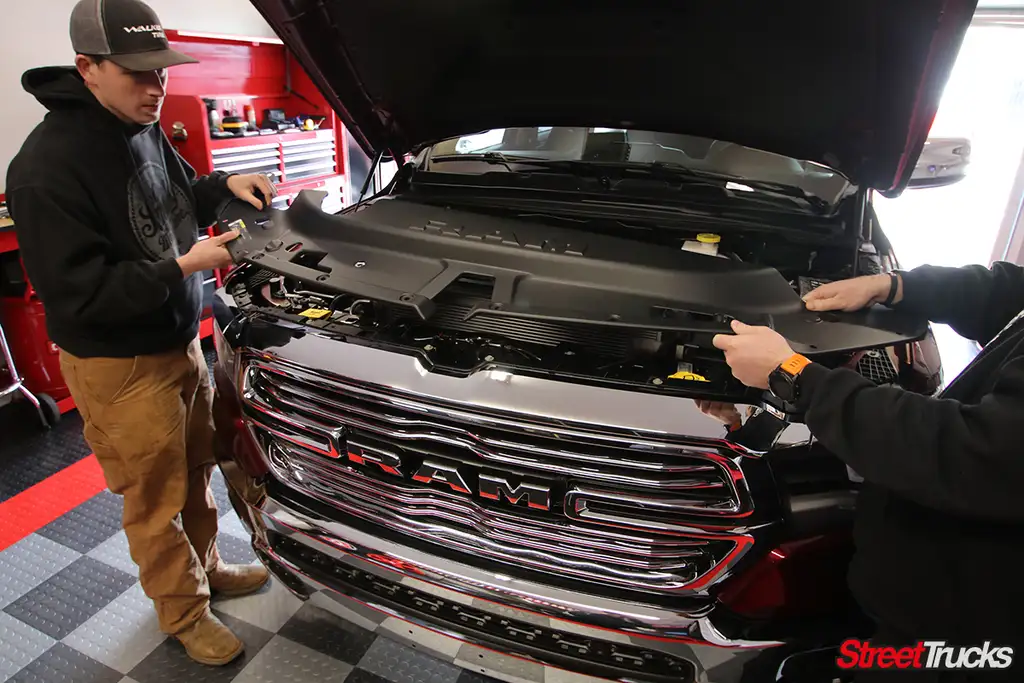 Lift off the radiator shroud and set it aside for now.
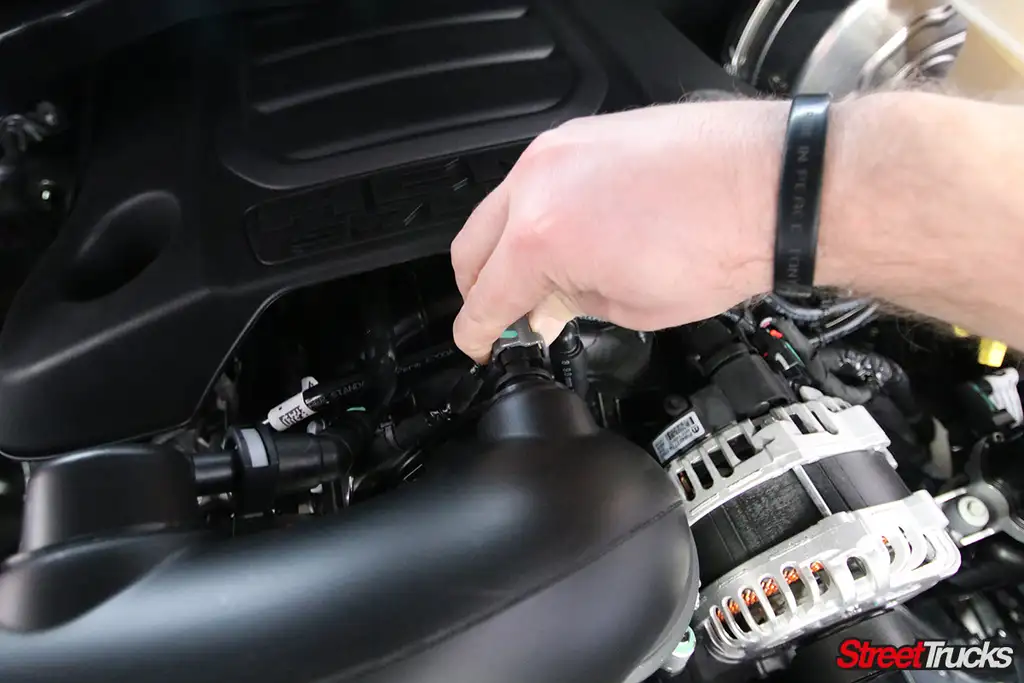 Unplug the MAF plug from the factory intake tube.
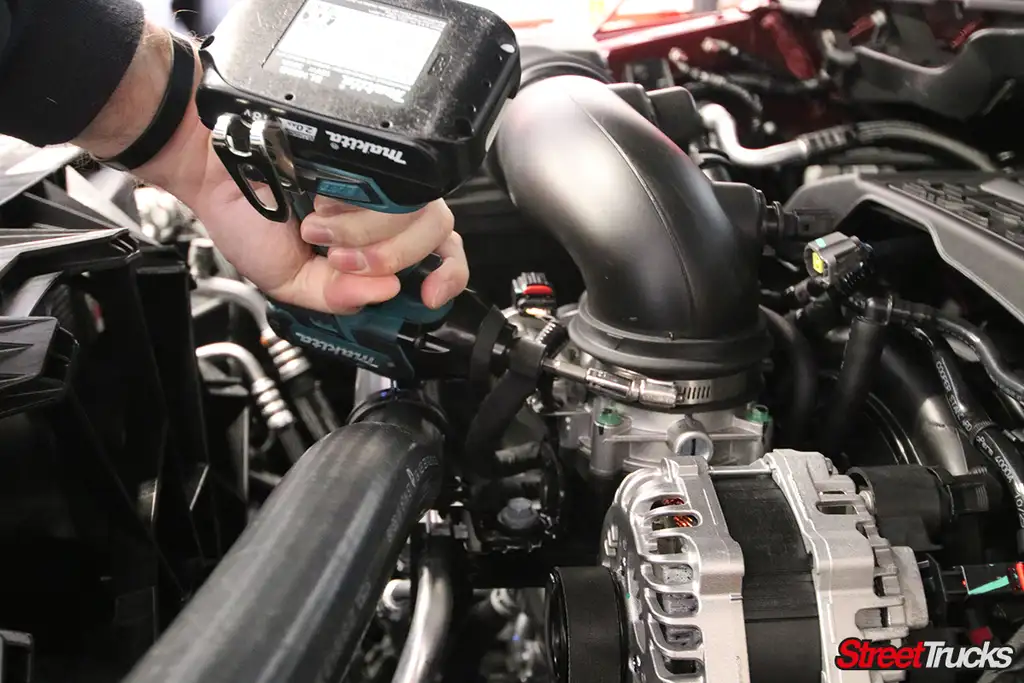 Unbolt the factory intake tube from the throttle body.
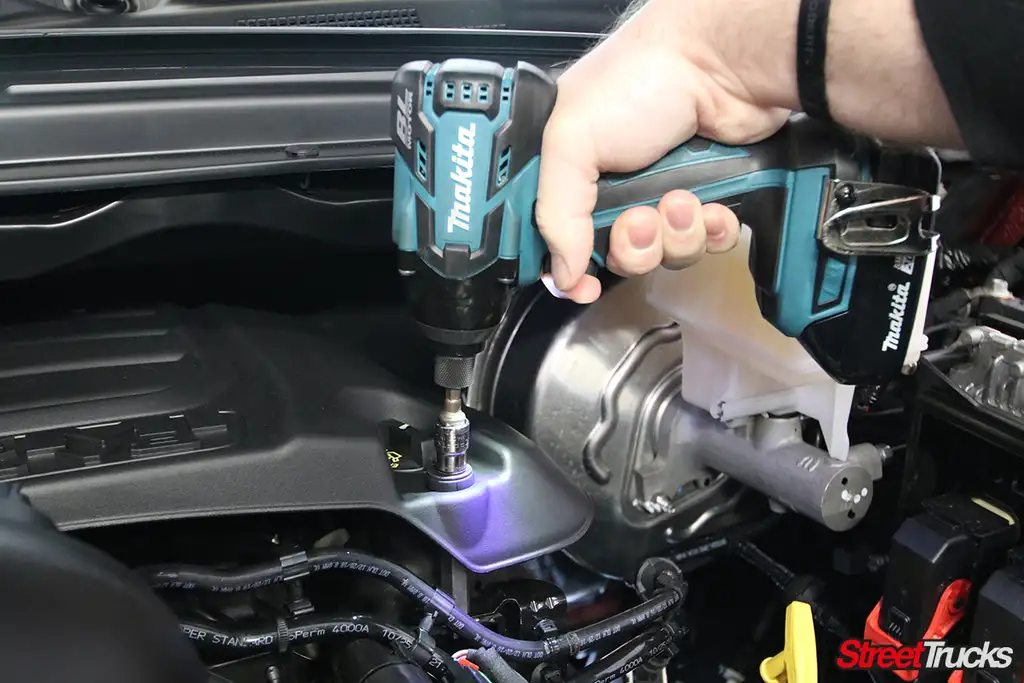 The engine cover must be removed to gain access to some hoses, so unbolt the two 10mm bolts on the cover and set it aside.
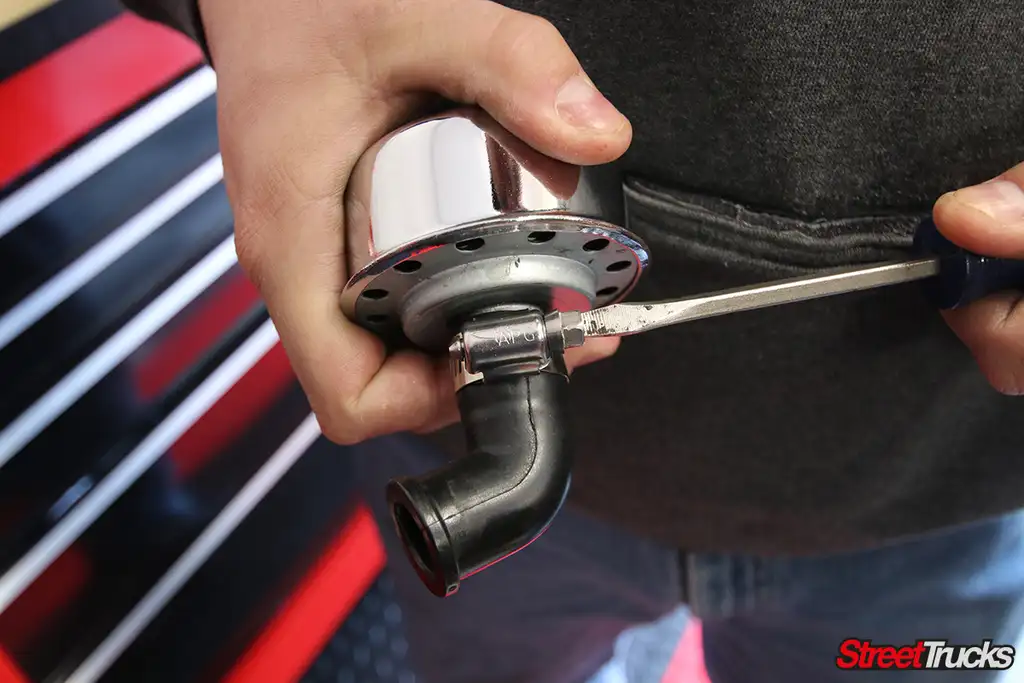 Remove the stock PCV line. The short 45-degree section of the line will then be used to install the supplied chrome breather back where the PCV line was removed from.
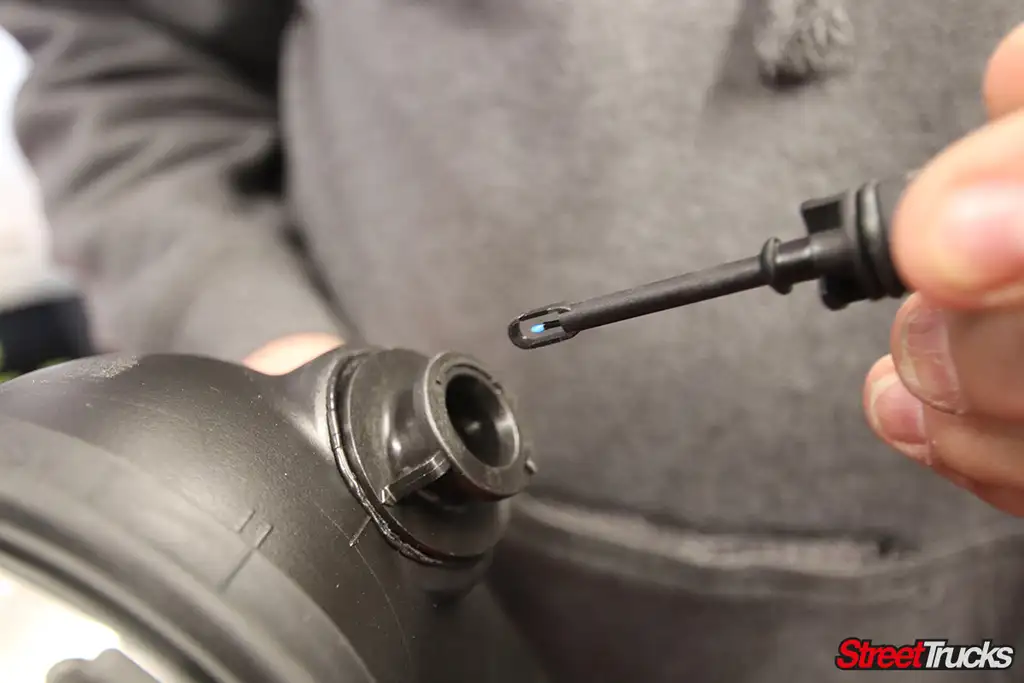 Remove the temp sensor from the factory intake and install it in the supplied intake connector, making sure the hoop is facing the direction of air flow.
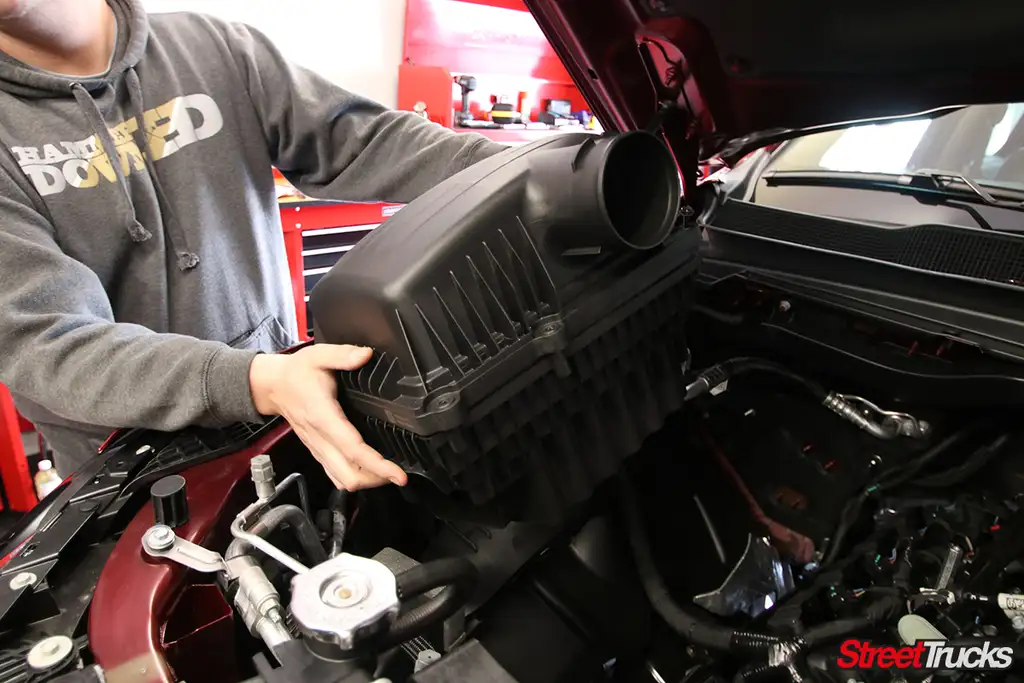 Unbolt the complete factory air box assembly and remove it from the truck, as it will not be needed.
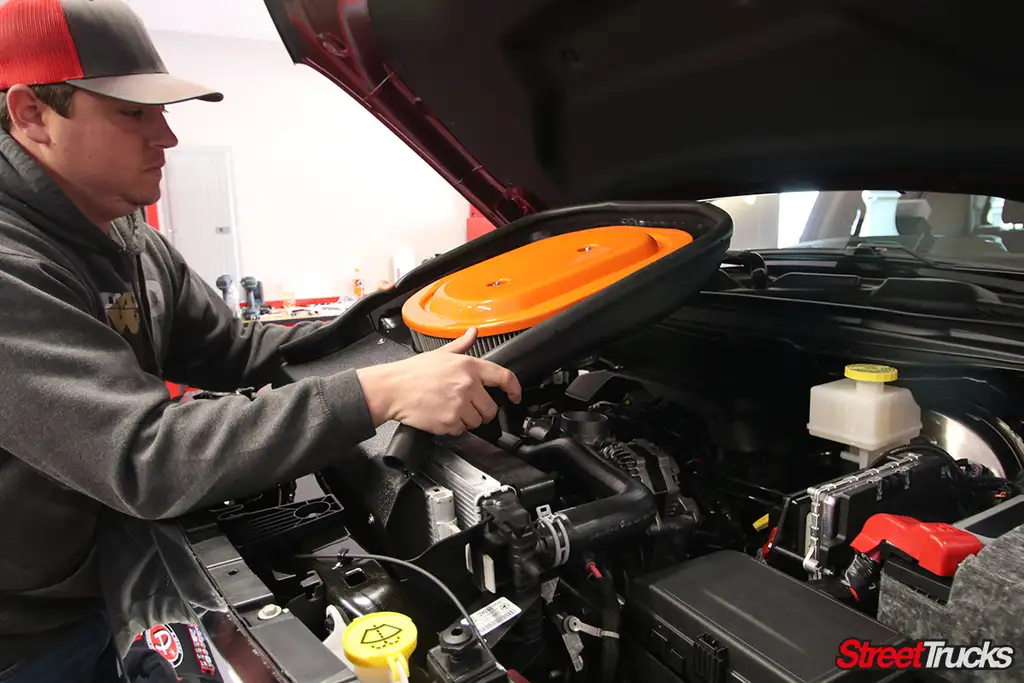 After assembling the Vararam intake panel and the front wing, set it into the truck as one unit making sure that it is securely clamped to the supplied intake tube you already installed the temp sensor into.
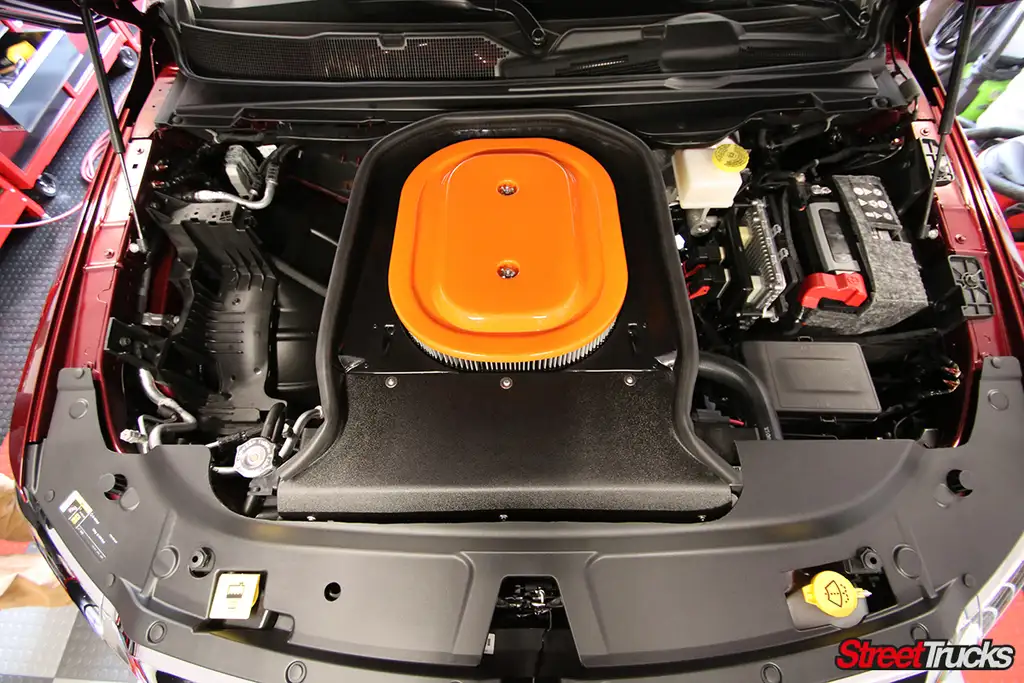 You can either leave the radiator shroud off the truck or trim it like we did, to allow more air flow into the filter while driving the truck. We used an air saw and Dremel, but any plastic trimming method will work. As you can see, the new Vararam Intake gives the engine that old school look while also letting the HEMI breathe a little better.
 We stuck the Edge CST2 screen to the windshield with the supplied bracket and simply plugged it into the ODB2 port. This will provide full display of numerous engine specs.
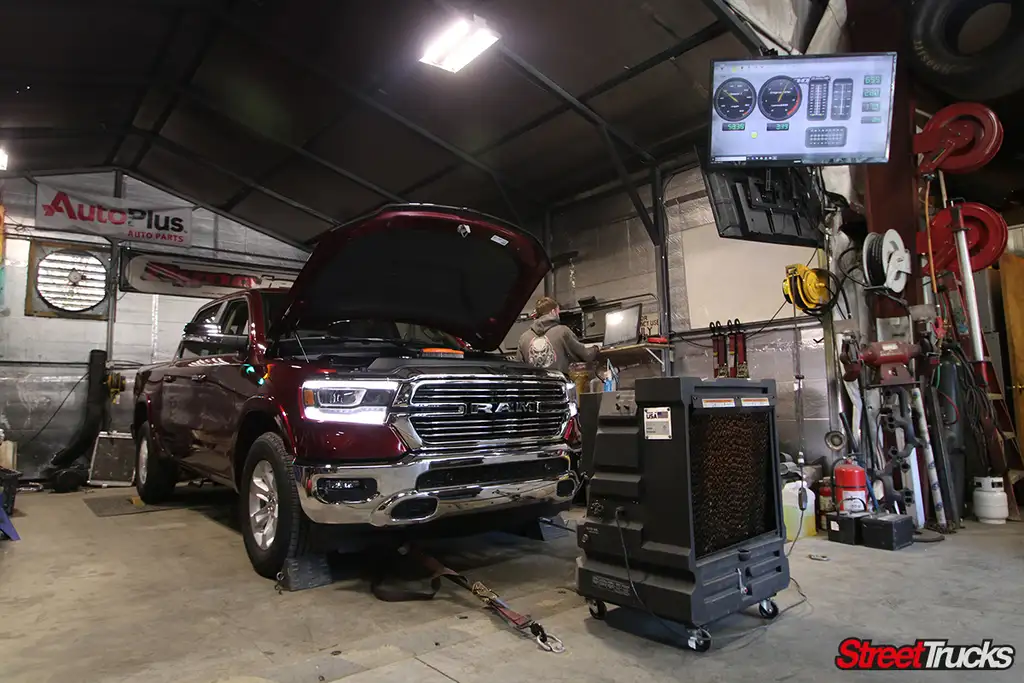 Once the parts were installed, we took the truck back to Tameless Performance for a second dyno run (we took it to them for a base run before the install as well) to see how much real-world power these parts added.
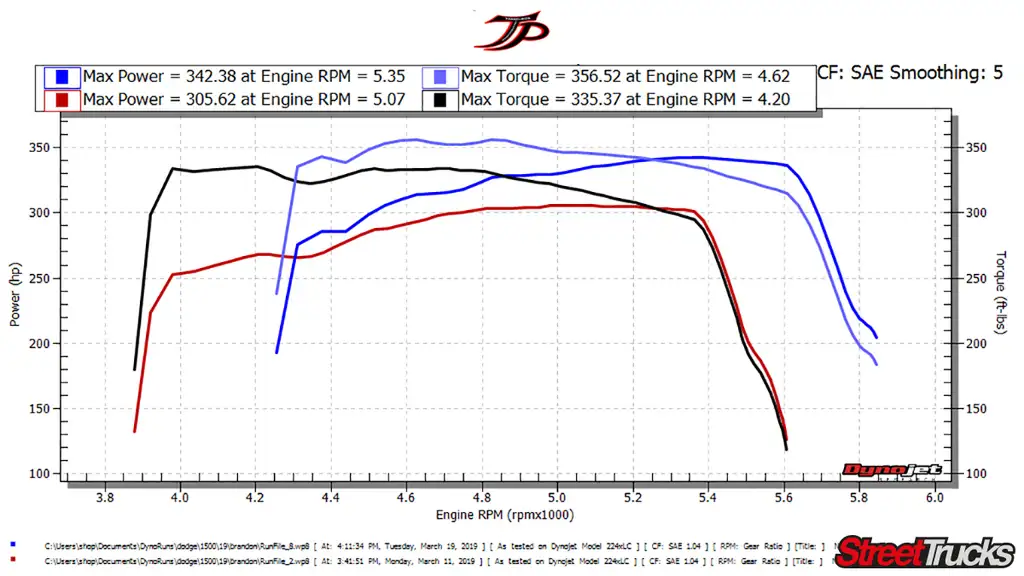 Stock numbers were 305 HP and 335 Ft Lbs. of torque. Once the parts were installed, the truck was at 342 HP and 356 Ft Lbs. of torque. So, for an afternoon of work, we gained 37 HP and 21 Ft Lbs. of torque to the ground. Not a bad increase for a gas motor and simple bolt on parts.
Share Link