 Chris Hamilton
.
December 03, 2018
.
HEADLINE

LS-based small block engines are extremely common in our industry both as daily driver workhorses as well as high-horsepower hotrods.
The V-8 was General Motors’ primary engine choice for its line of cars introduced in January 1995, engineered to be a “clean sheet” design using only rod bearings, lifters and common bore spacing as the longstanding Chevy small-block V-8. It was cast in aluminum for car applications and iron for most truck applications with some exceptions, including the Chevrolet TrailBlazer SS, Chevrolet SSR and a limited run of Chevrolet/GMC Extended Cab Standard Box Trucks.
With three generations of design and several versions of each generation, it made for a lot of parts numbers and confusion for anyone other than GM diehards. Luckily for us, Wikipedia is a rich resource of factual data, specifically about these small-blocks. What makes them all different? We figured you would ask that, so let’s explain.
Generations I and II were modular GM small-block engines based on the Chevrolet small-block V-8, originally designed in 1955. We are starting with Gen III as the kickoff for LS based small-blocks as introduced in 1996, and still the go-to V-8 for GM cars and trucks today. The architecture of the LS series makes the aluminum engines nearly as strong as the iron generation I and II engines preceding it. The cylinder firing order was changed to 1-8-7-2-6-5-4-3, so that the LS series now corresponds to the firing pattern of other modern V-8 engines like the Ford Modular V-8. The new LS engine design also used a coil-near-plug style ignition to replace the distributor setup that we all know and hate. A square four-bolt design replaced the traditional five-bolt pentagonal cylinder head pattern, and flat-topped pistons in the LS1, LS2, LS3, LS6, LS7, LQ9 and L33 with all other variants receiving a dished version of the GM hypereutectic piston.
Check out this breakdown on each generation and keep an eye out for the next issue as we start pumping some power into our own 5.3-liter Chevy. We have some great names on board for this build, including Magnaflow and ProCharger, so it’s sure to be interesting.
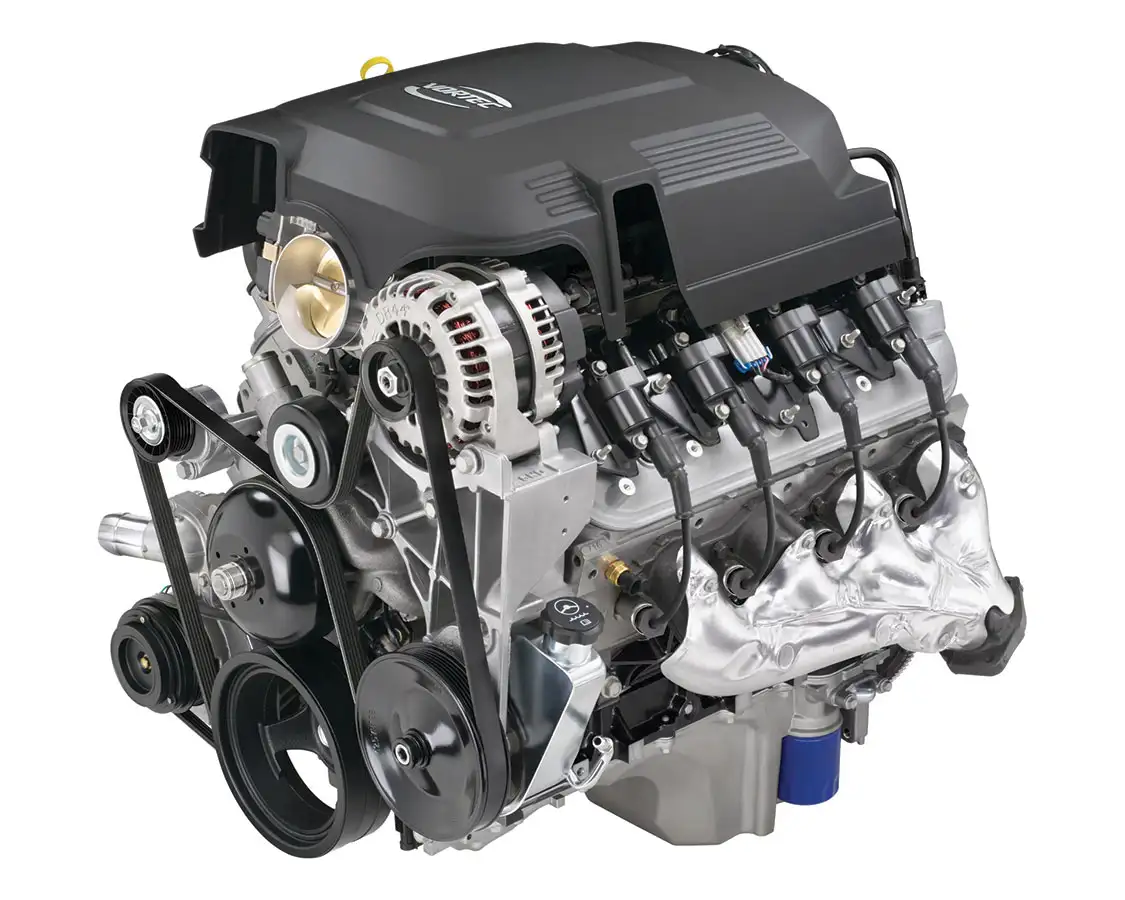
This is a longer-stroked (by 9 mm (0.35 inch)) version of the Vortec 4800 with a displacement of 5.3-liters (5,328 cc (325.1 cubic inches)) from 3.78-inch (96 mm) bore and 3.622-inch (92 mm) stroke. Vortec 5300s are built in St. Catharines, Ontario, and Romulus, Michigan. Another engine variant, the L33, shares the same displacement, but has an aluminum block with cast in cylinder liners, much like the LS1. The LM7 was a bit lighter than Gen I or II engines when fully built and easier to find in good shape at a junkyard. It matched the power and torque of the F-body LT-1s even with a 25-cubic-inches-smaller design. With the availability of engine swap kits from many advertisers in this book, it just makes good sense to use Gen. III engines.
LM7 applications:
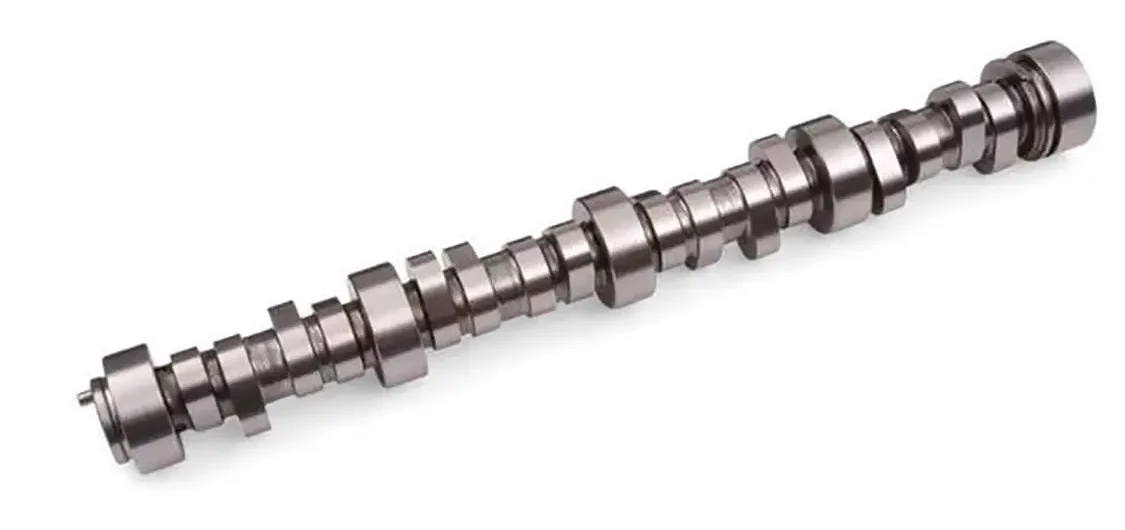
Common power adders for these engines include your basic cold-air intake, cat-back exhaust and a simple plug-n-play tune. Most truck owners who get to this point always find themselves wanting more, and we don’t blame them. Upgrading the tiny 191 at 0.050-inch cam LM7 Camshaft and Valvetrain is the one of the top mods recommended as they really held these engines back. An LS3 or LS9 cam makes good power, but we would recommend a dedicated truck cam to maximize torque in the mid-range. Plan on upgrading to larger fuel injectors to meet the fuel demands of increased power since the factory LM7 injectors were only rated at 22-25 pounds and won’t support much more than 380 hp.
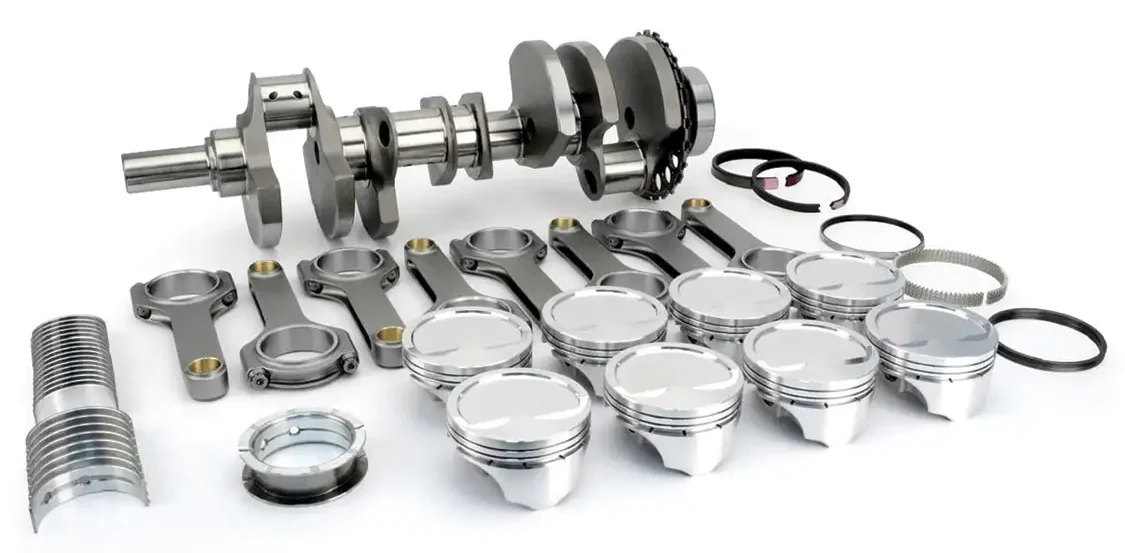
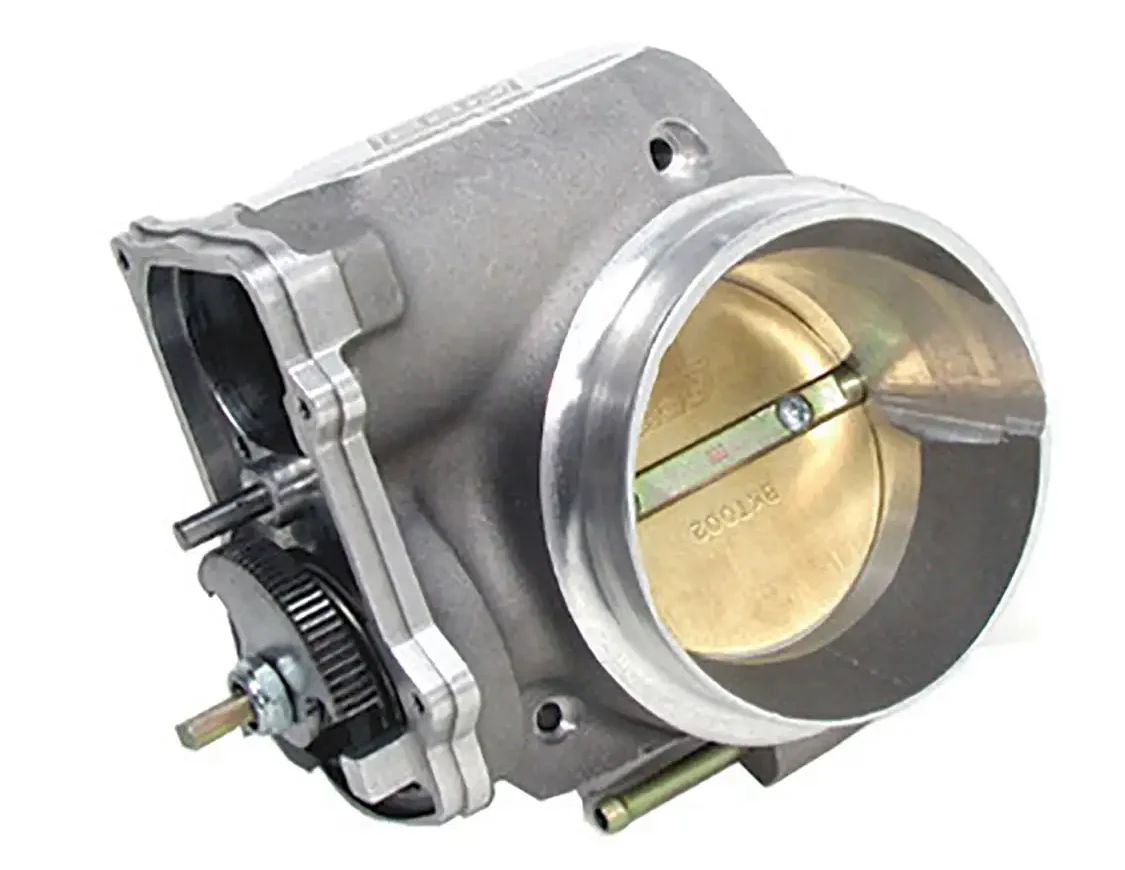
Next on the list would be swapping out the factory installed LM7 intake manifold and throttle body as well as the cylinder heads and rotating assembly as the pistons become a weak point. Something most people don’t know is that the 5.3-liter iron blocks can be bored to the LS1’s size. If you’re running boost and nitrous, you can hone the blocks to 3.8 inches. These blocks have been known to withstand 1,300 whp with proper machining, racing fuel and an excellent tune, which is hard to believe but true. If you’re lucky enough to be making more than 850 whp, we advise you also upgrade the head and main studs.
In 2005, the Generation III was replaced with the Generation IV with provisions for high-displacement ranges up to 7,442 cc and power output to 776 bhp. Generation IV was designed with displacement on demand in mind and based on the Gen III block, a technology that allows every other cylinder in the firing order to be deactivated. It can also accommodate variable valve timing, which is the process of altering the timing of a valve lift event, and is often used to improve performance.
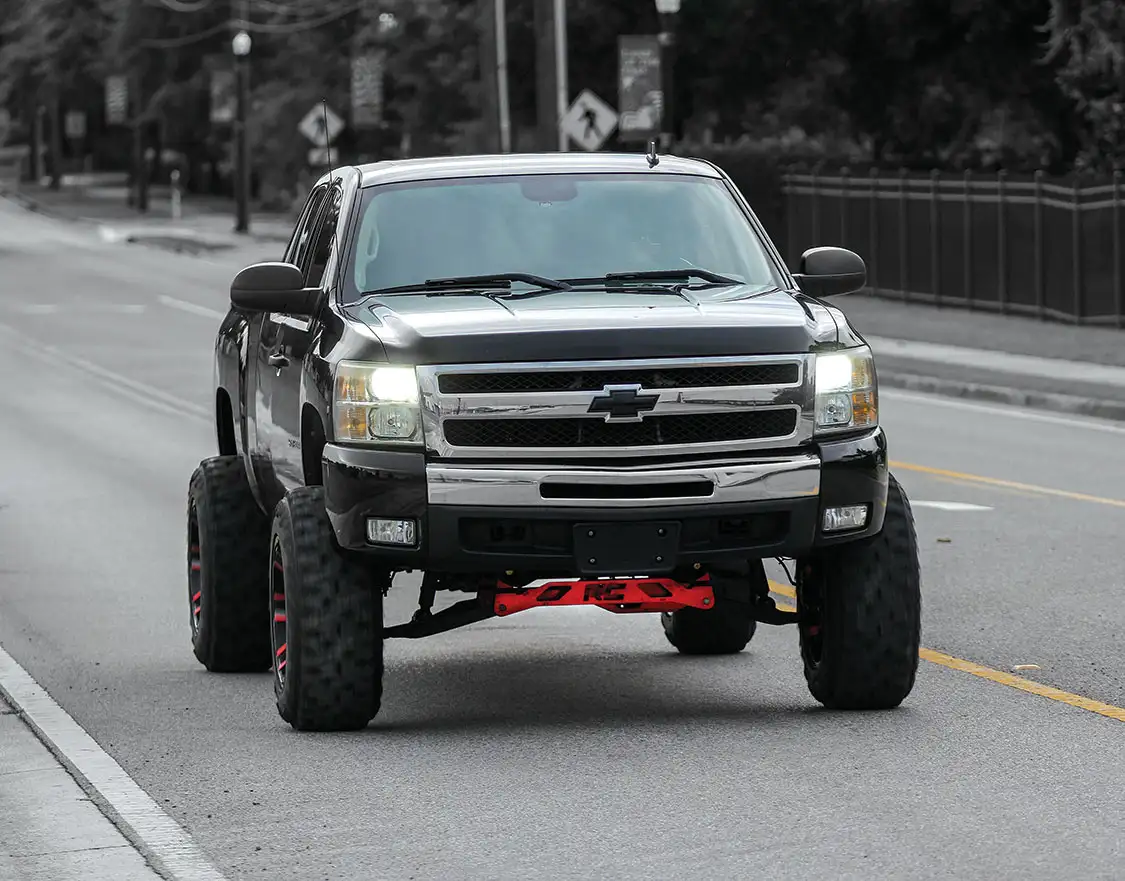
The 5.3-liter Generation IV engines share all the improvements and refinements found in other eight version if the Generation IV engines that were produced. This included three cast iron blocks (LY5, LMG and LMF) and five aluminum blocks (LH6, LH8, LH9, LC9 and LS4), which all featured versions of active fuel management other than the LH8, LH9 and LMF.
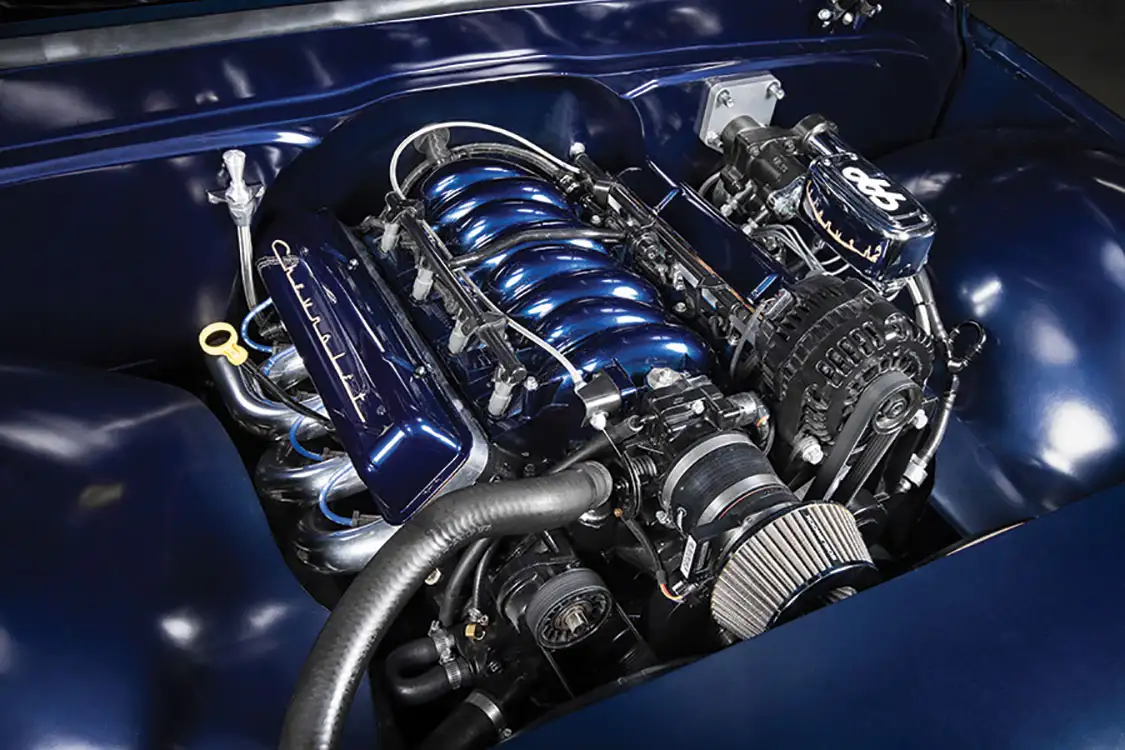
When built correctly, the smaller 5.3-liter motor will beat an iron-headed small block in a drag race because it makes more torque and more horsepower with aluminum heads, so it’s going to be 40 pounds lighter. By simply upgrading the cam to something similar in the small block’s 222 at 0.050 you can create power numbers you will be surprised with. Understandably the 6.0 swap can produce more power based on displacement, but if the LS badge appeals to you, an aluminum 5.3 is the way to go.
With active fuel management, the LH6 replaced the LM4 for 2005 and was the first of the Generation IV small block V-8 truck engines to go into full-scale production. This aluminum block design is a counterpart to the LY5 producing up to 300 hp with 330 ft-lbs.
LH6 applications:
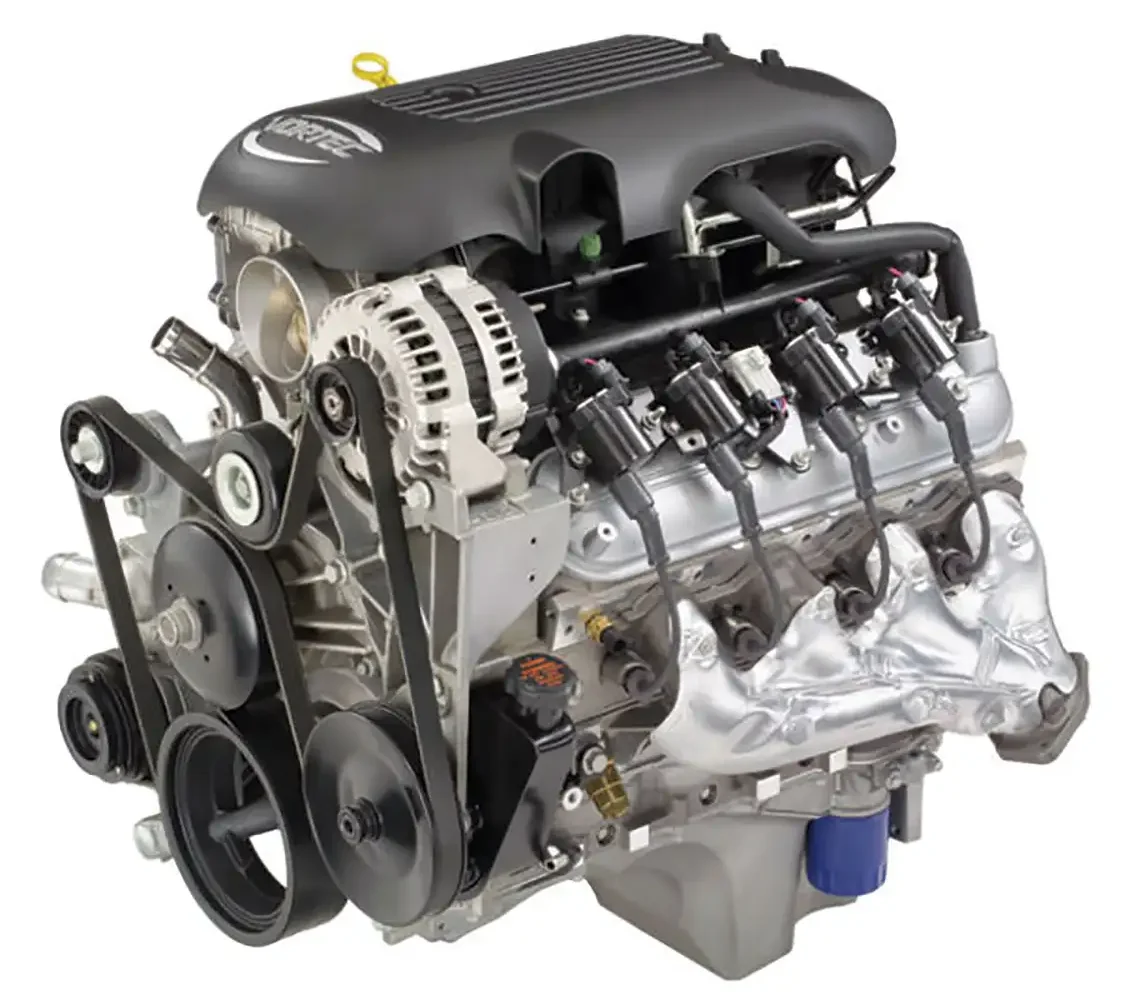
The Vortec 5300 LC9 is the aluminum block flex-fuel version of the LH6 and is found in most 4WD models as well as 2WD Silverados. Applications have been rated at 320 hp at 5,400 rpm and 335 ft-lbs of torque. Pickup truck applications are rated at 315 hp at 5,300 rpm with 335 ft-lbs of torque. Along with the previous model, variable valve timing was permanently added for the 2010 model year.
LC9 applications:
The fifth and final generation of the iconic GM small block engine family features the same cam-in-block architecture and 4.4-inch bore centers, which is the distance between the centers of each cylinder. The Gen-V small-block is similar to the Gen III/IV engines structurally including a deep-skirt cylinder block design. A revised cooling system and all-new cylinder heads are some of the refinements and new or re-engineered components used throughout.
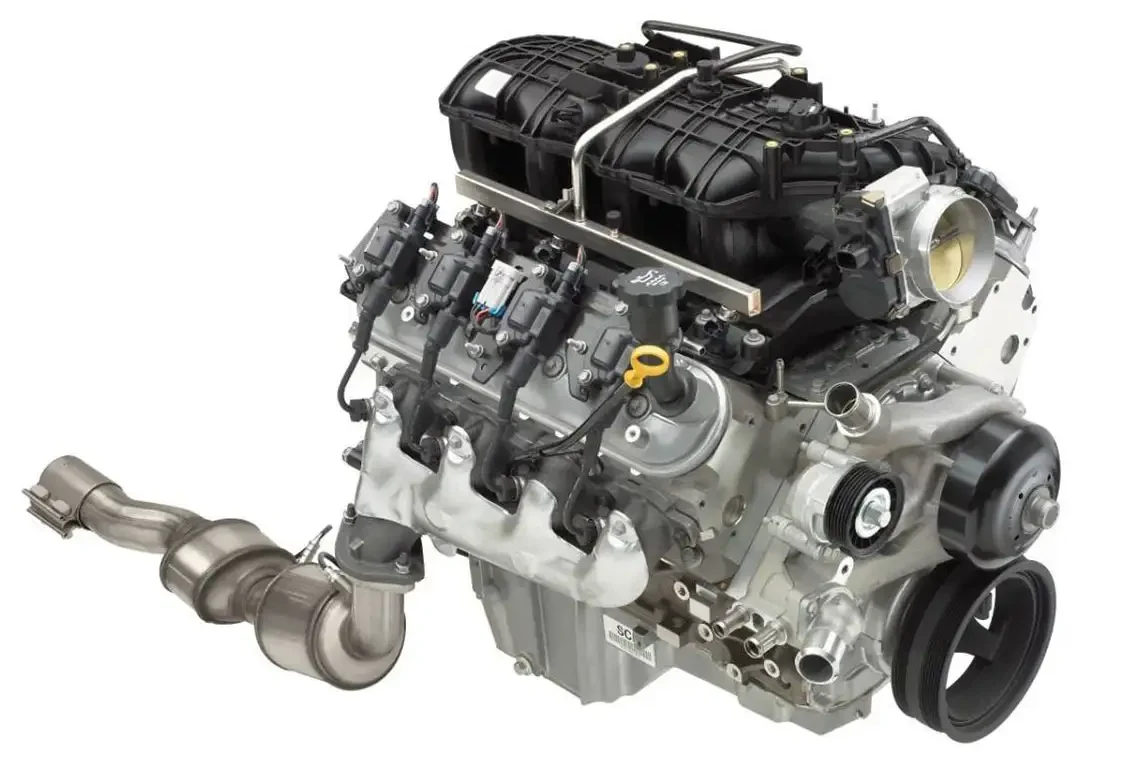
In this generation, all engine blocks are aluminum with aluminum cylinder heads and include unique features such as aluminum cylinder heads and block, direct fuel injection, piston cooling jets, active fuel management, variable displacement oil pump and continuously variable valve timing. The original two-valve pushrod valvetrain was replaced in this series.
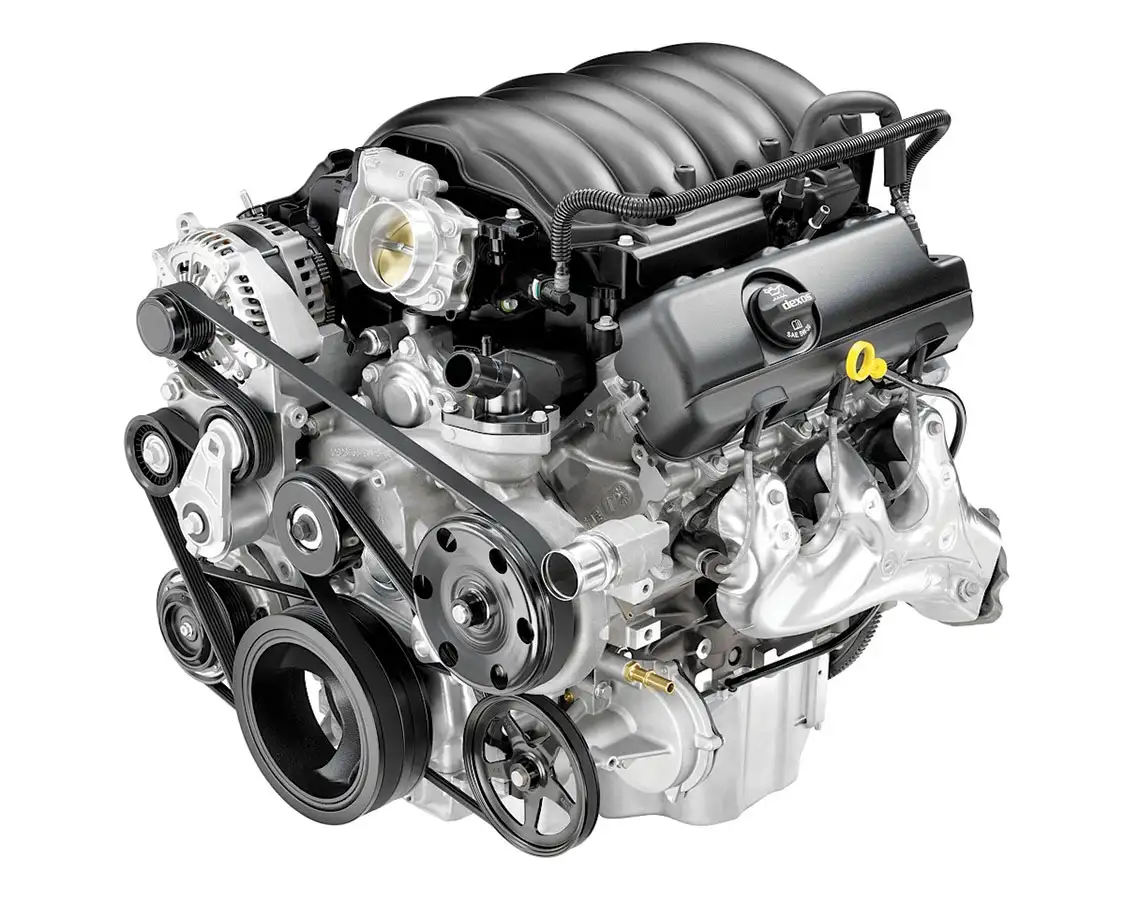
Dubbed EcoTec3 5.3-liter is a Generation V small block V-8 truck engine. It gets its displacement from 96.01-mm bore and 92-mm stroke with a compression ratio of 11.0 to 1, just like its Vortec 5300 Generation IV predecessor.
What parts can be used to increase the performance of a 5.3L LS engine?
To boost the performance of your 5.3L LS engine, a selection of well-chosen parts can make a significant difference. Here are some of the top components you might consider:
By carefully selecting and installing these parts, you can significantly enhance the performance of your 5.3L LS engine. Whether you’re aiming for better throttle response, increased horsepower, or overall engine efficiency, these upgrades can help you achieve your goals.
Why would you want to build an LS engine?
Why Build an LS Engine?
One of the most compelling reasons to build an LS engine is its exceptional cost-to-performance ratio. LS engines offer robust horsepower without breaking the bank. With millions of units produced since 1998, they’re widely available and competitively priced.
The LS engine benefits from a vast ecosystem of aftermarket parts. Renowned companies like Holley, Edelbrock, and Summit Racing offer a plethora of options. This extensive availability means you can easily find parts tailored to your specific needs, from performance upgrades to everyday replacements.
The LS engine is remarkably easy to modify. Whether you’re a seasoned mechanic or a DIY enthusiast, the user-friendly design makes it simpler to tinker with. Many builds can reach impressive horsepower numbers—up to 415 HP—with minimal adjustments and upgrades.
The scalability of LS engines is another strong selling point. You can start with a basic build and gradually upgrade components as your budget allows. This flexibility ensures that your engine can grow alongside your ambitions.
Besides trucks, LS engines have been swapped into a variety of vehicles, from classic muscle cars to more modern sports cars. Their compact size and lightweight design make them suitable for an array of automotive projects.
Building an LS engine combines affordability, extensive support, ease of modification, scalability, and versatility, making it an ideal choice for anyone looking to maximize their vehicle’s performance.
What were the performance results on the dyno after the initial carburetor and ignition controller swap?
After swapping the carburetor and ignition controller, the stock 5.3L engine showed impressive performance on the dynamometer. Initially, the factory rates this engine at approximately 320 horsepower and 340 lb-ft of torque. The modifications brought the dyno results very close to these stock numbers. Specifically, the engine achieved 315 horsepower and 325 lb-ft of torque.
These results demonstrated the effectiveness of the changes, even with a basic swap of components. It was evident that the engine responded well, laying a solid foundation for further enhancements, such as a simple cam change, which later yielded even more significant gains in power and torque.
What Are the Benefits of Using Aftermarket Valve Covers and Headers for LS Engines?
Aftermarket valve covers and headers offer several advantages for LS engine owners, enhancing both performance and aesthetics.
Aftermarket valve covers can provide a sleek and personalized look to your engine bay. These covers are designed to conceal unsightly coil packs, giving a cleaner, more polished appearance. Some models may require customization to fit perfectly, but the end result is often a visually appealing upgrade.
High-quality headers are designed to optimize exhaust flow, which can, in turn, improve engine efficiency and power output. Manufactured to fit specific models, such as Gen-2 Camaros and certain Novas, these headers make the LS conversion process smoother while ensuring a better fit and finish.
Aftermarket manufacturers often use superior materials and coatings for valve covers and headers. Coated headers, for instance, resist rust and heat, extending their lifespan and maintaining their appearance longer than stock options.
The versatility of these aftermarket parts can’t be overstated. Many manufacturers produce different styles of headers to fit a variety of classic trucks, including popular models like the ’63-72 C10 and the ’73-87 C10. This adaptability makes it easier to find components tailored to your specific vehicle’s needs, ensuring a better performance fit.
While the initial cost of aftermarket valve covers and headers can be higher than stock, they offer long-term benefits in terms of durability and performance. This often makes them a cost-effective investment for serious automotive enthusiasts.
Using aftermarket valve covers and headers for LS engines provides numerous benefits, from improved aesthetics and performance to superior materials and versatility. These upgrades are particularly effective in enhancing both the look and functionality of your vehicle, making them a worthy consideration for any LS engine owner.
How do the camshaft specifications compare between the stock cam and the aftermarket cam?
When comparing the stock camshaft to an aftermarket upgrade, there are several key specifications to consider: duration, lift, and Lobe Separation Angle (LSA).
The stock camshaft typically features:
These specs contribute to a balanced performance suitable for everyday driving, offering a smooth idle and decent power across a wide RPM range.
Upgrading to an aftermarket camshaft usually involves specs like:
The aftermarket camshaft is optimized for a higher RPM range (typically 1,600-6,600 RPM), providing significant gains in power and torque. This makes it ideal for performance enthusiasts looking to maximize their engine’s potential, both on the street and at the track.
By choosing an aftermarket camshaft with these enhanced specifications, drivers can expect a notable improvement in engine performance, characterized by a more responsive throttle and increased power output at higher RPMs.
What components are included in the serpentine pulley kit installed on the LS engine?
The serpentine pulley kit installed on the LS engine includes several high-quality components designed to optimize performance and reliability. Here’s a comprehensive list:
These parts come together to form a complete and efficient system, making the installation process straightforward and ensuring the engine runs smoothly.
How do you install the intake manifold on an LS engine?
How to Install the Intake Manifold on an LS Engine
Installing the intake manifold on an LS engine is a straightforward process, especially with modern advancements in gasket design. Here’s a step-by-step guide to help you get it done right:
By following these steps, you can ensure a secure and efficient installation of the intake manifold on your LS engine. Happy wrenching!
What features does the new starter offer for improved engine cranking and clearance?
The latest starter model introduces significant advancements to optimize engine cranking and ensure better clearance. Here are some notable features:
These features collectively enhance engine cranking efficiency and offer improved clearance, making maintenance and installation more straightforward and effective.
What adjustments were needed to ensure optimal fuel delivery during the dyno test?
To ensure optimal fuel delivery during the dyno test, several crucial adjustments were made to the engine.
The engine started smoothly, but initial tests revealed insufficient fuel supply from mid to top end. To correct this, the fuel bowls were opened, and the front and rear main jets were replaced. The main jets were upgraded from size 61 to size 70. This adjustment resulted in a performance boost, achieving 315 hp and 325 lb-ft on a stock engine.
Following a camshaft change, it was necessary to re-jet the carburetor once again. The new setup included 64 primary jets and 70 secondary jets. This configuration provided better fuel control across various conditions, including cruising, heavy load, and wide-open throttle.
During the carburetor adjustment, it was also crucial to change the primary power valve. The new camshaft required more fuel during the transition from idle to wide-open throttle. Updating the primary power valve ensured the engine received adequate fuel during this phase.
These adjustments collectively optimized fuel delivery, enhancing engine performance across all operating conditions.
What changes were made to the carburetor to accommodate the new camshaft?
To ensure optimal engine performance after installing the new camshaft, modifications to the carburetor were essential.
These adjustments were vital for maintaining fuel control during various driving conditions, including cruising, heavy loads, and wide-open throttle scenarios. By tweaking the jet sizes, the engine could achieve better fuel efficiency and responsiveness under the new camshaft setup.
How do you remove and install a camshaft in an LS engine?
The provided text does not contain any entities that fit the specified categories (Person, Organization, Address, Phone, Email, Location, Website). Therefore, no modifications are necessary.
How Easy is it to Get a Junkyard 5.3L LS Truck Engine Running Again?
Pulling a 5.3L LS truck engine from a junkyard can be quite a rewarding project. Here’s a step-by-step account of what it takes to revive one of these engines:
While reviving a junkyard 5.3L LS truck engine requires meticulous work and attention to detail, it is entirely feasible with the right tools and knowledge. Whether you stick with the stock setup or decide to implement some performance upgrades, getting the engine running again can be a rewarding endeavor.
What is the easiest way to swap fuel injection for a carburetor in an LS engine?
To easily swap fuel injection for a carburetor in an LS engine, you’ll want to simplify the engine setup. Start by replacing the complex fuel injection system with a straightforward carburetor. Consider a 650 CFM model for appropriate airflow.
Next, manage the ignition system by installing a coil pack controller compatible with a carbureted setup. Finally, use a dual-plane intake manifold to ensure balanced air and fuel distribution.
This combination provides an efficient, manageable way to convert your LS engine.
How do you ensure proper alignment when installing a camshaft?
Proper alignment of the camshaft is crucial for optimal engine performance. Here’s a step-by-step guide to ensure you get it right:
By following these steps, you can be confident that your camshaft is properly aligned, contributing to better engine performance and longevity.
What steps were taken to address an oil pan crack during transportation?
During transportation, an unfortunate mishap led to the cracking of the stock oil pan. Here’s how the issue was addressed:
By swiftly shifting to a robust replacement, the problem was effectively turned into an opportunity for an upgrade, ensuring the vehicle’s performance and clearance were both enhanced.
Why is it recommended to use an adjustable engine leveler when loading an engine?
Why Use an Adjustable Engine Leveler When Loading an Engine?
Using an adjustable engine leveler is highly recommended when loading an engine, whether it’s into a truck or onto a dyno, for several compelling reasons:
An adjustable engine leveler helps in positioning the engine precisely without scratching or damaging crucial parts. Traditional methods often risk scraping or denting vital engine components, which can lead to costly repairs or replacements.
Engine levelers distribute weight evenly, making it much easier to handle the heavy load. By adjusting the leveler, you can ensure the engine is balanced, reducing the risk of accidents during the lifting process. This is especially important when you’re lifting from areas like carburetor studs, which can be delicate.
These tools are versatile and can be adjusted to fit various engine types and sizes. Whether you’re working on a compact car engine or a larger truck engine, an adjustable leveler adapts to your needs, providing a customized fit that enhances safety and efficiency.
Using an engine leveler streamlines the loading process. It allows you to maneuver the engine into place without frequent adjustments or stops, saving you valuable time and effort in the garage or workshop.
Manual lifting or using inadequate tools can put significant strain on your body, leading to injuries. An adjustable engine leveler minimizes physical effort, promoting better ergonomics during the engine loading process.
In summary, an adjustable engine leveler is crucial for ensuring safety, protecting your engine from damage, and enhancing the efficiency of loading operations.
What additional performance parts were installed from Comp Cams?
What Additional Performance Parts Were Installed?
To amp up the performance, several crucial components were installed.
By integrating these parts, the vehicle’s performance and reliability have been significantly boosted.
What are the advantages of using a Holley LS replacement oil pan?
When it comes to enhancing your vehicle’s performance, choosing the right oil pan can make a significant difference. The Holley LS replacement oil pan, part number 302, offers several compelling benefits, especially for those who lower their pickup trucks.
Switching to a Holley LS replacement oil pan is a wise decision for truck owners looking to improve clearance, boost performance, and ensure durability. It’s an investment that pays off by enhancing both the functionality and longevity of your vehicle.
What are the benefits of using the Edelbrock dual-plane intake for the LS engine?
What are the benefits of using a dual-plane intake for the LS engine?
For those looking to optimize their LS engine, a dual-plane intake manifold offers several key advantages:
Incorporating a dual-plane intake manifold into your LS engine setup can bring immediate benefits through better cooling, improved power delivery, and maintaining the use of stock parts, simplifying your upgrade process.
What are the specifications of the Comp Cams hydraulic roller camshaft used in the build?
For this build, a high-performance hydraulic roller camshaft was selected to enhance the engine’s capabilities. Here are the detailed specifications of the camshaft:
To provide context, let’s compare these specs to the stock camshaft:
The upgraded hydraulic roller camshaft offers significantly higher duration and lift on both the intake and exhaust sides compared to the stock camshaft. This improves airflow and overall engine performance, especially at higher RPMs. The slightly narrower LSA of the new camshaft also contributes to more aggressive valve timing characteristics.
What are the features and benefits of the Holley 650 Ultra Double Pumper carburetor?
Key Features:
Benefits:
By integrating these features, the Holley 650 Ultra Double Pumper carburetor offers a combination of performance, durability, and customization options, making it a valuable addition to any high-performance engine.
How do you install the MSD 6LS Ignition Controller on an LS engine?
Installing the MSD 6LS Ignition Controller on an LS engine involves a few detailed steps. Here’s a comprehensive guide to help you through the process:
By following these steps, you can install the MSD 6LS Ignition Controller efficiently and ensure optimal performance for your LS engine.
What is the Function of the Lokar Anchor Tight Locking Flexible Engine Dipstick?
The Lokar Anchor Tight Locking Flexible Engine Dipstick serves two main functions. First, it helps in maintaining a tidy engine bay by offering a flexible design that can be positioned conveniently, keeping the area uncluttered.
Second, it provides an easy way to monitor your engine oil levels. This dipstick features a locking mechanism that prevents it from coming loose due to vibrations or engine movement, ensuring accurate readings every time.
Benefits:
This tool is essential for any car enthusiast looking to keep their engine in top shape.
How can you achieve 400-plus horsepower from a stock LS engine?
Common power adders for these engines include your basic cold-air intake, cat-back exhaust, and a simple plug-n-play tune. Most truck owners who get to this point always find themselves wanting more, and we don’t blame them. Upgrading the tiny 191 at 0.050-inch cam LM7 Camshaft and Valvetrain is one of the top mods recommended as they really held these engines back. An LS3 or LS9 cam makes good power, but we would recommend a dedicated truck cam to maximize torque in the mid-range. Plan on upgrading to larger fuel injectors to meet the fuel demands of increased power since the factory LM7 injectors were only rated at 22-25 pounds and won’t support much more than 380 hp.
It’s cool to see how easy it is to build a reliable 400-plus-hp engine from a bone-stock bottom end. Simply adding commonly recommended upgrades can push your engine to impressive power levels. For instance, with a few bolt-on modifications, you can reach 415 hp with 396 lb-ft of torque. This level of performance will make any truck scoot just fine, proving that substantial gains don’t always require extensive overhauls.
Next on the list would be swapping out the factory-installed LM7 intake manifold and throttle body as well as the cylinder heads and rotating assembly as the pistons become a weak point. Something most people don’t know is that the 5.3-liter iron blocks can be bored to the LS1’s size. If you’re running boost and nitrous, you can hone the blocks to 3.8 inches. These blocks have been known to withstand 1,300 whp with proper machining, racing fuel, and an excellent tune, which is hard to believe but true. If you’re lucky enough to be making more than 850 whp, we advise you also upgrade the head and main studs.
By focusing on these key upgrades and understanding the potential of your stock LS engine, achieving a reliable 400-plus horsepower becomes not only possible but straightforward. Whether you’re just starting with basic mods or looking to push the limits, these insights ensure you’re on the right path to enhanced performance.
How can you distinguish between a 4.8L and 5.3L LS engine?
The Vortec 5300 or LM7 is a longer-stroked (by 9 mm (0.35 inch)) version of the Vortec 4800 with a displacement of 5.3-liters (5,328 cc (325.1 cubic inches)) from 3.78-inch (96 mm) bore and 3.622-inch (92 mm) stroke. Vortec 5300s are built in St. Catharines, Ontario, and Romulus, Michigan. Another engine variant, the L33, shares the same displacement, but has an aluminum block with cast in cylinder liners, much like the LS1.
To distinguish between a 4.8L and 5.3L LS engine, you can utilize two reliable methods:
By understanding these key differences and using the right tools, you can accurately identify which engine you are working with.
What specific parts did the author choose for the 5.3L LS engine build?
Check out this breakdown on each generation and keep an eye out for the next issue as we start pumping some power into our own 5.3-liter Chevy. We have some great names on board for this build, including Magnaflow and ProCharger, so it’s sure to be interesting.
Next on the list would be swapping out the factory-installed LM7 intake manifold and throttle body as well as the cylinder heads and rotating assembly as the pistons become a weak point. Something most people don’t know is that the 5.3-liter iron blocks can be bored to the LS1’s size. If you’re running boost and nitrous, you can hone the blocks to 3.8 inches. These blocks have been known to withstand 1,300 whp with proper machining, racing fuel, and an excellent tune, which is hard to believe but true. If you’re lucky enough to be making more than 850 whp, we advise you also upgrade the head and main studs.
To ensure peak performance, we’ve selected some crucial parts:
With these components, the 5.3-liter Chevy engine is set to deliver impressive performance gains. Keep following as we continue to refine and upgrade this powerhouse.
What are the benefits of using a 5.3L LS engine for project vehicles?
When built correctly, the smaller 5.3-liter motor will beat an iron-headed small block in a drag race because it makes more torque and more horsepower with aluminum heads, so it’s going to be 40 pounds lighter. By simply upgrading the cam to something similar in the small block’s 222 at 0.050 you can create power numbers you will be surprised with. Understandably the 6.0 swap can produce more power based on displacement, but if the LS badge appeals to you, an aluminum 5.3 is the way to go.
Combining the affordability, availability, and aftermarket support with the performance benefits highlighted earlier, the 5.3L LS engine stands out as a versatile and powerful choice for any project vehicle.
Why should someone consider building an LS engine?
Given their cost efficiency, ease of modification, and strong aftermarket support, building an LS engine is a practical and rewarding choice for enthusiasts.
What kind of performance can be expected with minimal modifications?
Even with minimal parts, these engines can achieve impressive performance, such as producing 415 horsepower in test setups.
What is the level of aftermarket support for 5.3L LS engines?
There is extensive aftermarket support, with numerous companies producing parts specifically for these engines.
How readily available are 5.3L LS engines?
These engines are highly accessible, with over a million trucks equipped with V-8 LS engines since 1998.
Why are 5.3L LS engines popular for project vehicles?
They are favored due to their affordability and ease of construction, making them an attractive option for many builders.
What modifications are needed to swap a 5.3L LS engine from a 2008 Silverado into a 2002 Suburban?
Swapping a 5.3L LS engine from a 2008 Silverado into a 2002 Suburban involves several modifications. Here’s a breakdown to guide you through the process.
All LS engines share similar external dimensions, making the physical fitment relatively straightforward. However, ensure that your engine mounts are compatible or look for aftermarket mounts designed for LS swaps.
Depending on your Suburban’s drivetrain setup, you might need to consider different transmission mounts or adapters. Check if your current transmission can bolt up to the new engine, or if you need a compatible one.
If the 2008 engine has Displacement on Demand (DOD) technology, you might need to delete this system for compatibility with older vehicle electronics. This could involve purchasing a DOD delete kit that includes lifters, valley covers, and tuning modifications.
Exhaust manifolds may not line up perfectly with the existing exhaust system. Custom headers or exhaust manifold adapters might be required to fit the new engine correctly.
Ensure that the radiator and cooling system are adequate for the new engine. This may involve upgrading the radiator, hoses, and possibly the fan configuration to maintain optimal temperature control.
Once all the components are physically in place, you’ll need to perform some tuning adjustments. The ECU will likely require reprogramming to ensure the engine runs smoothly in its new home.
To successfully complete this engine swap, plan for modifications to the mounts, drivetrain, electrical system, fuel system, exhaust, cooling system, and potentially a few other custom tweaks to ensure everything runs seamlessly. Detailed planning and possibly consulting with an expert will help you navigate any unique challenges you may encounter. Good luck with your project!
What parts are needed for an LS engine swap?
When performing an LS engine swap, you need several specific components to ensure a successful installation. Here’s a comprehensive guide to the key parts required:
By gathering these critical parts, you can effectively prepare your vehicle for an LS engine swap, ensuring a smoother and more efficient conversion process.
Is reprogramming necessary when swapping LS engines between different vehicles?
Swapping an LS engine between different vehicles, like moving a 5.3 LS from an ’08 Chevy Silverado 1500 to an ’02 Chevy Suburban 1500, can be a thrilling project. However, one common question arises: is reprogramming necessary?
LS engines share similar external dimensions and mounting points, making the physical aspect of the swap relatively straightforward. However, it’s crucial to note that engine control units (ECUs) differ between models and years. These units manage everything from fuel injection to ignition timing, and they are programmed specifically for the vehicle they’re installed in.
When you swap an engine, the new engine’s ECU might not communicate seamlessly with the existing systems in your vehicle. Reprogramming the ECU ensures that:
Reprogramming might seem like an extra step, but it’s essential for ensuring a smooth and successful engine swap. Without it, you could face issues ranging from poor performance to potential damage to your engine or drivetrain. Happy swapping!
What recommendations are there for parts needed for an LS swap in specific vehicles?
If you’re planning an LS engine swap, getting the right parts is crucial. Here are some guides that can help you match your vehicle to the suitable LS engine and vice versa, ensuring a smooth swap process.
To find out which LS engines fit particular vehicles, you need:
For a successful LS swap, you’ll need several key components. Here are the essential parts:
For those looking to dive deeper into LS swap requirements, many resources offer comprehensive lists of parts needed for specific vehicle models. These guides can help streamline your project by pointing out exact parts and accessories needed for a hassle-free installation.
By carefully following these recommendations and consulting detailed guides, you can ensure that you get the necessary parts for a successful LS engine swap in your vehicle.
What are the compatibility issues when swapping a 5.3L LS engine between different vehicle models?
Swapping a 5.3L LS engine between different vehicles can be a rewarding yet challenging task. Here are some compatibility issues to consider:
These are some of the main compatibility issues to address when swapping a 5.3L LS engine between different vehicle models. Careful planning and possibly consulting with a knowledgeable technician can ensure a smoother and successful engine swap. Good luck with your project!
How does GM’s Active Fuel Management technology impact the 5.3L LS engine?
GM’s Active Fuel Management (AFM) technology brings significant improvements to the 5.3L LS engine, primarily enhancing fuel efficiency and overall performance.
AFM enables the engine to switch seamlessly between eight-cylinder and four-cylinder modes. During light-load conditions, such as cruising on the highway, the system deactivates half of the cylinders. This reduction in active cylinders directly translates to lower fuel consumption, providing better miles per gallon (MPG) for your vehicle.
By maintaining a balance between fuel efficiency and power, AFM ensures that when maximum performance is required, all eight cylinders are activated immediately. This dual-mode operation allows the 5.3L LS engine to achieve optimal power output when needed while conserving fuel under less demanding conditions.
Reducing fuel consumption also results in lower emissions. With AFM, the 5.3L LS engine contributes to a smaller carbon footprint by improving fuel efficiency and reducing the overall amount of fuel burned.
The technology’s inclusion in the later Gen IV versions of the 5.3L LS engine extends its benefits beyond trucks and SUVs to passenger cars, such as the Impala and Monte Carlo. This versatility ensures that vehicles equipped with the 5.3L LS engine can balance performance and efficiency, regardless of the vehicle type.
In conclusion, GM’s Active Fuel Management technology makes the 5.3L LS engine more efficient, powerful, and environmentally friendly, while also extending its applications across various vehicle types.
Where can I find a spec chart for the 5.3L LS engine?
Looking for the spec chart for the 5.3L LS engine? You’ve come to the right place. These charts are essential for anyone serious about performance upgrades or repairs. Here’s where to start:
By exploring these resources, you’ll find the in-depth spec chart you need for the 5.3L LS engine, helping you make informed decisions for your vehicle.
How do you identify which 5.3L LS engine you have in your vehicle?
Identifying which 5.3L LS engine you have in your vehicle is straightforward once you know where to look. Here’s a step-by-step guide to help you determine exactly which engine is under your hood.
The first step in identifying your engine is to locate your Vehicle Identification Number (VIN). Typically, you can find the VIN:
Your VIN is a 17-character string that includes both letters and numbers. Each section of the VIN provides specific information about your vehicle. For engine identification, you’ll want to focus on the 8th character. This character indicates the engine type and can help you narrow down whether you have an aluminum or iron block engine.
Common Codes for 5.3L LS Engines
Note that these codes can vary depending on the model year and manufacturer, so double-check with a reliable VIN decoder tool for accuracy.
For absolute certainty, consider using an interactive VIN decoder tool specialized for LS engines. These tools allow you to input your VIN and get a detailed breakdown of your vehicle’s specifications, including the engine type. Several automotive websites offer free VIN decoders that are very user-friendly.
In addition to decoding the VIN, a physical inspection can also confirm your engine type. Here are some visual indicators:
Conclusion
By following these steps, you can accurately identify which 5.3L LS engine you have in your vehicle. Whether you’re planning an upgrade or just curious, knowing your engine type can be incredibly useful.
Hope this guide helps you in your quest for automotive knowledge!
What emissions compatibility issues should be considered when swapping LS engines between different model years?
When considering an LS engine swap between different model years, there are several important emissions compatibility issues to address to ensure a smooth transition. Here’s a comprehensive look at what you need to consider:
By understanding these key areas, you can better navigate the complexities of emissions compatibility when swapping LS engines between different model years, ensuring a legal and efficient transition.
What is the definitive guide to LS engine specs and upgrades?
Our comprehensive guide on LS engine specifications and upgrades is an essential resource for anyone interested in maximizing their engine’s performance. This guide covers everything from the foundational specs of various LS engine models to advanced upgrade options that can take your engine to the next level.
What You’ll Find Inside the Guide
Get in-depth information on:
Discover transformative upgrades such as:
See how others have successfully upgraded their LS engines with before-and-after performance metrics and expert insights.
Learn best practices for maintaining the durability and efficiency of your modified engine, including:
Get targeted advice from industry professionals to help you make the best choices for your specific goals and vehicle application.
Find comprehensive lists of recommended parts and tools, focusing on high-quality components from reputable manufacturers.
Whether you’re a novice looking to learn more about LS engines or a seasoned pro seeking the latest in upgrade trends, this guide is your go-to resource for achieving peak engine performance.
What is the best supercharger for a high-performance build on a 5.3L LS engine?
When considering a supercharger for your high-performance 5.3L LS engine build, it’s essential to evaluate factors like desired power output, budget, and vehicle application. There are a few different types of superchargers to choose from, each with its own advantages.
Choosing the best supercharger depends on your specific goals and build characteristics. Roots superchargers are great for immediate power, while centrifugal superchargers excel at high RPM performance. Twin-screw superchargers offer a balanced approach, providing robust power across the RPM range. When planning your build, consider your vehicle’s primary use, and don’t forget to budget for necessary supporting modifications.
What troubleshooting steps are recommended if a swapped LS engine has issues reading the crankshaft sensor?
Swapping engines can be a challenging process, especially when dealing with sensor compatibility. If you’re facing issues with your LS engine not reading the crankshaft sensor, follow these troubleshooting steps:
By following these steps, you can systematically identify and resolve issues with the crankshaft sensor, ensuring your LS engine swap operates smoothly.
How do you identify the year of a 5.3L LS engine using the block number?
Identifying the year of a 5.3L LS engine can be straightforward if you know where to look. Here are the steps to help you pinpoint the exact year using the block number:
The block number is usually found on the rear of the engine block, near the transmission mounting surface. It may also be located on the side of the block, near the oil filter or above the starter.
Once you have the block number, you’ll need to decode it. The block number consists of a series of numbers and letters, which can be deciphered using available reference guides or databases.
Utilize online resources or automotive reference books that list GM engine block numbers. Websites such as LS1Tech, Summit Racing, and other enthusiasts’ forums and databases are excellent resources for cross-referencing your block number to find out the exact manufacturing year.
Some block numbers will have specific prefixes or suffixes that denote the model year. For example, a block number starting with ‘125’ might indicate a particular production period. Pay attention to these subtle details.
Often, the cylinder head casting numbers can also provide clues about the year. In your case, the ‘862 heads’ are typically associated with certain production years. Comparing this information alongside the block number will give you a more precise idea of the engine’s year.
If you’re still uncertain, reaching out to a professional mechanic or an LS engine specialist can be invaluable. They can provide a definitive answer and may have access to databases not readily available to the public.
By following these steps, you should be able to confidently determine the year of your 5.3L LS engine using the block number.
What guides are available to help identify LS engines?
If you’re trying to identify LS engines, two comprehensive guides can assist you:
Both guides provide detailed insights, ensuring you can accurately identify and match LS engines without confusion.
What resources are available for swapping a 5.3L LS engine?
Switching a vehicle to a 5.3L LS engine can be a thrilling yet challenging task. To ensure a smooth engine swap, having the right resources at your disposal is essential. Here are some highly recommended guides:
By utilizing these specialized resources, you’ll be better prepared to tackle your 5.3L LS engine swap project with confidence.
What piston and ring sizes are recommended when boring out a 5.3L LS engine?
When boring out a 5.3L LS engine, careful consideration of piston and ring sizes is crucial for optimal performance. Here’s a comprehensive guide:
For a standard bore size, the 5.3L LS engine typically measures around 3.78 inches. Boring out the engine involves increasing the bore size to 0.020 inches over the standard, making it approximately 3.800 inches. Ensure your pistons match this new bore size for proper fit and performance.
Piston rings need to be matched to the bored size of the cylinder. For a bore of 3.800 inches, you’ll typically choose rings denoted as +0.020 inch over standard size. Here’s a step-by-step guide to setting the end gap:
By following these detailed steps, you’ll ensure that your bored-out 5.3L LS engine has the appropriate piston and ring sizes, leading to enhanced performance and longevity.
What is the recommended maximum lift for a camshaft in a 5.3L LS engine with factory pistons?
When modifying a 5.3L LS engine, especially focusing on the camshaft, it’s crucial to determine the maximum lift compatible with factory pistons. The factory pistons have specific clearance limits you must respect to avoid interference and potential engine damage.
By staying within the recommended 0.550 inches lift with the factory pistons, you can ensure reliability and performance without the need for significant internal engine modifications. Always verify measurements and consult a performance specialist if in doubt.
Can a 5.3L LS engine fit in a 2023 Kia Forte?
Fitting a 5.3L LS engine into a 2023 Kia Forte is a complex task, but it’s possible with the right tools and skills. Here’s what you need to know:
With these tools and steps, fitting a 5.3L LS engine into a 2023 Kia Forte can be achieved, but it requires a high level of mechanical skill and patience.
What tools and parts are necessary for removing and replacing a high mileage 5.3L Vortec engine?
What Tools and Parts Are Necessary for Removing and Replacing a High Mileage 5.3L Vortec Engine?
Replacing a high mileage 5.3L Vortec engine, especially one with a blown head gasket, requires meticulous preparation and the right tools. Here’s a comprehensive guide to ensure you have everything you need for a smooth engine swap.
Some parts from your current engine might be intact and can be reused, including:
With this guide, you’ll be well-equipped for a successful 5.3L Vortec engine swap. Be methodical, stay organized, and ensure you have all the tools and parts before you start the project. Happy wrenching!
How does a 5.7 Vortec engine compare to an LS engine?
When evaluating the 5.7 Vortec engine against an LS engine, there are several key factors to consider. Each engine has its unique strengths and applications, and understanding these differences can help determine which one suits your needs best.
5.7 Vortec Engine:
LS Engine:
5.7 Vortec Engine:
LS Engine:
5.7 Vortec Engine:
LS Engine:
Choosing between a 5.7 Vortec and an LS engine largely depends on your specific needs and goals:
Assess your priorities and budget to determine which engine will be the better fit for your project.
Are LS fuel rail covers interchangeable across different years and models?
Fuel rail covers, often referred to as engine covers, can provide both aesthetic value and slight functional benefits for your LS-powered vehicle. When it comes to interchangeability across different years and models, there are a few considerations to keep in mind.
Owners of classic cars, like a 1956 Chevy, often retrofit modern LS engines (like a 5.3L LS) for enhanced power and reliability. In these cases, they may find covers from the original LS engine lacking visual appeal or not fitting perfectly with the modified setup. Exploring options from different years and performing subtle modifications can yield the desired results.
In summary, while LS fuel rail covers can often be interchanged between different years and models, careful attention must be paid to engine generation, mounting points, and required modifications. Always verify compatibility with your specific setup to ensure both functionality and aesthetics are maintained.
What are the popular displacements of LS engines?
When diving into the world of LS engines, you’re likely to encounter a range of popular displacements, each with its own set of specifications and advantages. Here’s a closer look:
Each displacement comes with unique features and benefits, making the LS family a versatile option for various automotive projects. Whether you’re looking for a budget-friendly build or aiming for high-performance glory, there’s an LS engine that fits your needs.
What performance long block engines are recommended for a 2011 LT 4×4?
Considering your desire to boost performance while retaining the ability to tow a camper, you’ll need a robust and reliable long block engine. Here are some top recommendations:
Upgrading your 2011 LT 4×4 with a performance long block engine not only boosts power but also retains the towing capabilities you need. Evaluate the options above to find the perfect match for your vehicle and driving needs.
How does the 5.3L LS engine compare to the 4.8L LS engine?
What makes them different—and which ones are best?
LS-based small block engines are extremely common in our industry both as daily driver workhorses as well as high-horsepower hotrods.
The V-8 was General Motors’ primary engine choice for its line of cars introduced in January 1995, engineered to be a “clean sheet” design using only rod bearings, lifters, and common bore spacing as the longstanding Chevy small-block V-8. It was cast in aluminum for car applications and iron for most truck applications with some exceptions, including the Chevrolet TrailBlazer SS, Chevrolet SSR, and a limited run of Chevrolet/GMC Extended Cab Standard Box Trucks.
With three generations of design and several versions of each generation, it made for a lot of parts numbers and confusion for anyone other than GM diehards. Luckily for us, Wikipedia is a rich resource of factual data, specifically about these small-blocks. What makes them all different? We figured you would ask that, so let’s explain.
Generations I and II were modular GM small-block engines based on the Chevrolet small-block V-8, originally designed in 1955. We are starting with Gen III as the kickoff for LS based small-blocks as introduced in 1996, and still the go-to V-8 for GM cars and trucks today. The architecture of the LS series makes the aluminum engines nearly as strong as the iron generation I and II engines preceding it. The cylinder firing order was changed to 1-8-7-2-6-5-4-3, so that the LS series now corresponds to the firing pattern of other modern V-8 engines like the Ford Modular V-8. The new LS engine design also used a coil-near-plug style ignition to replace the distributor setup that we all know and hate. A square four-bolt design replaced the traditional five-bolt pentagonal cylinder head pattern, and flat-topped pistons in the LS1, LS2, LS3, LS6, LS7, LQ9, and L33 with all other variants receiving a dished version of the GM hypereutectic piston.
Check out this breakdown on each generation and keep an eye out for the next issue as we start pumping some power into our own 5.3-liter Chevy. We have some great names on board for this build, including Magnaflow and ProCharger, so it’s sure to be interesting.
This is a longer-stroked (by 9 mm (0.35 inch)) version of the Vortec 4800 with a displacement of 5.3-liters (5,328 cc (325.1 cubic inches)) from 3.78-inch (96 mm) bore and 3.622-inch (92 mm) stroke. Vortec 5300s are built in St. Catharines, Ontario, and Romulus, Michigan. Another engine variant, the L33, shares the same displacement, but has an aluminum block with cast-in cylinder liners, much like the LS1. The LM7 was a bit lighter than Gen I or II engines when fully built and easier to find in good shape at a junkyard. It matched the power and torque of the F-body LT-1s even with a 25-cubic-inches-smaller design. With the availability of engine swap kits from many advertisers in this book, it just makes good sense to use Gen. III engines.
To directly compare the 4.8L and 5.3L LS engines, let’s look at their bore and stroke dimensions:
This difference in stroke is a key factor in the displacement and performance characteristics of these engines. The longer stroke of the 5.3L provides greater displacement and potential for higher torque, making it a popular choice for both daily drivers and high-performance applications.
Share Link